
How to transfer VOB to DVD for watching on DVD player


Try Blu-ray Creator to burn downloaded HD movies to watch on a standalone Blu-ray player.
With the rapid development of wireless technologies and mobile devices, video enthusiasts spend more time on watching movies and listening to music on the Internet. Despite the way we view the world are changing, many of you are always trying to get a way to make the movie downloaded off Internet and stream onto home entertainment centre with large TV screen. In today's article, we mainly focus on how to convert downloaded videos to a DVD for Mac and Windows platform.
If you downloaded lots of favorite videos you might want to find a way to burn some of the downloaded videos to DVD that will be playable on a standalone DVD player. A movie DVD requires no internet connectivity, letting you decide exactly when and where you'd like to enjoy the movie on a DVD player.
Many of disc burning programs around are actually simple and user-friendly, and yet still have the power to burn downloaded videos to DVD folder or ISO file for later burning. Here, we will show you how to burn your downloaded videos to a DVD on Mac using a tool called DVD Creator for Mac so that you can then play in your living room.
This amazing piece of software is really handy when it comes to creating custom DVDs with downloaded movies, and it has pretty excellent support for pretty much all video formats, including MP4, AVI, WMV, MPEG, MOV, MKV and AVCHD. With simple four steps, a movie DVD will successfully create in front of you.
To burn your downloaded movie files to DVD on a Windows computer, please go with its PC version: DVD Creator for Windows.
Step 1: Import your grabbed movies to the program
First of all, open the DVD Creator. You'll be greeted by a clean window where asks you to "Add pictures or videos", Then, you use a usual way by pressing the "+" button there, when that dialog box opens, navigate to the hard drive that contains your downloaded videos, and select them.
Alternatively, you simply drag the downloaded movies which need burning and drag them into the program.
<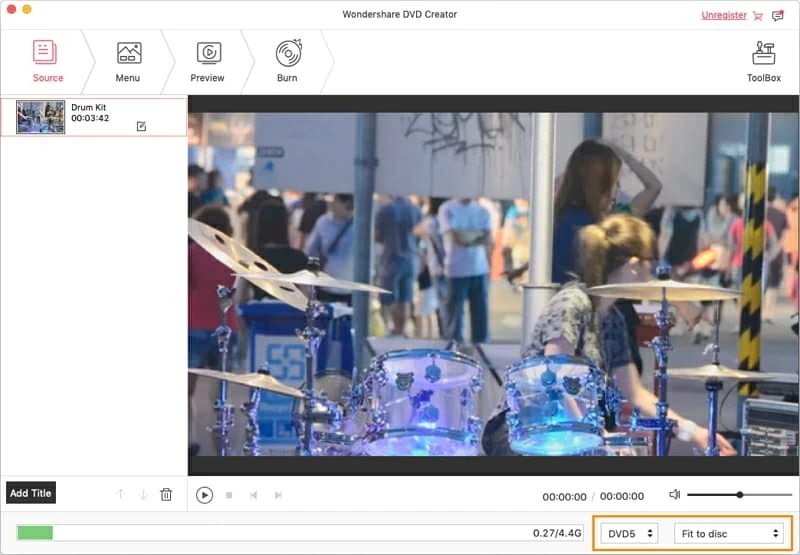
In the bottom of the window, you'll see a colored calculating bar. It shows you how full the DVD will be when you have files loaded.
Step 2: Edit the downloaded video (optional)
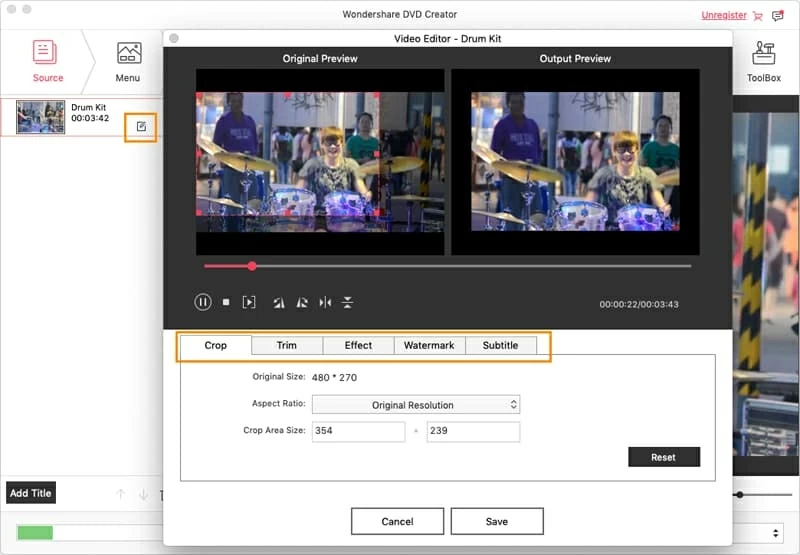
Once you've imported all your downloaded video clips, before burning to DVD for Mac, you can use the built-in editing tools to enhance your any of clips if necessary.
Click the "Edit" icon at the right side of video thumbnail to enter editing window. You can trim the video to only include a specific portion of video in DVD, crop the edge of video to remove black bar, insert personal image/text watermark and more.
Do the same operation for all videos you would like to be edited.
When you're satisfied with your edited video files, next, add a DVD menu template.
Step 3: Menu design
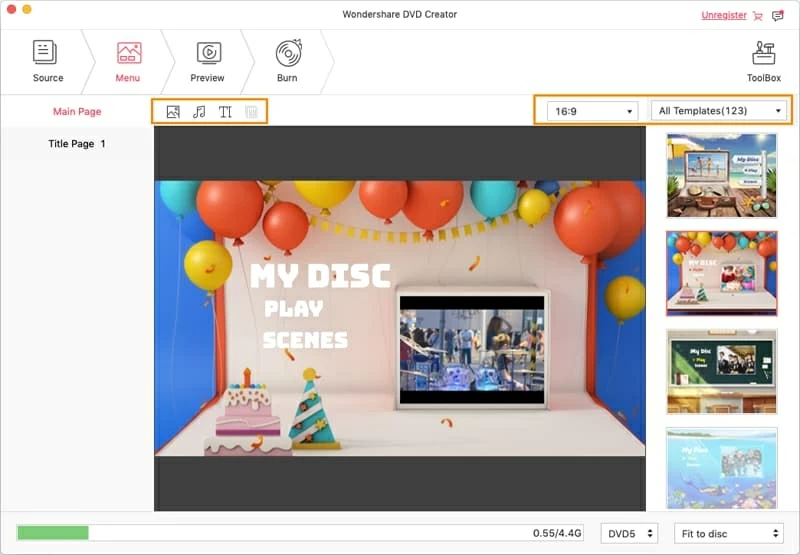
This DVD burning application lets you choose a DVD menu from built-in menu list for easier navigation, by clicking the "Menu" tab at the top of screen, and full control over the menu you choose such as change font type and size, add additional custom audio track and photo, etc.
From "Preview" next "Menu" button, you will immediately see the effects you are setting.
Step 4: Begin burning the downloaded video to DVD on Mac
If you are satisfied with the effect of menu of your choice, insert your blank DVD into the DVD drive connected to your Mac and hit the "Burn" button at the top of program window.
A windows with several options opens up, from there you will configure your desired output settings.
In Burn Settings, choose "Burn to Disc". If you wish to store the conversion as one file on your hard drive, then tick the "Save as ISO" option, or the "Save as DVD Folder" for later creating regular DVD.
Type a new name for DVD Name.
In TV Standard, the video format depends on the country you live in, see more at NTSC vs. PAL.

All that is left to do at this point is click the "Burn" to commence the burning process of downloaded movie file to DVD in Mac. Depending on the speed of your computer and the amount of video content being burning, the time this process will take will vary.
That's all there is to it. Now just wait for your DVD to finish burning. That's how you burn downloaded movie to DVD on a Mac. Once the process has finished, the disc will be ready to use in your home DVD player with big TV.
Happy disk making!