How to Burn MTS Video Files to DVD for Mac OS X


See more about: Blu-ray Creator to burn HD (iPhoto) Photos slideshow to Blu-ray for watching on big TV.
Photos for Mac (the successor to iPhoto) isn't just a collection of pictures. If you are regularly snapping photos, you are likely import them into Photos application, combined with videos and/or songs, to make stunning slideshows and then share in all kinds of great ways - Facebook, Twitter, YouTube, iCloud. It's nice sometimes to burn iPhoto/ Photos slideshow to a DVD to preserve the precious memories and share with family.
However, Photos itself has no option or capability to help you burn slideshows or projects (books, calendars, prints, cards) to discs. If you want a way to burn Photos slideshow to DVD on Mac that will then play in a normal DVD player, you'll need to use a 3rd party disc burning program.
DVD Creator for Mac is what we're going to introduce today to burn slideshow exported from Photos to DVD in Mac. It can take almost any movie files, music and/or photos you have and burn to a blank DVD, and includes the ability to create and manage chapters, customize the menu template. It even allows you to do basic editing to enhance the video.
If you happen to have a Photos slideshow on Windows machine copied from a Mac or sent by friend, you may use to DVD Creator for Windows for creating a DVD from Photos slideshow.
To ready the burning process, you should first render your Photos slideshow as a video file by using the "Export" button in the toolbar of Photos window, configure the necessary options as you like in opening dialog, and then select OK to starting the exporting and wait until it is complete.
Note: iPhoto 9.6 is still running on OS X Yosemite and El Capitan to make slideshows, but we suggest you update to Photos in case of any unnecessary using trouble.
Step 1: Import Photos slideshows you want to burn to DVD
To add an slide show created in Photos for Mac or a list of ones, from the center area of program window, simply select the big "+" icon. Browse to the directory where your slideshow(s) is located.
Alternatively, drag them and drop to the blank zone of main interface.
<
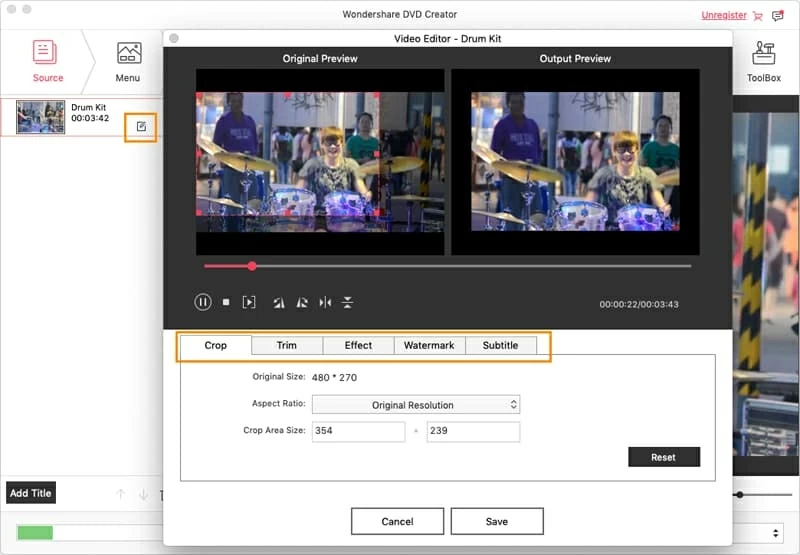
Step 2: Edit the slideshow items (optional)
After the Photos collections are loaded, you're given power to do some editing on them. You can do this by hitting the "Edit" appeared at the lower right side of item.
In editing windows, you can trim and crop the video, apply some special effects, put personal watermarks, and even rotate the displaying angle.
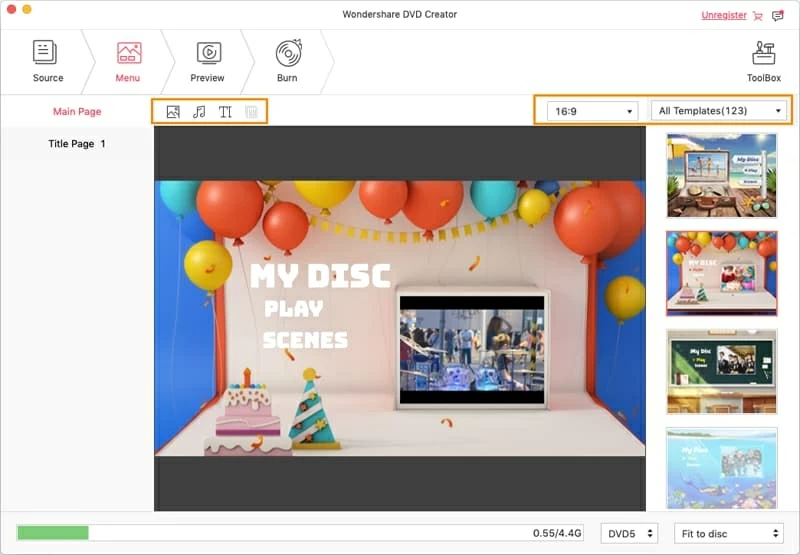
Step 3: Select a pre-installed DVD menu or not
There's also plenty of, if you need it, beautiful menu templates in "Menu" tab you can choose from this Photos slideshow to DVD converter for Mac, each of which has customization options for background, buttons, frame and text.
In background, you can add your own music and image that you want to include in your slideshow, which is very cool if you're creating a disc as a special gift for grandparents or kids.
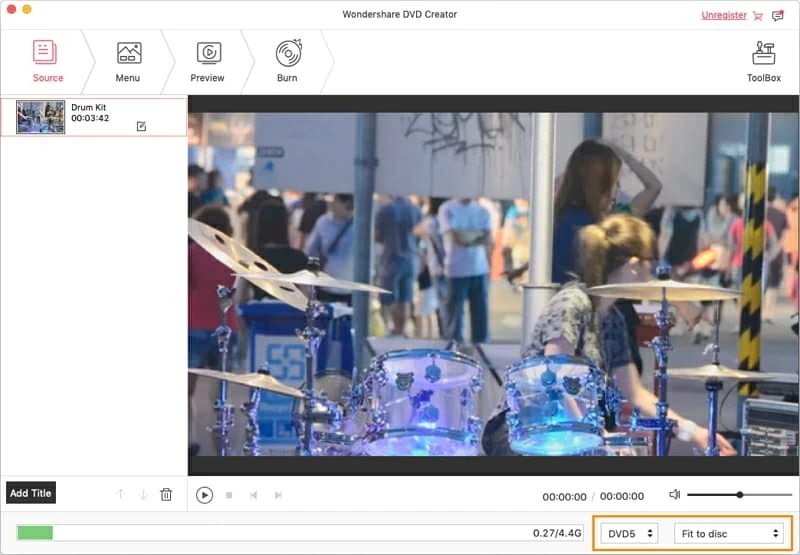
Step 4: Convert the Photos slideshows to DVD in Mac
If everything is OK, you can preview your DVD project by clicking the "Preview" tab next to "Menu" to see how it looks.
Next, insert a blank DVD-R disc into your Mac drive. All that is left to do is to hit the "Burn" tab on the top, in opening dialog, type a name for the disc in the Name field if necessary, and select "Burn" to begin burning iPhoto/ Photos slideshows to DVD on Mac.

After the burning process is finished, your slideshow DVD is ready for watching!
Have a good time!