How to Burn MKV Movie Files to DVD on Mac OS X


Check out the Blu-ray Creator to burn high definition M4V movie files to fit on a Blu-ray disc
There is no getting around the fact that we are more likely to watch movies and TV shows using the big TV connected Internet network, or surf online using mobile devices these days. However, solid medium like DVD disc still has its position from time to time – whether it's for putting your movies onto the disc and watch on a standalone DVD player, or just for a regular data backup.
If you have some movie collections with .m4v file extension, you may wonder how you can burn those M4V files onto a DVD for playback on home TV screen, or a way to convert the .m4v format into something playable on a DVD player. That is what we're going to talk about in this article. But before we go further, please note that if your own M4Vs are DRM protected, you will have to find a way to remove the restriction legally before you burn to fit on a DVD.
The current software options for converting M4V to DVD are virtually endless. If you want a feature-filled and straightforward DVD burning tool, DVD Creator is more than capable of offering everything you need to make a playable DVD. Aside from converting M4V to DVD for Mac or PC, the program can burn nearly any video format.
One of its useful features is it enables you to create your own DVD with menu, text, scene selection and background music. It also has the option to export the project and create DVD folder as well as ISO image file for later burning use.
Step 1: Load M4Vs
Launch this M4V to DVD converter on your Mac. The first thing we will do is to import M4V files.
Click the big "+" icon on blank area of the program, a browser window displays. Choose M4V files from your computer and click "Open". Alternatively, just find the M4V videos that you want to burn onto DVD, select them all and drag to the program.
<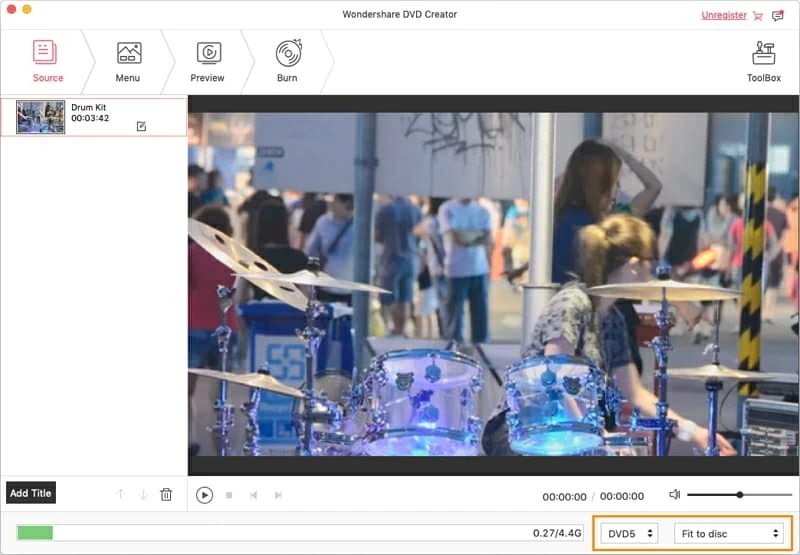
Keep an eye on the colored bar at the bottom, it will automatically calculate the amount of space required on the DVD, which decides what type of DVD (DVD5 - 4.7GB, DVD9 - 8.5GB) you will prepare.
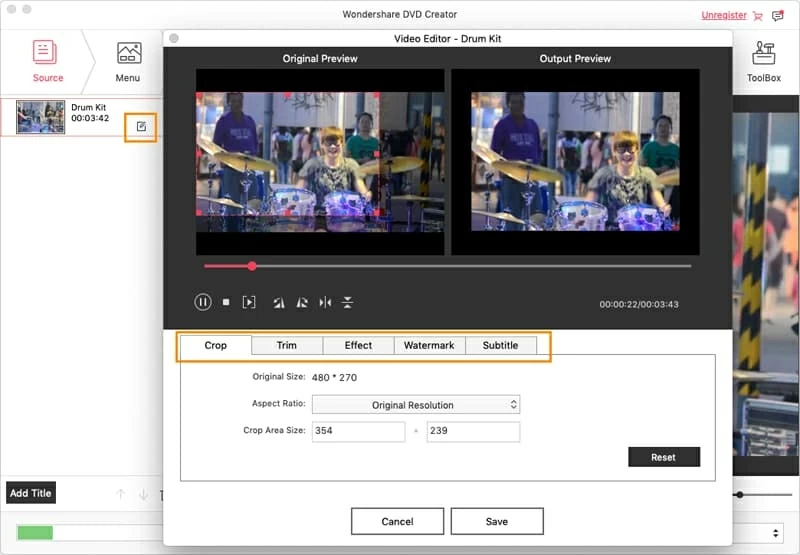
Step 2: Edit M4V clips before selecting a DVD menu (optional)
The converter gives you ability to enhance your videos with the help of built-in editing tools to cut black bars of video, add effects, put watermarks and rotate the video before burning M4V onto DVD.
You just click the Pen icon located in the lower right side of the video item to enter the video editing window. It should look something like the screenshot below.
If you think there really isn't anything to change here, just leave it the way it is.
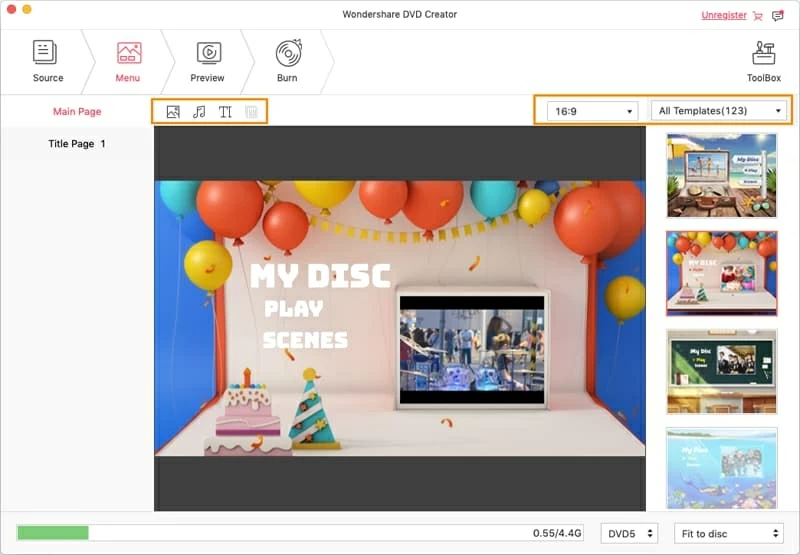
Step 3: Customize and modify DVD menu
Once you edit the video, you can burn your M4V to DVD in Mac with one click, or, if you prefer, you can choose a menu from a given list of templates to make your DVD special before you burn it, or even customize your DVD menus.
Go to the "Menu" tab at the top of program window, it will bring menu list on the right portion, from there select one menu you like. You then can choose the font type and color of the menu, change a button, add background music and photo.
To view the effect of how you chosen menu will look on the DVD click the "Preview" tab next to "Menu".
Step 4: Burn M4V videos to DVD for Mac
Now that the steps above have overviewed adding M4V files, performing editing on files and selecting menu, it's time to configure output settings which is fundamental to creating a DVD.
Click on the "Burn" tab on the top of screen, a settings window will pop up. You can check the default output settings to see if you want to change them. You will pay careful attention to "TV Standard" (NTSC vs. PAL), which depends on where you are living.

When you decide to start the actual burning of your M4V to DVD on Mac, Insert a blank DVD into the DVD drive connected to computer. Hit the "Burn" button again.
While the DVD is burning you will a window showing you an estimate of the remaining time. Be patient.
Once the burn is finished, you will have a disc which you can play in your DVD player in your home entertainment system. Enjoy!