How to Use DVD Creator for Mac

Peter Rugg Updated on Apr 21, 2022 5:40 PM
DVD Creator for Mac is a great tool for transforming your digital video collections into DVD disc. With a diversifying range of DVD templates, you can create the most unique DVD out of your ordinary video and audio files in minutes. In addition, it can turn photos into a photo show like no other with your favorite background music and burn it to DVD. Here below is the detailed user guide.
Step 1: Download and install DVD Creator for Mac.
Step 2: Import video or photo files into the program
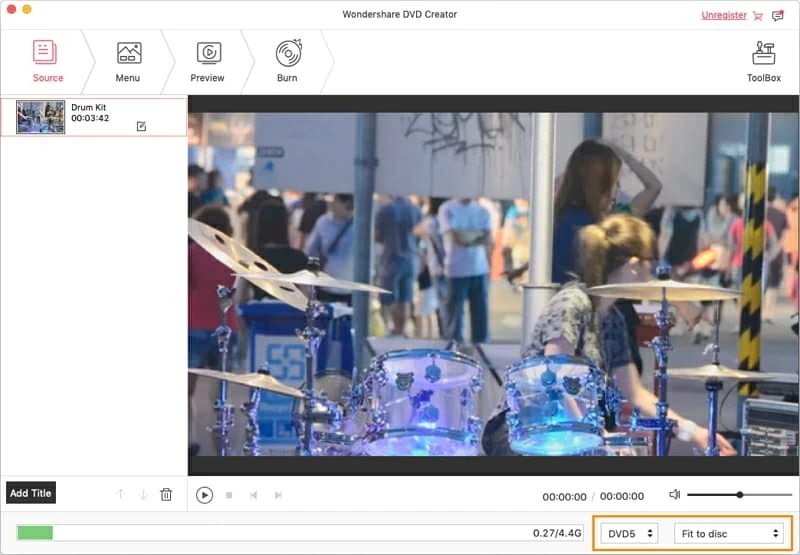
Drag-and-drop or simply click big "+" button on the main interface to load video files or photos. and click the "↑" and "↓" buttons to adjust the preview order. The loaded files will be shown in thumbnail at the file list.
<
Note: You can combine a few videos together by dragging videos to another. If you want to separate them, just highlight a video and drag it out of the pane until a blue line appears.
Step 3: Edit the video or photo files (Optional)
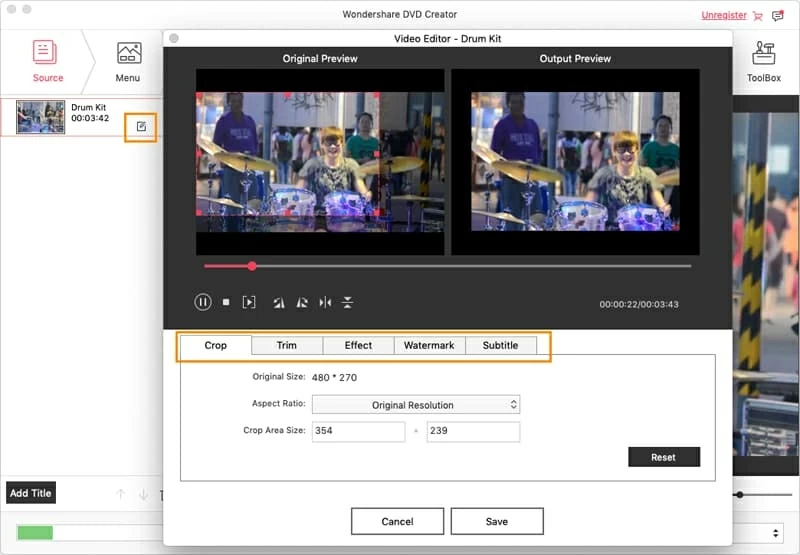
Highlight a video you need and then click "Edit" icon on the right side of video thumbnail. Editing functions include crop, rotate, split a video to trim unwanted sections, add watermark, set special effects, etc. All the settings you apply can be seen instantly in the right window.
To slideshow files, you can set the transition effects, add text and background music to make them more personalized and eye-catching.
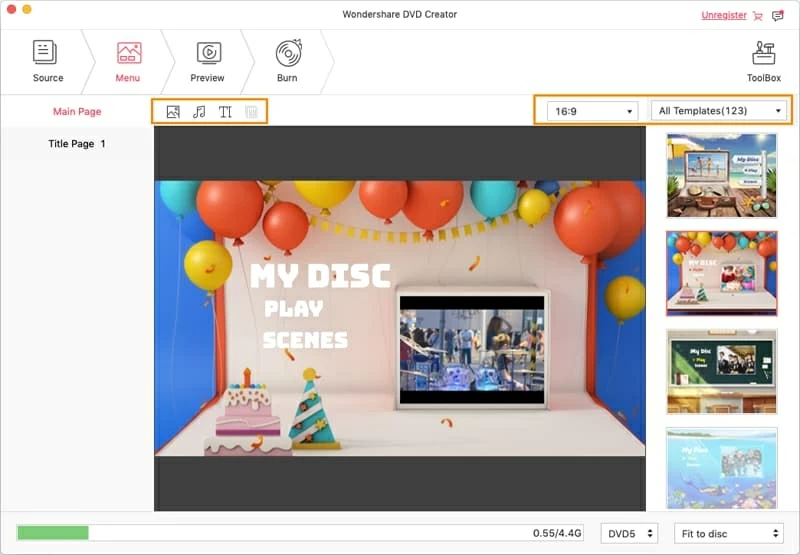
Step 4: Make custom DVD menu for your DVD (Optional)
More than 100 sets of free animated and static DVD menu styles available. To make a custom menu, just go to Menu tab on the top to choose a suitable menu style for your DVD, and then customize it according to your needs. No menu is also provided. If you particularly like some menus, you can add them to favorite for better finding then later.
Step 5: Preview and start to burn
After finishing all the editing, click the "Preview" tab to preview your DVD project.
If it's ok, then click "Burn", and choose your output settings. Give your new DVD a name and click "Burn".
Note: If your DVD project is larger than 4.7G and you don't have a DVD9 disc, just insert a D5 disc, the program will compress it automatically.