How to Change FLV Files to QuickTime MOV


In digital media field, we are confronted with different type of video formats like FLV flash, iTunes video, MPEG-4 and many others. It is a hard truth that a device you have may only accept a few of formats while another one will read a few of other formats, often resulting in compatibility issues to enjoy a favorite movie in a spare moment. And in order to play a video from a particular file format on your computer, you have to install a dedicated desktop video player. So we ended up wasting time on these tedious works. In short, working with a video on the different of devices and applications wasn't that easy from a user perspective.
It happens to all of us, you may have some of FLV movie files downloaded off YouTube or other online video services, and want to import FLV into iTunes (just like you copy WMV files into iTunes) to work on an iPhone or just store in iTunes library. But you finally find iTunes can't recognize these FLV videos. Today we'll show you a quick and easy way to convert FLV to iTunes supported format with media conversion program.
Video Converter for Mac is a nice Mac application with a simple design that makes it easy to convert most of popular format including FLV to iTunes compatible files. It allows you to convert public and private videos for using on different video devices like Smartphones, iPhone, Apple TV, etc. The program is also capable of performing the basic video editing function within a matter of clicks.
If you're using iTunes on Windows XP, Vista or Windows 7 platform, and want to copy FLV videos to iTunes, please switch to get Video Converter for Windows.
Step 1: Add FLV videos
Choose your video file by clicking on the "Add File" button and select the FLV files you want to convert to iTunes. You can also add your files by dragging and dropping them into the project area of FLV to iTunes converter.
The program supports batch conversion, making it possible to add multiple FLV media files to the queue and convert them in one batch. And it also allows you to merge several video clips into a single video file for a seamless playback through "Merge" option under the project area.
On the right side of the program window you have the option to preview the video or take a snap.

Step 2: Select the output format
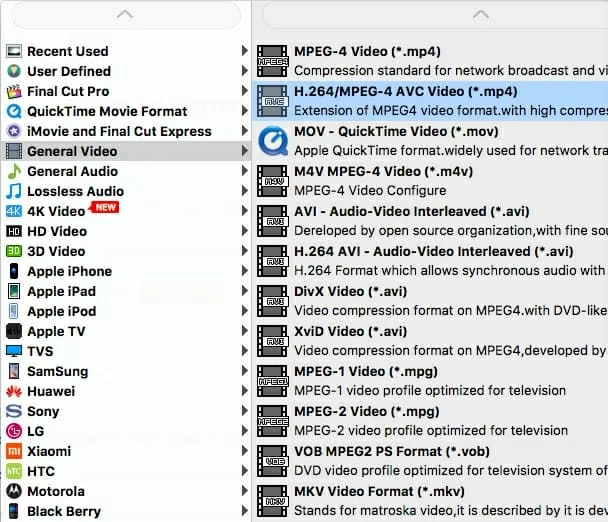
Here, you will be requested to set output format. For reference purposes, here are the video format with their extensions for Apple iTunes: .*MOV, .*MP4, .*M4V.
Simply click "Profile" drop-down box, and then choose MP4 for example as output file type from "General Video" (or HD MP4 from "HD Video", depending on your source FLV videos' resolution). The program will optimize all the video settings for you.
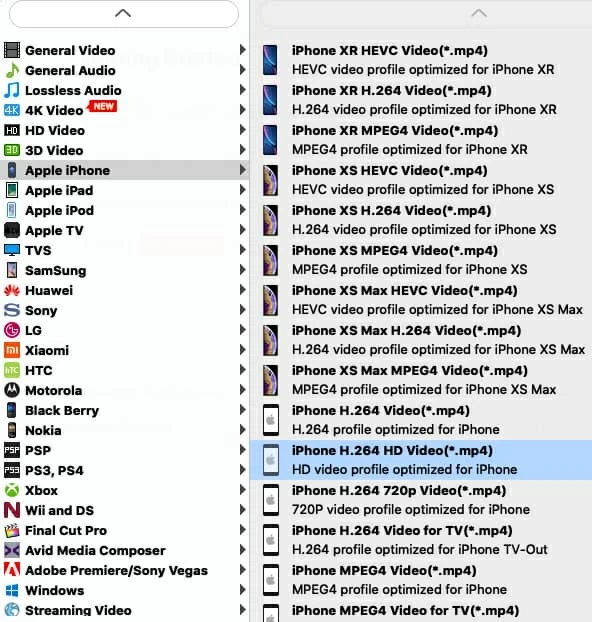
If you eventually want to play the video on your iPhone, iPad, ATV, you can select your device model from an array of presets and this Mac FLV converter will automatically update the output settings for you.
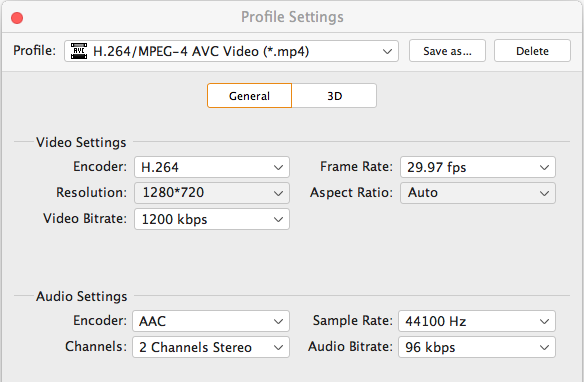
If you want to take even more control of the output preferences, you can make tweaks.
Next, select "Destination" box, the encoder will take you to a new screen where you can select where you would like the resulting file to be saved after the conversion is complete.
Step 3: Begin converting FLV to iTunes file
After all options set, just click the "Convert" button and you're off. You'll be able to see the progress in a new monitor window like so:
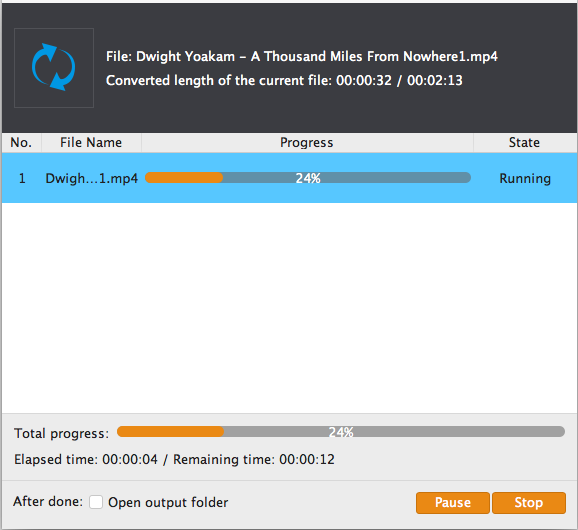
Now the conversion process will begin. This may take a few minutes depending on your system's hardware and length of the FLV files.
Step 4: Put converted files from FLV to iTunes on Mac
After you have converted FLV videos into an iTunes-ready format, the next step is to launch iTunes, drag and drop the converted files to iTunes. Now you can put your favorite movies on your iOS players and enjoy them on the go!
That is it!