
How to Record Audio on Windows 10 PC

Wondering how to record your screen with audio using QuickTime? Here're fairly easy ways to get QuickTime screen recording with external audio and internal audio.

Does QuickTime screen recording record audio?

QuickTime Player allows you to record a video of your screen with video and sound captured at the same time.
For many Mac users, using QuickTime to record screen and audio comes simpler – whether you're near a stunning movie playing on the browser and you want to capture the video footage for sharing, or you're trying to creating a tutorial or demonstrating how to use a particular macOS app. Whatever the reason, taking a QuickTime screen recording with audio is actually an effortless process with the help of New Screen Recording function built into QT Player.
Related: How to Record YouTube Videos on any Mac
If you're sitting in front of your Mac's screen, you're ready to open QuickTime and start to screen record with both audio and video. You'll also get a dedicated Screen Recorder utility as a means of capturing audio for a screen recording.
Jump to key parts:
A Note: Apple has no longer supported QuickTime 7 for Windows, and disabled the QuickTime Pro functionality including the screen & audio recording ability.
QuickTime is a popular multimedia player for Mac, with an added benefit of a screen recorder that you can use to record a screencast of what's on the computer screen. It's a good choice if you want to record your screen and audio simultaneously without having to pay any money for another application.
1. Open the screen you want to record, be it a video, a browser, an application, etc.
2. Launch QuickTime Player.
3. Choose File > New Screen Recording from the menu bar at the top.
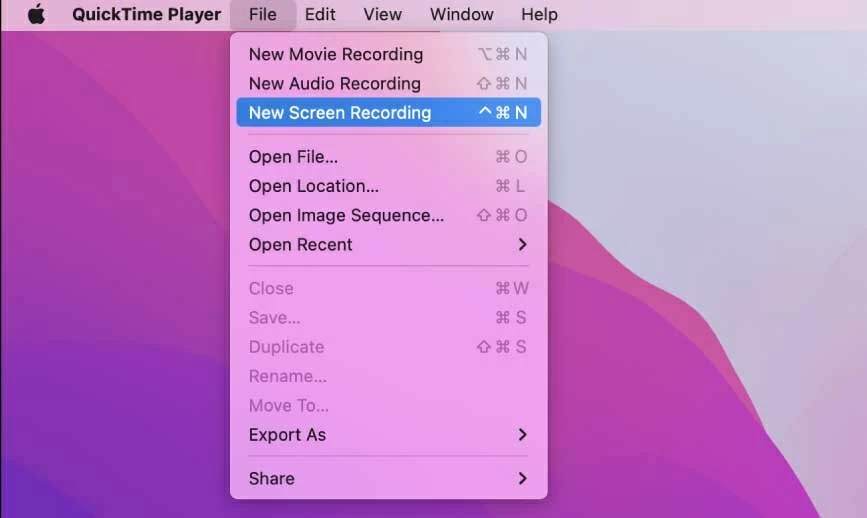
Click New Screen Recording option to begin the QuickTime video recording affair.
If you're running macOS Mojave or higher, you will get the Screenshot Toolbar for screen capture with sound on Mac. The screenshot looks like this:

You can also press Shift + Command + 5 to bring up recording options on Mac.
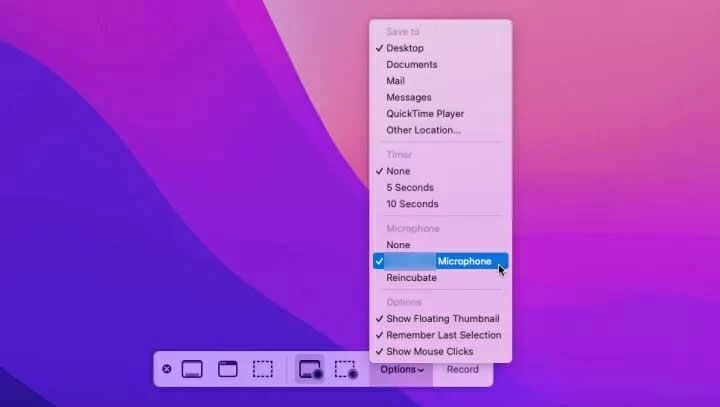
If you select "None" under Microphone, there will be no audio for screen recordings.
Tip: You can set 5-second delay for a screen recording to begin after you press Record, so you have time to hide any playback controls or any other window you don't want to capture.
Your recording will automatically save to the Desktop as a .mov file. Double-click on it and you'll able to watch the entire video recording and test out the audio you've captured.
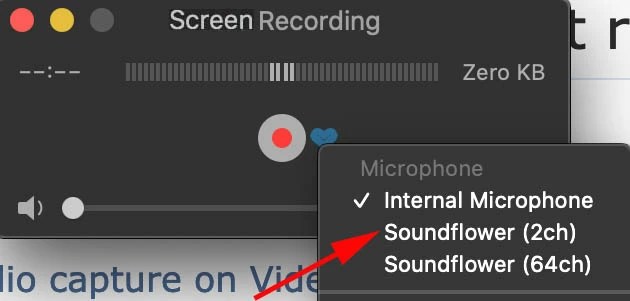
In case you own a Mac with macOS version earlier than macOS Mojave, after you click File > New Screen Recording within QuickTime, you will see the Screen Recording window, shown as below:
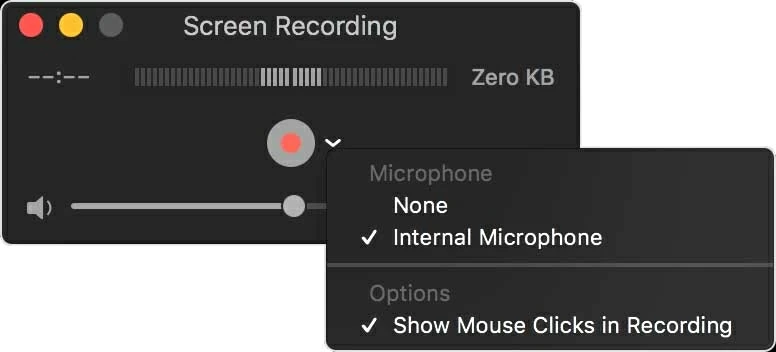
Have your microphone checked if you don't want to get a muted screen recording from QuickTime Player.
As soon as you stop recording in QuickTime:
Being able to record screen and voice is one of QuickTime's best features. But there is a catch: QT has never recorded internal sound during a screen recording, and can only capture your voice from the microphone if it's been enabled. The audio from a video playing on a browser won't get picked up.
This is why many users reported that screen recording through QuickTime doesn't have system sound, only the video screen. So to take a simultaneous screen recording of video and audio with QuickTime, you need additional software like Soundflower - but a little setting up needed.
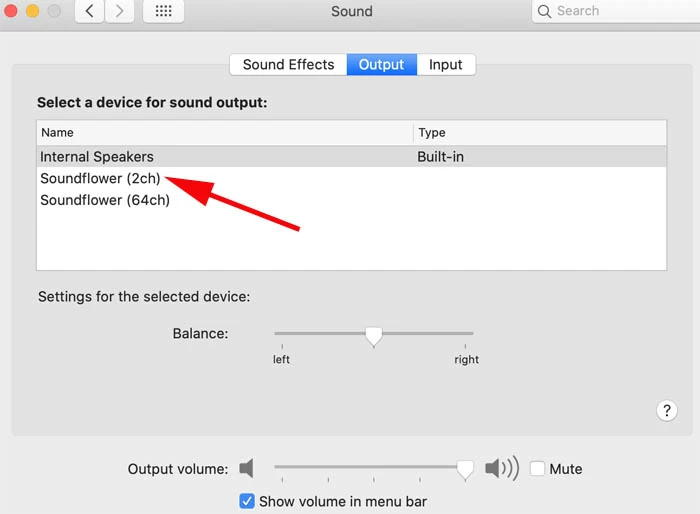
To use Soundflower with QuickTime for recording screen with internal audio together, you have to have the macOS Sound output set to "Soundflower (2ch)" via System Preferences (or System Settings since macOS Ventura 13) > Sound. Note that you won't be able to hear anything from your Mac but it will record and you'll have audio on the playback.
Then open QuickTime and use the steps above to get audio recorded while you're capturing what's happening on your screen, expect the step of choosing "Soundflower (2ch)" in the QuickTime screen recording options instead of Microphone.
After QuickTime recorded your screen with audio included:
If you're going to let go of QuickTime and you're looking for a streamlined screen recording tool for Mac, your best bet is Screen Recorder. It's an all-in-one toolkit that packs with Video Recorder, Audio Recorder, Webcam Recorder and Screen Capture together.
In this case of recording the screen with a video playing from either QuickTime Player or browser, you just employ Video Recorder function and it will capture any screen activities, system sound, as well as microphone audio so you won't miss a thing.
Thanks to the user-friendly layout built into this alternate screen recorder to QuickTime, the process is straightforward:
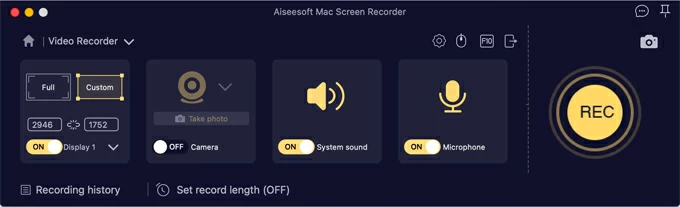
Step 1- Launch the program then pick Video Recorder to continue.

Step 2- Full & Custom. Choose if you'd like to have the whole screen or a specific area of the screen recorded.
Step 3- System sound & Microphone. Switch on the toggle for "System sound" to record audio playing from Mac, and if you need to capture your voice during a screen recording, click to turn on "Microphone."
Step 4- Hit the REC button to get both video and any internal & external audio recorded. Unlike Soundflower working with QuickTime on recording screen and routed audio, you're able to hear what is playing back from the system, as you record.
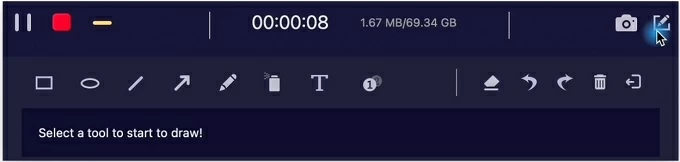
Step 5- Finally hit the Stop button on the float bar to end the screen recording right away. You will get a preview window where you can play the recorded video to see if the video clip and audio are included.
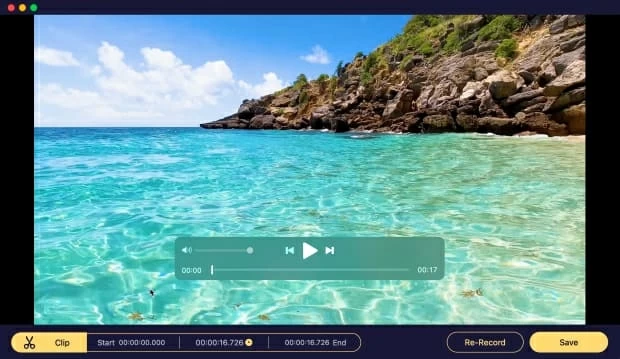
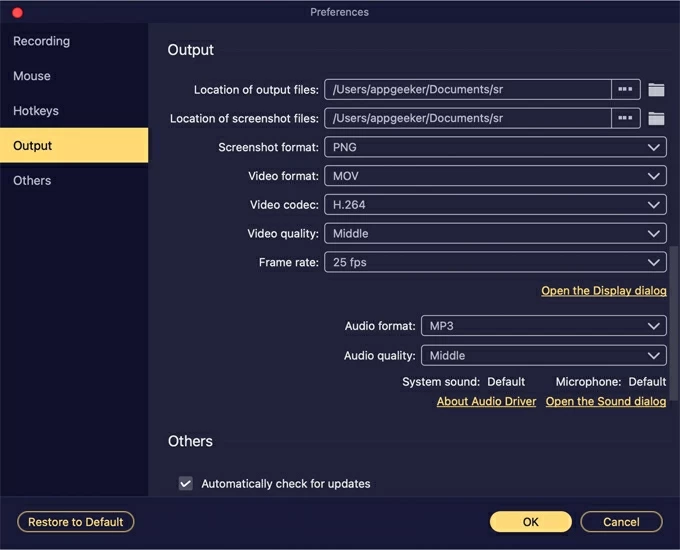
Optional Step. Before you start recording on screen, there're options available for customizing the screen recording the way you like. Click the gear icon which is located right above the "Microphone" to open Preferences window, you can change the video format from MOV to MP4 or whatever (QuickTime screen recordings are limited to MOV.)
Happy Recording! You've got QuickTime screen recording with audio.
Don't Miss: How Do I Record Screen on Windows 11
FAQ— Does QuickTime also record audio while doing a screen recording?
QuickTime Screen Recording does not and never support recording the Mac's audio out-of-the-box. It has allowed third-party apps to access the system audio to record, as long as you give the app permission to do so.
1. With QuickTime Player open, go to File > New Screen Recording.
2. To allow simultaneous recording video and any other audio, click the arrow to the right of the Record icon and choose the built-in mic or a connected peripheral.
3. Click Record button.
4. Select to begin a fullscreen recording, or a partial screen recording by dragging your mouse.
5. When finished, click Stop Record icon on the menu bar.
FAQ— Screen recording has no sound in QuickTime. I can record sound externally, i.e., myself talking, but not internally. How to fix? Upgraded to Mojave.
Since upgrading to Mojave, you're no longer able to get audio when you make a recording directly off the screen. Instead, Screenshot Toolbar utility invoking with Shift + Command + 5 appears to record screens and include audio and any ambient sound coming through the microphone.
The fact is that it's not possible to record the system audio when using the screen recorder within QuickTime. But all hope is not lost. You can give AppGeeker Screen Recorder for macOS a shot. It's a capable application that offers smart techniques to get a high-quality audio recording of what's happening on the Mac's screen. That means you will manage to record audio while simultaneously recording video on your Mac.
FAQ— How do I record both screen and audio on a Mac?
Here're the best screen recorders for capturing the Mac screen video and audio at the same time.
If you're looking for a simple video and audio recording app without setting up, AppGeeker Screen Recorder will probably suit you best: it's full-fledged, all-in-one, and easy to use.
QuickTime and Screenshot toolbar satisfy the screen recording for most users. However, they lack audio capabilities to record system audio unless a plugin is downloaded and set up properly.


