How to Retrieve Deleted Text Messages on iPhone

Use Windows 10's Xbox Game Bar or 3-rd party apps to record everything that happens on your screen - any sound and screen activities are captured in the screen recordings.

Quick Start — Record your screen and capture audio from microphone or computer
Xbox Game Bar built into Windows 10 helps you screen record with audio. Once you're in a game or app you want to record, press Windows key + Alt + R to get Xbox Game Bar to start a recording; and as soon as you press those keys again, the process should stop. If you want to capture your voice in the screen recording, press Windows key + Alt + M to turn microphone ON.
There comes a time when you expect more controls over your video and audio while recording. You'll need the power and flexibility that Screen Recorder provide.

Here are some of your best options to choose from when recording PC's screen along with audio.
Most often, recording screen and audio on Windows 10 as you play a game or use an application can be a handy feature to know. While it's easy to use the Game Bar that comes included with Windows to perform screen recordings, there're some limitations:
Related: The best ways to record screen on Windows 10
To get things rolling, we'll also show you other two flexible tools to record Windows screen with both video and audio, including the step to allow internal or external audio to be included in the screen recordings. Visit this article if you're interested in take video and audio recording on a Mac or MacBook.
Table of Contents:
The Xbox Game Bar app comes preinstalled on Windows 10 and newer version of Windows that makes the most sense to the majority users for screen recording together with the microphone and computer audio. It lets games to track and capture the gaming process, but it also embraces non-gaming apps as well as audio coming out of microphone or system.
Before recording a video of your screen and audio:
Now, you're ready to record computer screen on Windows 10 and capture the audio:
You'll need to go to the app, game, web browser, video playing through media player, or whatever that you wish to capture in your screen recording, except the Windows desktop or File Explorer.
An alternate way is to press Windows key + G to open Game Bar main window, then click the Start Recording icon in Captures widget.
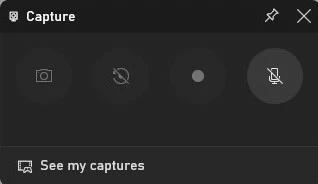
You can allow audio recording in Capture widget.
As soon as the Windows screen recording with audio begins, you will see a floating bar appear on the screen. The timer calculates how long your video recording is going.
To record your voice while your screen is recording, click on the Microphone icon right in the floating bar, and then talk yourself into your connected mic.
Windows key + Alt + M is for turn on or off the external audio recording. With that, you can do a voiceover and add a commentary.
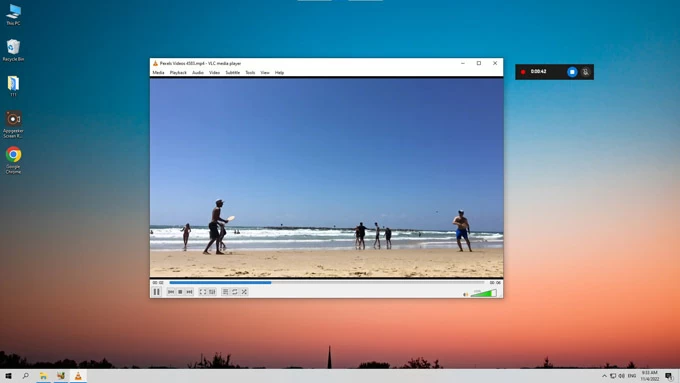
Turn on Microphone to add audio to the screen recording, or turn it off anytime to mute excessive noise from mic.
Alternative, hit the Stop Recording icon on the floating bar.
After you finish the recording process, "Game Clip Recorded" notification from Xbox Game Bar Recorder will appear on the right side of your computer's display.

You're indicated that screen recording on computer has been completed.
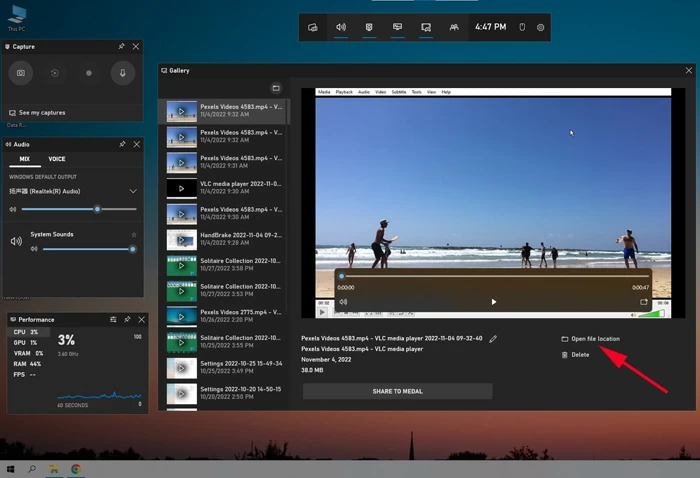
Click on that to open the Gallery where you can preview the video you recorded and text the sound. A press on the "Open file location" will take you Videos\Captures in File Explorer, and your new screen recording with both video and audio on PC is saved as MP4 format to be playable on most of media players or devices.
Watch your screen recording and listen to the sound to see if everything has been recorded as intended.
Bonus: Configure audio recording in Game Bar
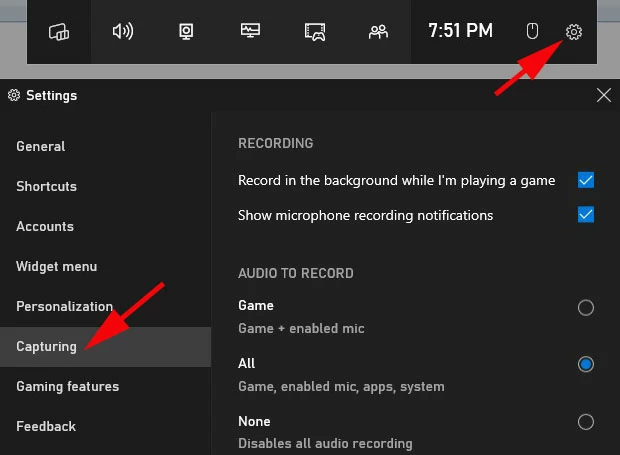
Xbox Game Bar offers options granting you to choose audio to record. Click Settings icon on its menu bar, choose Capturing, then under AUDIO TO RECORD section, check "All - Game, enabled mic, apps, system" option so you can record any sound you can hear from the computer.
Tweak audio record settings to screen record with sound coming from computer and mic.
Screen recording on Windows 10 with audio via Xbox Game Bar may be easier, but some of you like having more control over your video and audio. Another way is to use Screen Recorder, which serves as Windows screen recorder with audio to take a video for future use.
Windows Screen Recorder is a well-rounded screen-record utility that lets you take screenshots and record footage from your computer's screen or webcam (or both simultaneously), as well as system sound and microphone audio. It records games and smartphones as well.
In addition, with integrated screen recorder, you can record the entire screen or desktop - not just one single application, record a selected portion of the screen as you please, and save the screen activities as any file format you customize like MP4 (H.264, AAC), MOV, WMV, GIF, etc.
The process is pretty simple, too. Follow these steps to screen record with computer audio. There's no particular recording limit in the software. As long as your computer has enough free storage, you can continue to record your screen and audio.
1. Once you start the program, click Video Recorder tab.

2. By default, the software is set to record all activities happening on the screens of your computer, but you can make some tweaks on the control panel for screen and audio recordings.
To make more settings video recording and audio recording like the output format, frame rate, quality, etc., click the gear icon right above "Microphone" to go to Preferences window.

3. When you're ready to start recording the screen and capture audio along with it, hit the REC button. Anything on the recording screen is captured.
When you're done with your recording of screen and audio, hit Stop Recording button. Then you can take advantage of the powerful video editor to polish the video, and send it YouTube, Facebook, Twitter, Vimeo, Instagram, Google. Read More: How to Record Audio from YouTube
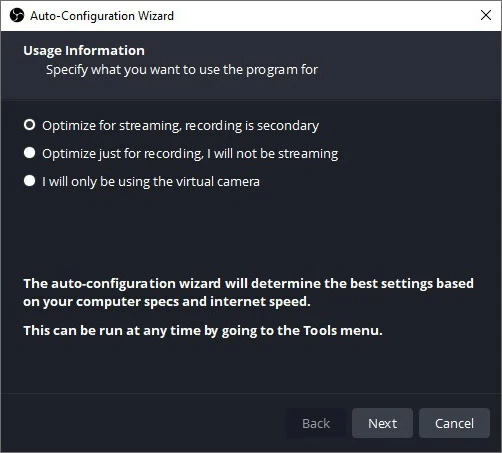
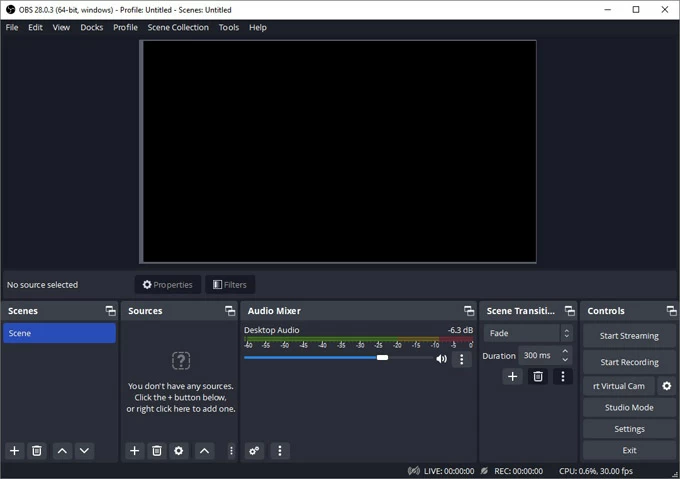
Recording your screen and audio simultaneously via OBS Studio is not as simple as hitting a button. You have to take extra steps before you can kick off the recording.
How to record screen and system audio from Windows computer using OBS:
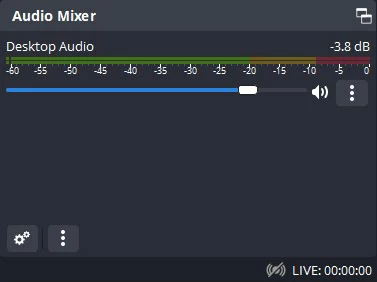
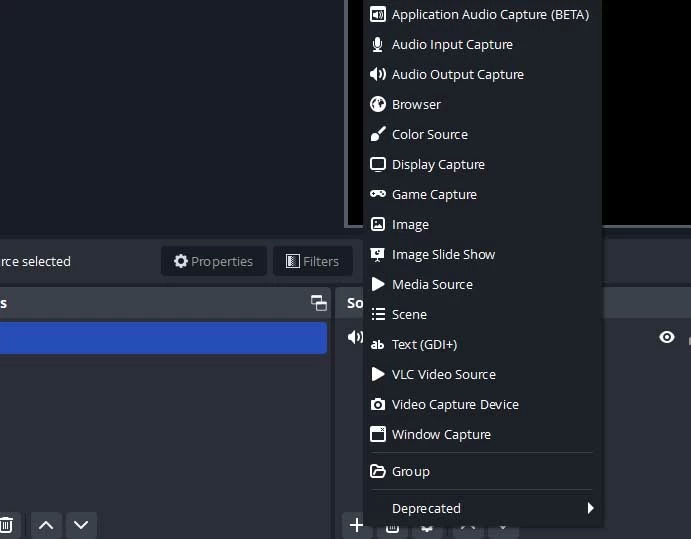
1. To get audio from the computer recorded, navigate to "Source" box again, click "+" symbol and choose "Audio Output Capture."
2. For allowing external microphone audio recording in a screen recording, pick "Audio Input Capture" and the select your input microphone device to capture your own voice.
The recorded screen video will be located into Windows Videos folder. Head to there and view the video and check if both footage and sound are included.
Does Windows 10 screen recorder record audio?
Windows 10 has an inbuilt Screen Recorder that can be used to record screen and audio from computer at the same time. However, it can only record one window, not the full screen, and has a 30 min recording limit. Here's how you can use it for screen recording
1. Go and open the application or any screen you wish to record.
2. Press Windows key + Alt + R to start screen recording.
3. Press Windows key + Alt + M to toggle on audio recording feature. If you want to mute your screen recording, turn off the feature.
4. Hit Windows key + Alt + R to stop screen recording video with sound.
In the case of you're going to record your entire screen like Windows Desktop, you could go with AppGeeker Screen Recorder for Windows OS. It lets you effortlessly record screen and capture audio for a screen recording, or capture only audio.
Shortcut for recording Windows 10 screen with audio
Open Game Bar: Windows key + G
Start/ stop screen recording: Windows key + Alt + R
Turn on/ off audio recording while capturing computer's screen: Windows key + Alt + M
Built-in screen recorder won't record external microphone and computer audio. How to fix the problem?
If you're having audio or sound problems with Windows Game Bar not recording external microphone and computer audio, perform the steps explained in this Microsoft Support page.
Windows 10 capture in Xbox Game Bar does a great job at recording screen and audio at the same time. Games and non-gaming applications, internal sound that playing on computer, as well as microphone audio can be captured without any hassle.