How to Convert a MKV File to QuickTime on Mac


MKV (Matroska Video File) container file is very popular among the Anime fan community. It is funny that you can embed your own subtitle or several ones into your videos, letting you customize movies with your own brands of humor and wit. The MKV format offer a handy way to make subtitles, multiple video and audio tracks and chapters included in a single file, but MKVs are less convenient once you want to stream them on many of media players or edit them in Sony Vegas (and other editing programs) without costly add-ons or other program tweaks.
Thankfully it's not too hard to convert MKV files for you to a more acceptable format on your computer and then watch them on your gadgets of choice. In this article, we mainly focus on convert video in MKV to WMV for a Mac machine and PC.
The Right Tool for the Job
There are several converters designed for transcoding MKV videos to WMV and other formats, but let's stick with the highly-respected tool - Video Converter for Mac. It's a cross-platform media converter available for Windows and Mac. It converts one media file type to another and produce excellent output quality. It also includes presets to convert movies for playing on a wide range of gadgets.
If you're converting an .mkv file to a .wmv on a Windows, you can go and get a Video Converter for Windows.
Step 1: Add MKV files into program
Open up the application, you will find it was pretty easy to figure out and use.
Load MKV file to the program by either clicking "Add File" button on the top left corner, or drag-drop the files into the interface. Its interface is self explanatory. Your videos will now appear in the left pane of the program.
Do note that as the MKV to WMV video converter supports batch-conversion, you can add multiple files into the board and convert them at a time.

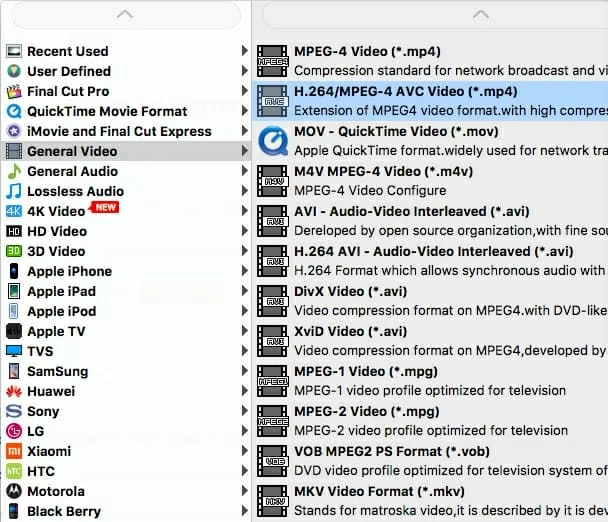
Step 2: Select WMV as output format
For the output settings, set the "Profile" to WMV - Windows Media Video (*.wmv) under "General Video" (see left side). One thing that you should be aware of is that you'd better go to pick "HD WMV Video (*.wmv)" from "HD Video" category if your want to keep quality of a HD MKV after conversion.
Next, set the "Destination" - specify a folder where you want the resulting file to be saved along with a file name.
If you want to tweak the output settings you can. In "Setting" panel, the Mac MKV to WMV converter does come with a lot of video/audio options to allow you to tweak the quality or file size of your finished movie.
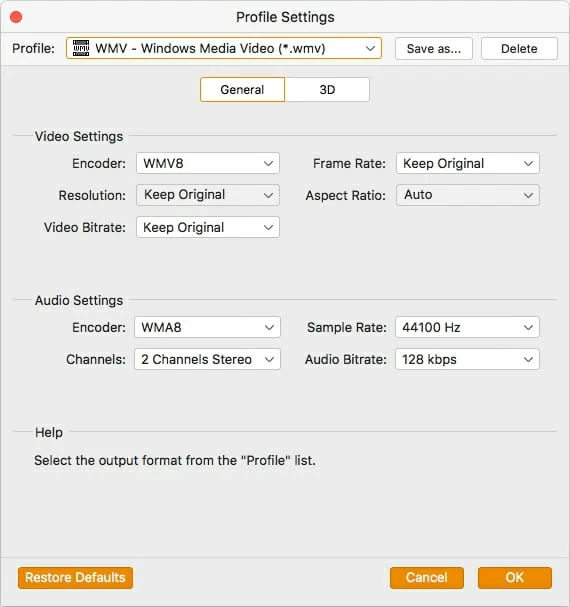
Keep in mind I am converting the MKV file to a specific WMV here. If you're converting the MKV file for a playable device, I recommend using one of the presets (see left side), it will save you a lot of time.

Step 3: Start converting MKV to WMV in Mac
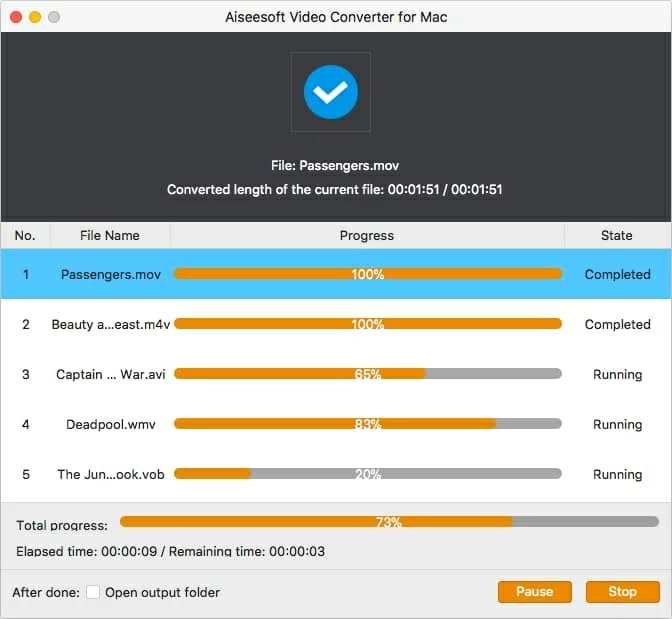
When you're happy with the settings you've chosen, simply click the "Convert" button and wait for your MKV file to be encoded into WMV video. That's it, you are off and converting.
While it's working, the progress is shown in two blue bars along with the amount of time remaining. The process may take some time depending of course on the amount of source files you imported and the quality you selected.