How to Burn MOV Files onto DVD for Home DVD Player


See more about: Blu-ray Creator to burn AVI movies for watching on Blu-ray player.
AVI container file is commonly used by many digital cameras and camcorders for motion video. If you have captured any video online (using VirtualDub, Fraps, Avidemux...), render and export video in video editing software, you may get videos with .avi file extension. Although AVI is convenient for playback on computer, a DVD is still a nice way to share the favorite photos and videos, and then you will need to burn AVI to play on DVD and watch on your big HDTV.
While there are several different utilities out there that can handle the burning of .avi to DVD to view in a DVD player, one of our favorites is DVD Creator for Mac. It is a plain and simple DVD creation and burning tool that will take a number of video files stored on your Mac and burn to DVD you can drop in your DVD player and enjoy on the big screen. In addition, it even supports adding external audio tracks, digital photos as well as subtitles for easier navigation.
The tool provides two versions based on PC and Mac. As for putting AVI file onto DVD for your Windows PC, please go to try DVD Creator for Windows.
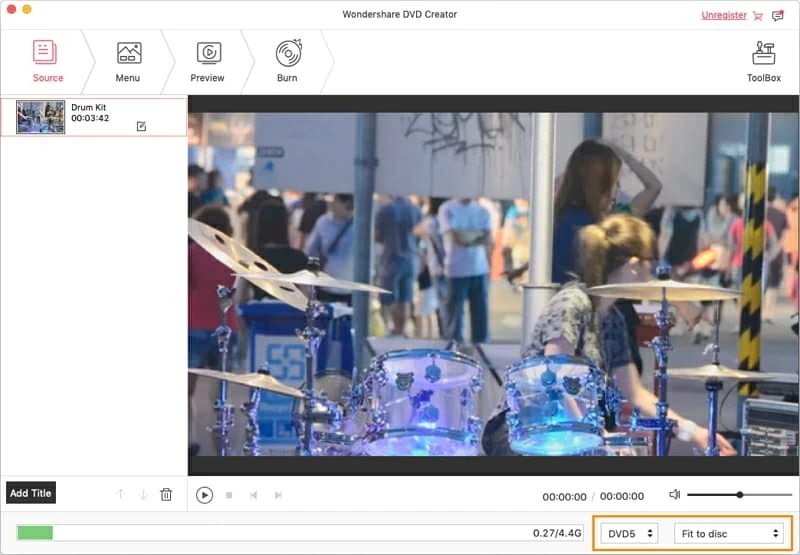
Step 1: Add AVI videos to the compilation
Run the program and load the AVI files by clicking the big "+" icon on the interface. Alternatively, drag the target AVI files you wish to burn over to this Mac AVI to DVD converter window. To move clips up and down, highlight the clip and use the "↑" and "↓" functions on the right side.
Bottom bar will indicate how much space is used on the blank 4.30G DVD disc with the default preferences. It depends on the size of the video you have added.
<
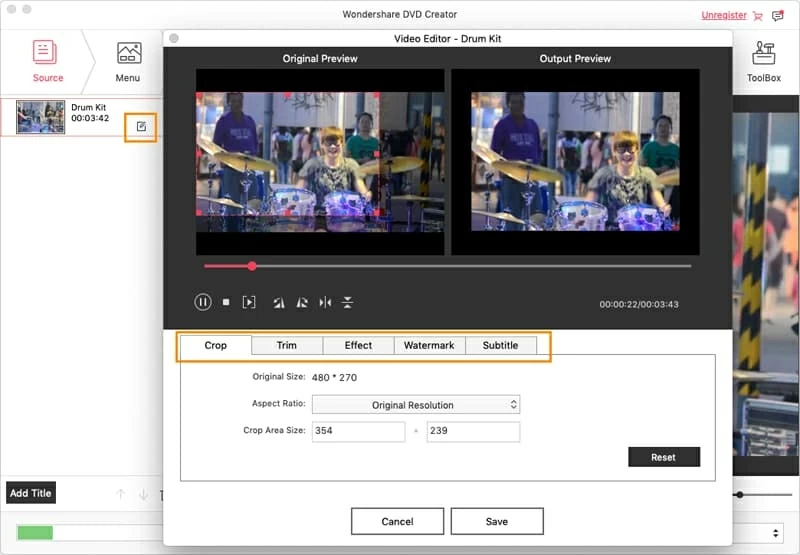
Step 2: Edit AVI files (optional)
The AVI to DVD burner provides a basic video editor where you can trim, crop, flip the video, you can even add effects and subtitles for the video. Simply click the video and then select "Edit" icon in the lower right side of the video thumbnail and it will bring up video editor.
Step 3: Create DVD menu
Now, let set up DVD menu options - press "Menu" tab on the top of the program window. This AVI to DVD converter for Mac already comes with dozens of pre-made templates on the right-hand side for your choice.
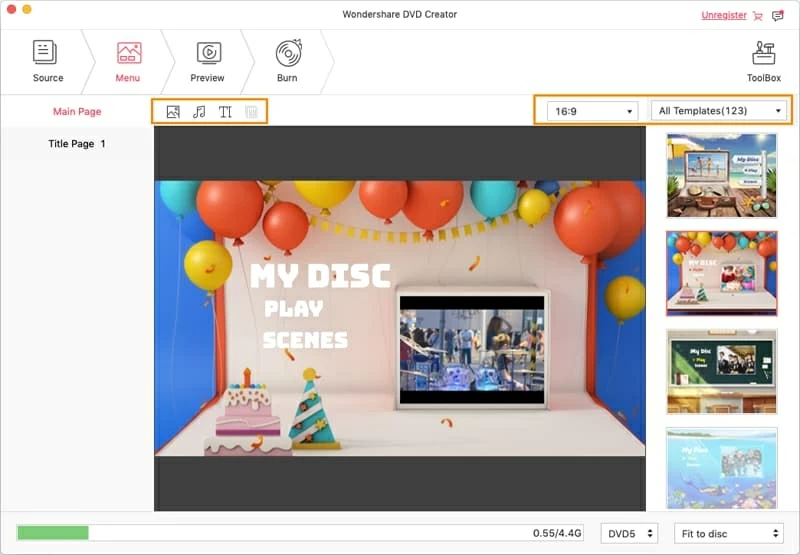
Preview your disc to check if everything is OK by clicking "Preview" tab on the top.
Step 4: Start converting AVI to DVD for Mac
Before your start, you can choose burn to "DVD Disc", or check "Save to ISO" option to create an ISO image file, or store the "DVD folders" in a folder on you HDD so you may burn a DVD disc using it later, and even create ".dvdmedia" files.
If acceptable, insert a blank DVD into the DVD driver and initiate the DVD burning process by clicking on the Burn button at the bottom center, the AVI to DVD on Mac burning kicks off.

Be patient with the burning process. You'll be shown a progress screen, indicating how long until it completes burning. Again the process time will vary between machines and the size of the files.
When the process is successfully completed, you have a fully functional DVD, ready to pop into any DVD player.