How to Copy MP4 Movies to DVD on Mac OS X


See more about: Blu-ray Creator to burn downloaded FLVs a high-definition Blu-ray disc.
Flash Video (.flv) is prevalent on the Internet. It is used mainly by online video-sharing services such as YouTube, Facebook, Hulu since it can hold high-quality videos with compression rate and in small file size. You might have some FLV video snippets on your media library and want to put those FLVs to disc, so that everyone in the family can have a copy and play in a DVD player. In that case, you'd need a custom movie-making app or a FLV to DVD burning program.
It doesn't matter what format is, FLV or any other digital video file format, burning a (FLV) video onto DVD is a fairly straight-forward process with DVD Creator for Mac, a light weight tool that has not more options to confuse you. In additional to burning a DVD you can pop into your DVD player and enjoy, the software also gives you power to create ISO images, DVD folder as well as DVDMedia. One of the advantages of the tool is that it comes with 40+ stationary and animated templates to touch up the creation of project.
If you are using a Windows machine, just turn to the equivalent version - DVD Creator for Windows to burn FLV to play on DVD, so as to view it on a TV using DVD player.
1) Import FLV files
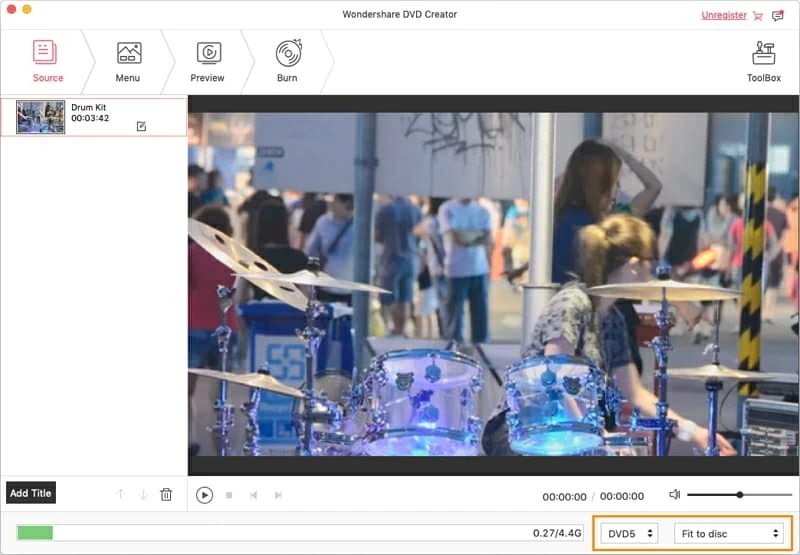
Once the installation has completed, launch the program. The first thing that you need to do is click "+" icon in the main interface to add as many FLV video files as you want to burn. Added videos (and photos) will be displayed as thumbnails on the right portion of the screen, and you can move the files around and change the order of them by clicking "↑" and "↓".
A blue indicator bar on the bottom of this FLV to DVD converter for Mac will tell you how much the disc capacity taked up after you have FLV videos imported. Here below is how the program should look after importing files.
<
2) Edit FLV Videos (optional)
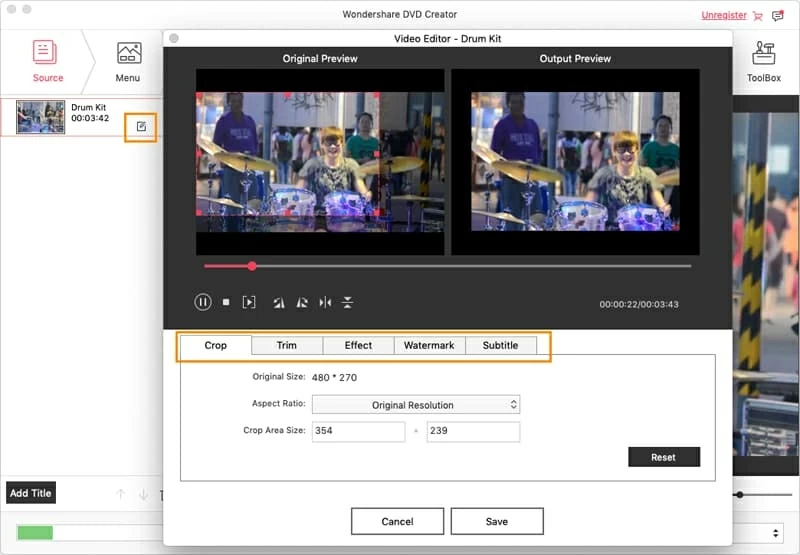
Once you've your FLV clips loaded, you can use the program's built-in editing tool to enhance your footages. Simply right click on the video item and then choose "Edit" icon located in the lower right side. The built-in video editor lets you edit your videos by cropping, trimming, adding watermarks, adjusting video effects, etc.
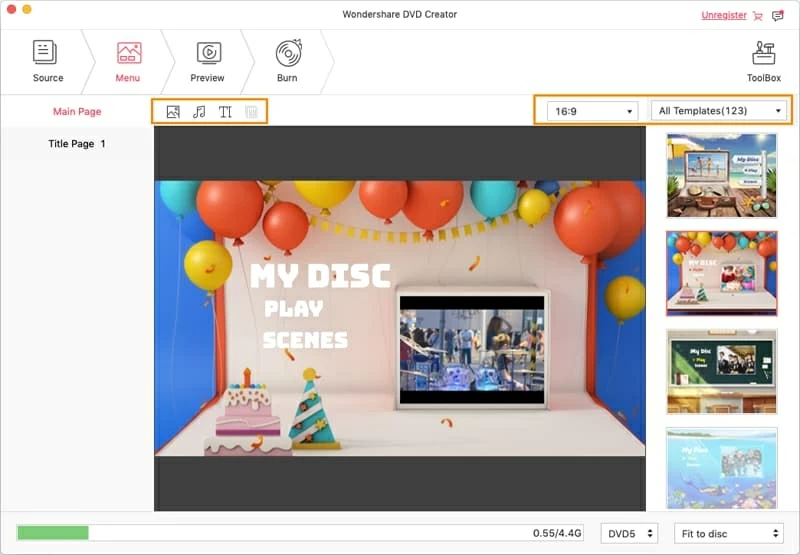
3) Configure DVD menu
Before converting FLV video to DVD, you can choose a DVD menu template by clicking the "Menu" tab at the top. The menu will be then showed out in the right portion of interface. The program offers extensive ways to customize the look of the menu screen. You could adopt the free stylish DVD template and add text and background music to the videos to completely customize your DVD menu screen.
Note, here you may need to set the Aspect Ratio: 4:3 is standard for televisions, not widescreen; while 16:9 is universal for HDTV and European digital television.
4) Begin burning FLV to DVD Mac
Click the "Preview" icon button at the top to check if everything goes well.
The last step, go to "Burn" tab next to the "Preview" icon to open the output dialog box. This Mac FLV to DVD converter has options to either burn the file directly to DVD or save to hard drive as a "DVD Folder", "DVDMedia" and "ISO File". The option to save as a DVD Disc is set as default. Then just put the DVD name that you want your DVD to have.

Now we are ready to burn FLVs, simply hit the "Burn" button and begin burning FLV to a playable DVD. Wait patiently for the disk to be burn.
A log window will be displayed showing the percentages of total to complete the process. How long the encoding takes is heavily dependening upon the length of the original FLV video files and your computer power.
Please keep in mind that the resolution of FLV flash video files grabbed from YouTube is often 320x420, while DVD frame size is 720x480 or 720x576. So the DVD quality may not be excellent.