How to Burn H.264 Video to DVD for Mac OS X


See more about: Blu-ray Creator to burn series of TV show for watching on Blu-ray player.
If your laptop or desktop has a pre-installed DVD drive or USB port ready for connecting external DVD drive, chances are you can create DVD. So you have recorded episodes of TV series and no way to get it to play on your home DVD player with big screen? In today's post, I will help you learn how to burn TV shows to fit on a DVD on Mac and Windows system with a disc burning application.
It should be noted that despite the number of episodes included in a TV series per season varies from show to show network to network, a TV series typically constitutes between 10 and 26 episodes in one season. So if you want to burn an entire series to DVD disc, you may have to prepare pieces of dual-layer DVD (8.5GB), or a Blu-ray disc which can hold approximately 25GB - 128GB of data.
Luckily, there are a lot of strong choices handling such kind of tasks. One of the most popular disc burning tools around is DVD Creator for Mac. It is quite handy when it comes to burning a series of TV shows to DVD on Mac, and supports almost every type of digital video & audio & photo as input. You could easily edit the episodes separately with built-in editing tools, create your very own ‚custom menu style, and even set background song and photo.
If your TV shows are kept on hard drive on Windows computer, you will use its DVD Creator for Windows to burn DVD disc.
Tip: Some of you guys might want to make Blu-ray from a whole TV shows that you can watch on a home entertainment system using a regular Blu-ray player. In that case, we suggest you try Blu-ray Creator - a cross-platform Blu-ray authoring program accepting just every file format and burn to both Blu-ray and DVD, with stylish menus and your own background sound track.
Step 1: Select your episodes content
Upon launch of the program, you'll be greeted by a simple yet clear screen. Select the "+" icon from the blank area of the interface, in the window that opens, locate the TV shows on your hard drive, choose them and hit "Open".
Once they are loaded, the window should look something like this:
<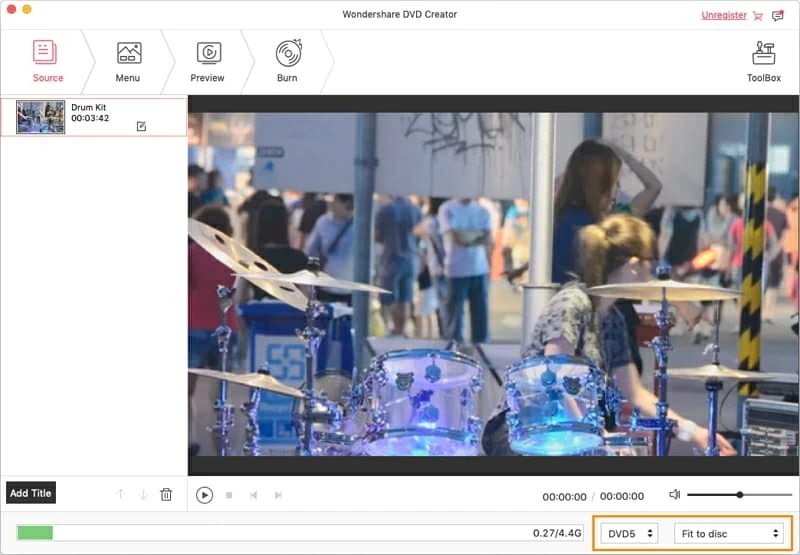
A bar on the bottom of screen indicates how much amount of space the recorded TV series take.
Step 2: Edit your added episodes of TV series (optional)
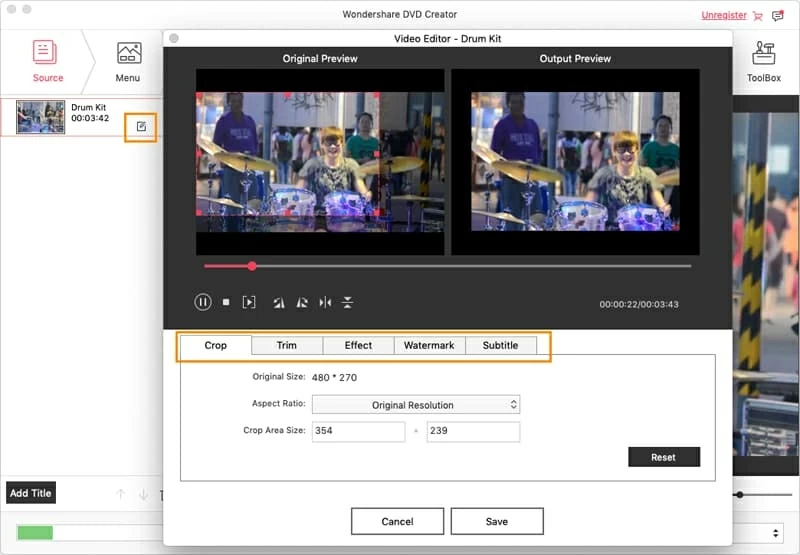
When finished selecting episodes of a TV show to be burned to DVD, you may want to do some editing on them.
You can enter the editing window by clicking the "Edit" icon at the lower right of episode item in the list, from there, you will crop the video (remove the black bar, for example), trim to get exactly what part of video you need, apply your own text and image watermark on it, add effects and even rotate it if required.
Step 3: Customize your DVD menu
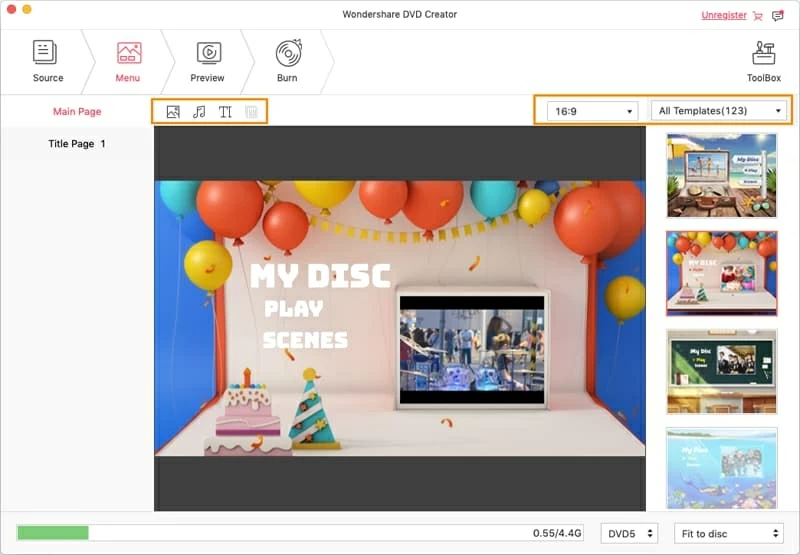
Now, we can move on to how you can add a menu to the DVD. A menu will help you skip to a particular episode using a DVD player remote control, rather than watching them one by one.
Go to the "Menu" tab on the top of main screen, you will see a menu list where there is a range of menu templates you can choose from. Also, you have full control, if you need it, over each of menus in a way you want it to appear on the TV screen. Frame, Buttons, Texts are all customizable in your hand. You can even add external song and photo as background to the menu to make your DVD visually pleasing.
A "Preview" option (next "Menu" tab) of how the menu will look can be click anytime you make a change.
Step 4: Start burning a TV series onto DVD in Mac computer
All that is left to be done now is to set output settings prior to finally burning the disc.
Press the "Burn" tab on the top of screen, you'll see a dialog popping up where some more settings you'll have to set.
At the top of the dialog, select "Burn to Disc" option in our case.
In DVD Name field, the default as you might have notices is "My DVD", you should give it a new label.
Lastly, choose your target format (NTSC or PAL) for your country, if you don't know what the correct setting would be, you can search online or click the link we offer
Once done, we are ready for burning recorded TV shows to DVD disc on Mac. Simply hit the red "Burn" button to begin the process of converting the episodes of TV shows to DVD on Mac.

On the burn screen, it shows you all kinds of detailed burning information. The time it will take depending on the size of episodes you have added in the step 1, the output settings you configure, and other factors,
Done! Just so easy to convert and burn TV series to DVD on Mac OS X! After the process completes, you should be able to place the DVD into a standard DVD player connected to your big TV in the living room and enjoy your TV shows.