
How to Burn FLV Video to DVD on Mac for Watching Big TV


See more about: Blu-ray Creator to burn WMV movie files to play on Blu-ray.
WMV is a file format commonly used in Windows-based video programs, like Windows Media Player. You might have got a series of WMV shows in your media collection, and want to be able to play those WMV videos on DVD player to share memories from vacations, special events and milestone occasions. All you need to do is get a third-party WMV to DVD converter program to accomplish this task on your Mac & PC.
There are a variety of disc burning applications out there that claim to create your own DVDs from WMV and other digital videos without any effort, our favorite is DVD Creator for Mac.
It is a surprisingly simple burning tool that makes easily for video enthusiasts to burn WMV to DVD in Mac, and create professional-looking DVDs with a chapter navigation list. Drag-and-drop feature and pre-configured menu templates are supported, making it easy and possible to produce quality DVDs. Of course, it has options to import external subtitles, add your digital photos with music as background image and track.
If you're on a PC, simply turn to DVD Creator for Windows to burn WMV video files to fit onto a DVD.
Our goal here is to copy and burn WMV to DVD on a Mac so that you can play on household DVD player in your living room. It's not a complicated process, though it does take time. Let's begin.
Step 1: Import WMV video(s)
First of all, click on the "+" icon on the blank area of the program window, this will bring up a 'Browse' window from which you can navigate to the WMV video files stored on Mac HDD you wish to burn.
Or use drag-n-drop feature to load WMV video files from your hard drive into this DVD burner. Pictures and slideshows could also be imported.
<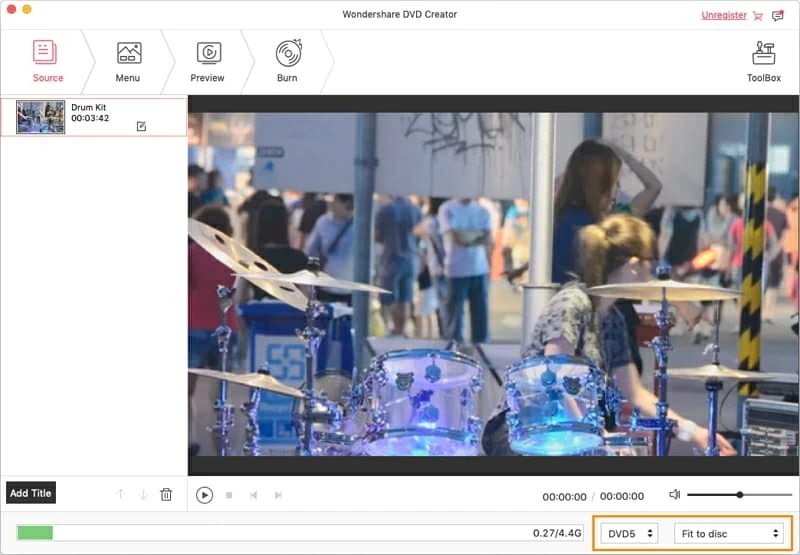
You should now see the files details displayed in the main window. The bottom green bar shows you how much space you've used, so keep an eye on your space.
Step 2: Edit WMV Videos if required
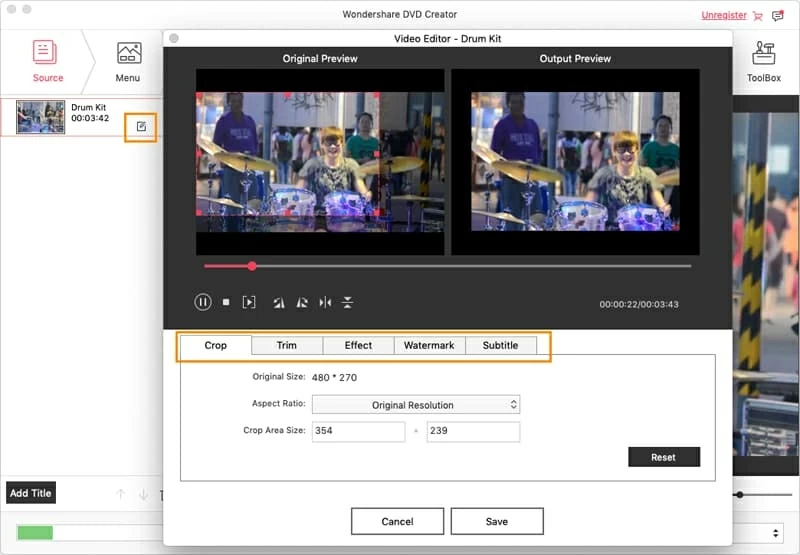
Hit the "Edit" button beside each video or photo slideshow to open the editing window. There are various video editing features available to crop, multiple trim, adjust effects, add watermarks, rotate, add subtitle, etc.
Step 3: Add a DVD menu
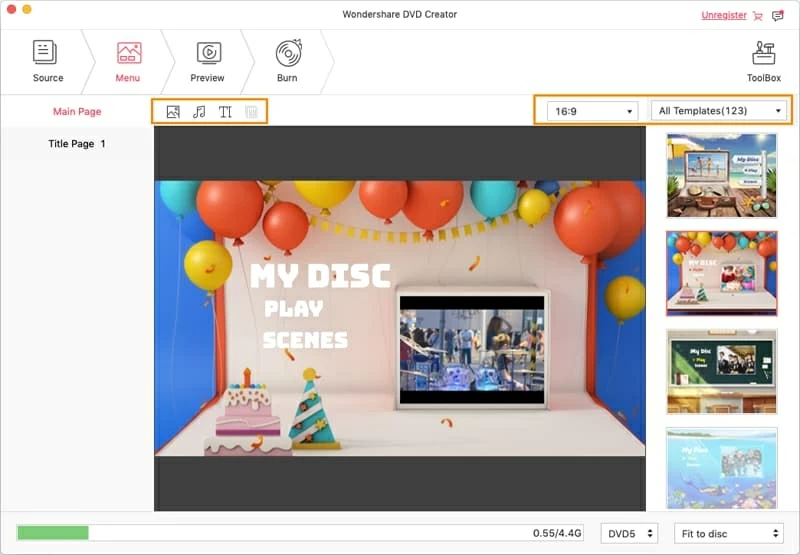
If you have many of titles in project, you might want to apply a stylish menu to your DVD so that you can select a title to play from a list with names and thumbnails.
Go to "Menu" tab on the top to customize a menu. The WMV to DVD burner for Mac comes with a group of free DVD menu templates for your choice. After select a menu template, you can change background image, add text/ music, customize thumbnail and create chapters with a row of buttons on the bottom of the window.
Step 4: Create your DVD from WMV on Mac
Go and click the "Preview" tab (near "Menu" tab) and preview your DVD project to make sure that all the effects go as you like.
Next, go to the "Burn" tab and complete the output settings. It's simple.
When you have done all the necessary settings, click the red "Burn" button and the WMV burning process will start. You will see a progress bar indicating the burn status.

The amount time of process could take anywhere from several minutes to hours to complete, depending on how large the WMV files are, and how fast your computer is.
That is all there is to it! Once the WMV to DVD burning has completed, pop the disc into DVD player and make sure it works.