How to Disable UEFI Secure Boot in Windows 8/ 8.1 Computer

Rob Parsons Updated on Apr 15, 2022 4:59 PM
UEFI (Unified Extensible Firmware Interface) is a standard firmware interface for new PCs pre-installed with Windows 8/10, which is designed to replace BIOS (basic input/output system).
Basic steps: Access UEFI BIOS settings and disable "Secure Boot" option, then change "Boot List option" as "Legacy", and enable "Load Legacy Option Rom", then follow a traditional method to boot computer from USB device or CD-ROM.
There are several ways to access Windows 8's boot options menu. The easiest one to find is in the PC Settings application – press WinKey+C to reveal the Charms bar, click Settings, and select Change PC settings to access it.
Part 1: Access UEFI BIOS by PC Settings
Move your mouse to the upper-right side of PC window (or press Win+C) to open the Settings Charms bar.
Then click Change PC Settings in the bottom right.
1) In Windows 8, from PC settings screen, you will find the General category located on the left column. Clicking it will present you Advanced startup option.
Click Restart under Advanced startup option.
2) In Windows 8.1, go to PC Settings screen.
Click the Update and Recovery category on the left column from the screen, and then click its sub-category Recovery.
From its expanded panel, click the 3rd Restart Now under Advanced startup option. Your computer will restart to the Windows 8s boot options menu.
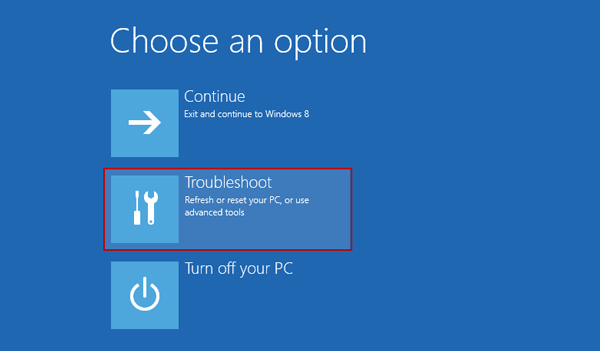
Now you will be presented with the Choose an option screen, simply select Troubleshoot.
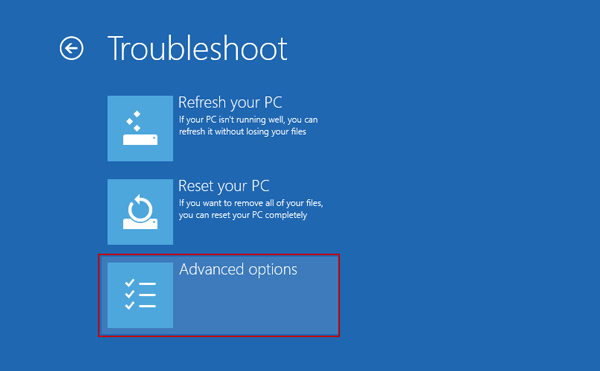
Next, select Advanced options.
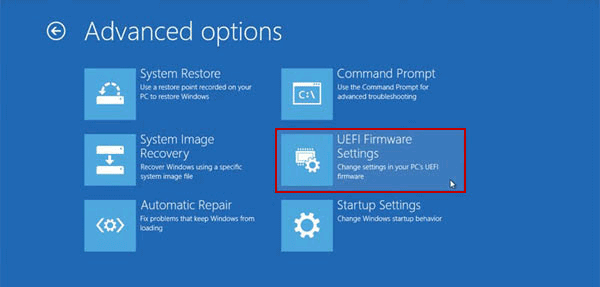
Next, select UEFI Firmware Settings.
Note: If you don't see the UEFI Firmware Settings tile here, your computer doesn't use UEFI. You'll need to access the BIOS using the common way.
Click the Restart button. Your system will restart and take you to the UEFI BIOS.
Also see: Best Windows Password Reset Software for PCs
Part 2: Disable UEFI Secure Boot on the computer to boot in a common way next time
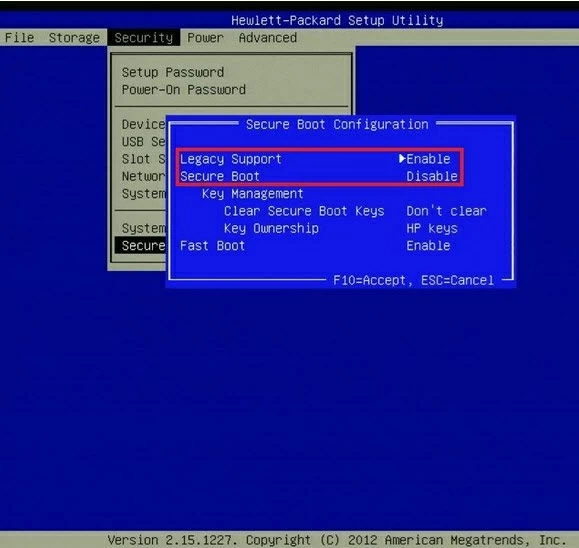
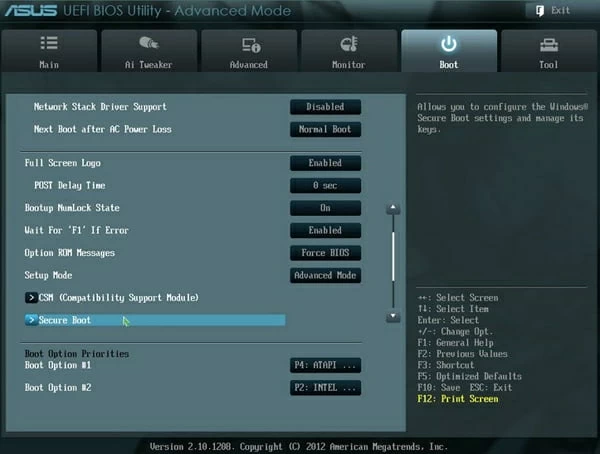
Once you're in the UEFI utility screen, move to Boot tab on the top of the screen. Use the arrow key to go to Secure Boot option and then press enter to select it. Use + or – to set Seucre Boot to Disable, and set Legacy Support to Enable, so that you will boot the computer in a common way.
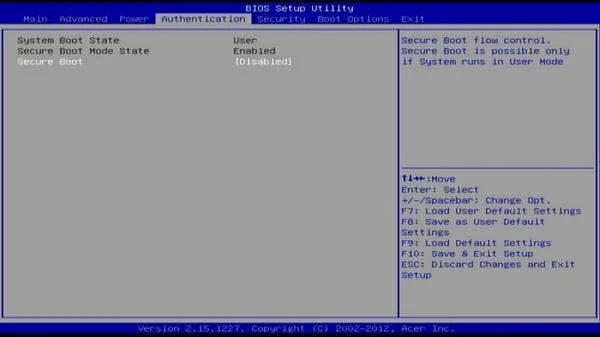
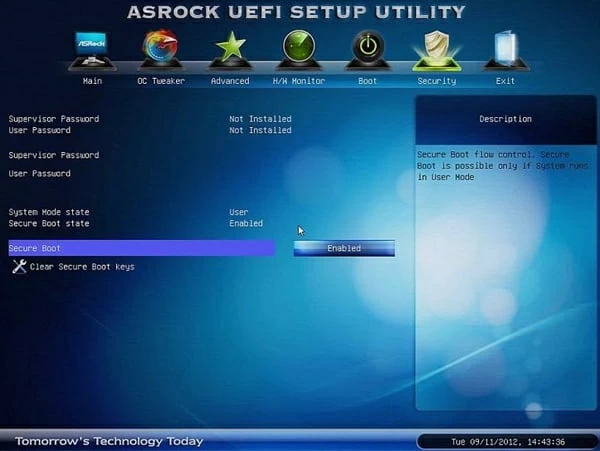
Note: Depending on the motherboard's BIOS/ UEFI firmware, the Secure Boot option may be listed under the "Boot", "Security", or "Authentication" tab.
HP Secure Boot
ASUS Secure Boot
Acer Secure Boot
ASRock Secure Boot
Next, press F10 to save the changes and exit the UEFI settings.
That's for how to disable secure boot in Windows 8/ 8.1. Note that if you're on an Arm-based Windows RT PC, you can't disable secure boot because these devices have a locked boot loader.