How to Use iPhone Data Transfer - Manage & Transfer Music

Support Updated on Apr 25, 2023 10:13 AM
The guide will show you how to download music from iPhone or iPad to computer, transfer music from computer to your Apple devices, as well as manage music files in your device media library. The following steps work the same whether you're running on Windows or macOS computer.
Here we take an iPhone 13 as an example for music transfer.
Table of Contents
In Manage Music Library section, you will learn how to create playlists, move music between playlists, delete or rename a playlist, merge duplicate songs, edit ID3 tags, and even make your own ringtones.
Let's get started!
How to transfer music from iPhone or iPad to computer, or between Apple devices
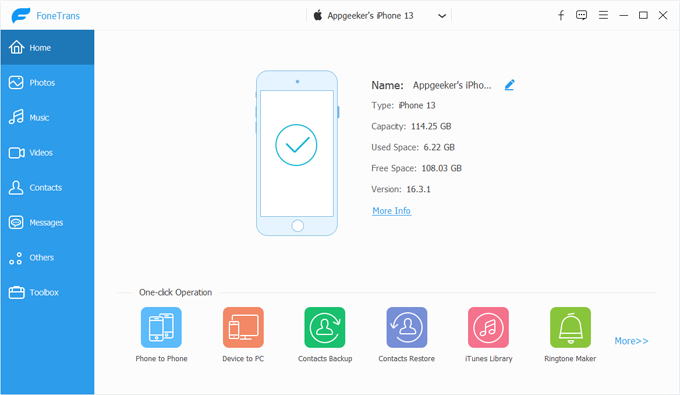
1. Launch the software and plug your iPhone or iPad into the computer. If you have more than one device connected, ensure that you've selected the one you want to transfer files from in the drop-down menu on the top center of the screen.
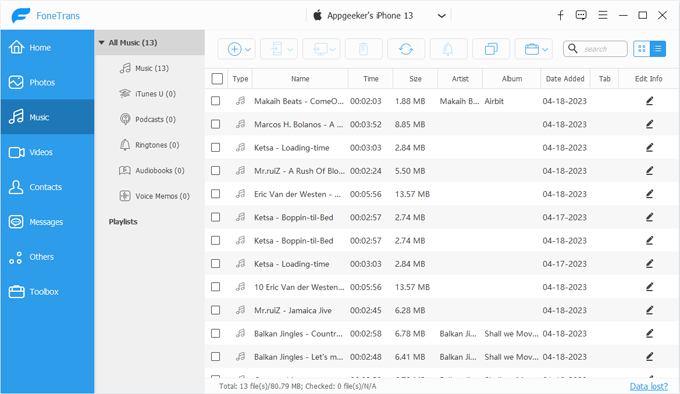
2. Click Music button on the left navigation menu, this should bring up your music library where all your songs and tracks are sorted well by Music, iTunes, Podcasts, Ringtones, Audiobooks, and Voice Memos on the center pane. Clicking a specific category will expand all the tunes it includes. By default, the selected category is All Music.
Here you can sort your tunes by Type, Name, Time, Size, Artist, Album, Date, and Tab.
List preview
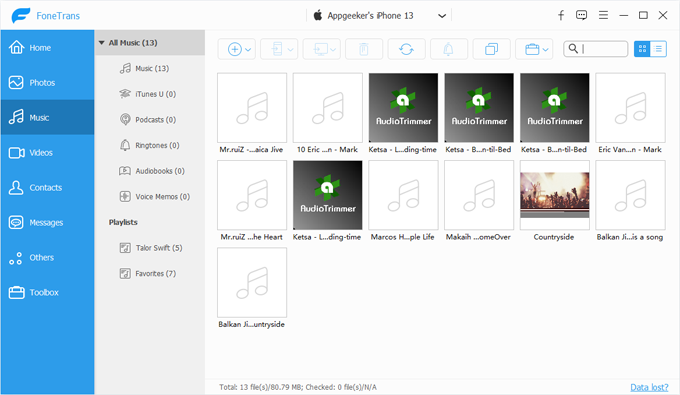
You can make some changes for the display on the program by clicking the "Thumbnail preview" or "List preview" icon located in the upper right corner.
When you click on the Thumbnail preview icon, you will get an interface like this.
Thumbnail preview
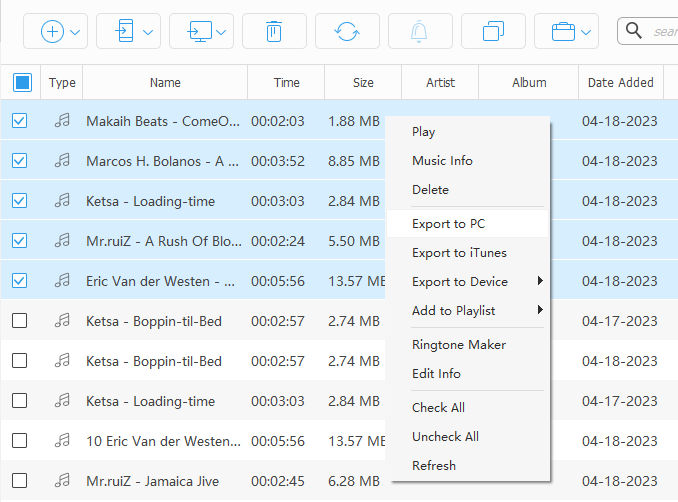
3. To download music to your computer, select the songs and any other audio file you want to transfer from the list.
- Pick the entire media library by checking the box next to Type at the top (beneath Plus icon)
- Select individual songs by checking the boxes next to songs you want one by one
- Right click on a specific track
- Select a specific playlist
4. After you've selected your music files, press the Computer icon button on the top menu bar and then select "Export to PC" or "Export to iTunes."
- When clicking "Export to PC," a dialog box will open, asking you to pick a place where your selected songs will be saved on your computer.
- When selecting "Export to iTunes," it will save your selected music to your iTunes library. If you're using a Mac, here will display "Export to Finder" instead.
Alternatively, after the songs are checked, right click and select "Export to PC" or "Export to iTunes" from the context menu to save your music locally.
Or, you can right click on a specific category to download all tracks contained in that category.
5. Wait until the program has completed the transferring process. Once done, you can view your music files on the folder you specified previously.
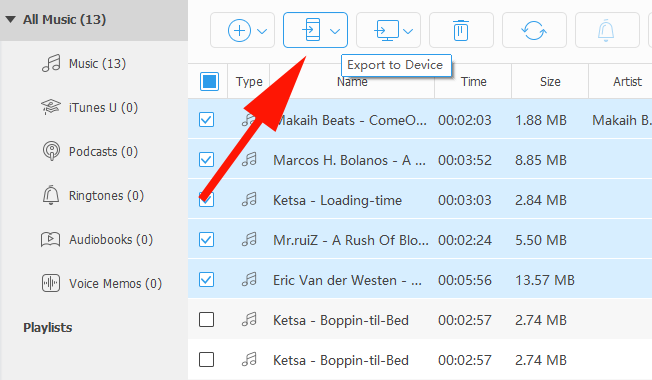
Quick Tip: If you're transferring tracks from one device to another, for example, from an old iPhone to a new iPhone (or iPad), simply click the Phone icon at the top menu bar, or use the right-click context menu to complete the transfer. Check the screenshot below.
If there are more than 2 Apple devices connected to the computer, you may need to select the target device you want to get music from the drop-down list.
How to transfer from computer to iPhone/ iPad
To import songs from your Mac/ PC's and put onto your iPhone or iPad, follow these steps:
1. Plug your device into the machine with a working USB cable.
2. Launch the program and navigate to Music library.
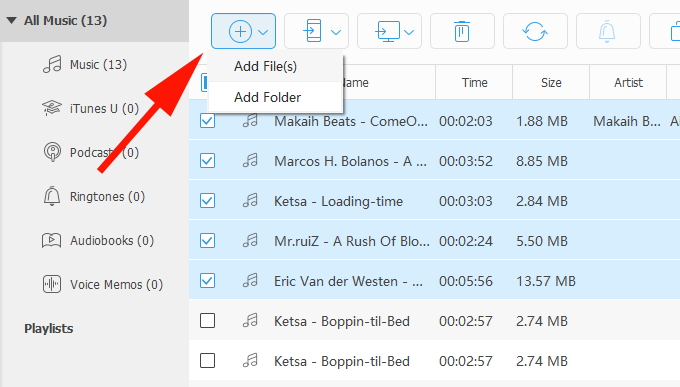
3. Click what category you want to add songs to, and then click Plus icon at the top menu bar. In its drop-down menu select Add File to add individual tracks, or Add folder to import an entire folder of music files from your computer. Alternatively, use drag-n-drop feature to add files directly from your machine.
Quick Tip: You don't need to worry about the audio formats. The program can automatically recognize your source music files and quickly convert the incompatible files into a format that is suitable for your device during transferring.
4. In the opening dialog, browse your hard drive for the songs you want to upload to iPhone, followed by Open button.
5. Your music will be transferred to your iPhone soon. Done!
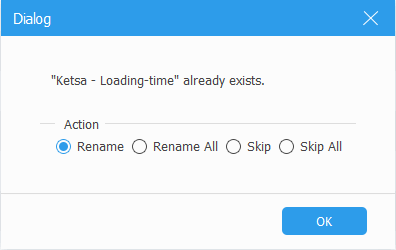
Tip: If you're transferring a music file that's already existing on your iPhone Music library, it will pop up a dialog box, asking how you want to get rid of the track(s) with the same name. You may select "Rename" to change the name of the file and then add to your iPhone, or click the "Skip it" option to not transfer the file.
Manage music in media library
Right-click context menu
Select one or more music files, then from right-click context menu, you can:
- Play your song with the program's built-in music player
- Delete it from your device (alternatively, use the Delete button on the top menu bar)
- Select all of songs in the category
- Export to your Mac/ PC's
- Transfer music to your another iPad & iPhone
- Save to your iTunes library
- Add the selected music to a playlist
- Check music Information
Right click on a specific music category on the left pane, you can:
- Export the full playlist of tracks to your PC/ Mac
- Export the full album of songs to your iTunes library
- Create playlists
- Rename the playlist
- Delete the playlist from your device, but the tracks will still be existing on your media library.
- Export the full playlist of tracks to your another iPhone or iPad.
Manage playlist
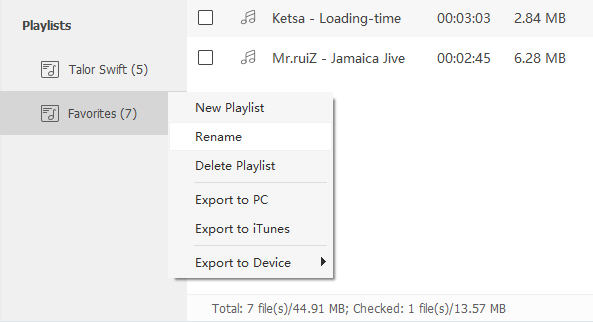
Right click on any of your playlist, you can:
- Create a new Playlist
- Delete or rename the existing playlist
- Export the whole playlist of music to PC/ Mac
- Export the full playlist of music to iTunes
- Export the entire playlist of music to another Apple device
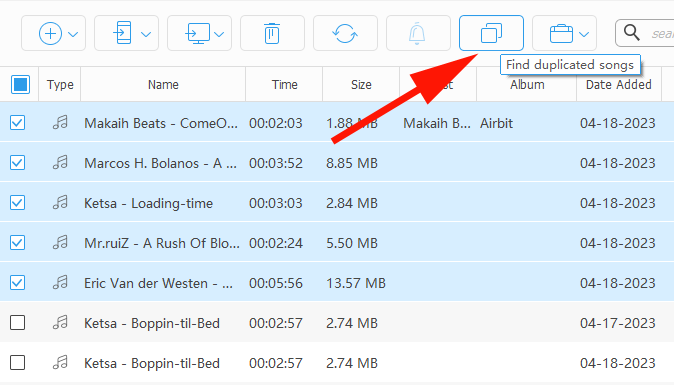
Merge duplicate music
Additionally, the program gives you ability to remove duplicate music files automatically.
To do so, simply click the De-duplicate icon on the top menu bar.
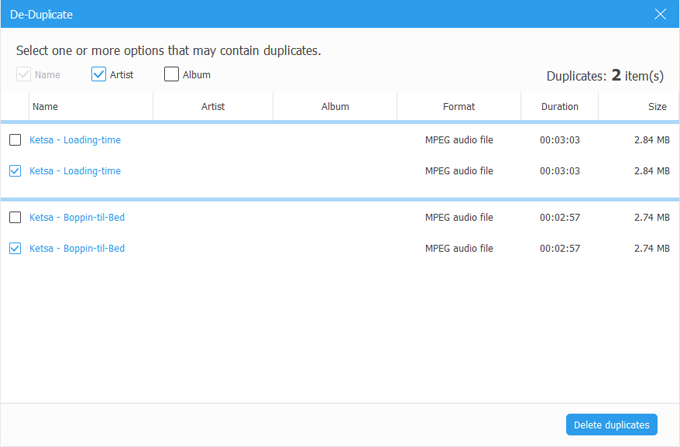
A window will pop up, with all the duplicate songs filtered by Name on there. You can tick the Artist and Album filters if required. Now, check the songs you want to merge, click Delete duplicates button.
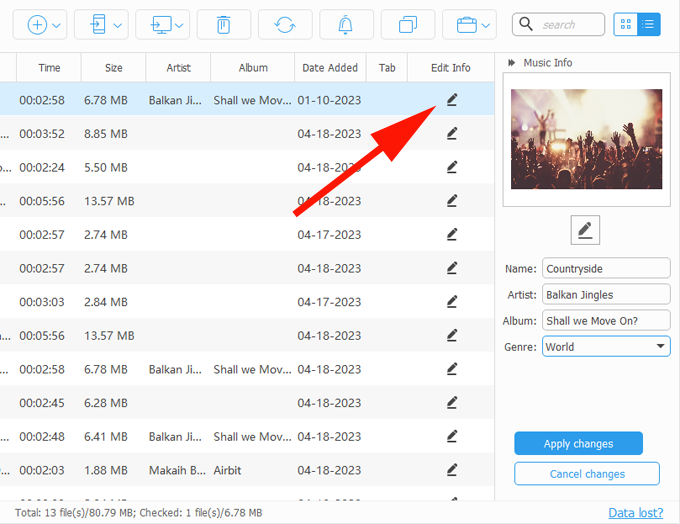
Edit music ID3 tags
The program also comes with option to edit music ID3 tags.
1. Select a tune you want to fix ID3 tags.
2. Right click on it, select Edit Info from the right-click context menu; alternatively, you click the Pen icon that appears on the far right side of the selected song.
3. A ID3 tags editing window comes up on the right pane.
4. Edit them manually or leave them at default.
5. Click Apply changes to complete the process or hit the Cancel changes to abandon the revise.
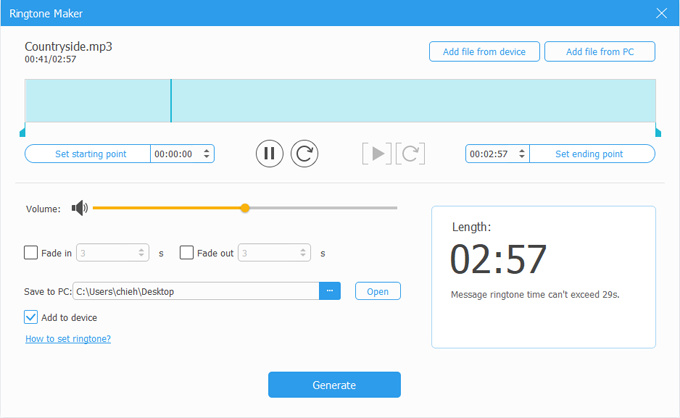
Ringtone Maker
Additionally, the program includes a ringtone maker module in the right-click context menu to help you create a custom ringtone for your device.
Tip: You can also create your own ringtones with a source song from your device or local hard drive by going to Home interface > Toolbox > Ringtone Maker.
1. Right click on the song.
2. Select Ringtone Maker from the context menu.
3. In the opening window, tweak everything you need for your own ringtone: starting time, end time, volume, fade in effect, fade out effect.
4. Select a saving path on your computer.
5. Click Generate button.
That's all there is to it!