How to Practice Editing with AI-Generated Stock-Style Images as Filler Shots in CapCut Desktop Video Editor

Martin Tord Updated on Sep 17, 2025 11:39 AM
Most artists have the same problem when they are cutting video—there is generally not enough footage. Gaps or dragging pauses created by missing clips destroy the flow of a story. Filler shots plug those gaps. Filler shots are simply images that keep the viewer engaged, pace well, and produce smooth transitions. They can be used for short films as well as long projects.
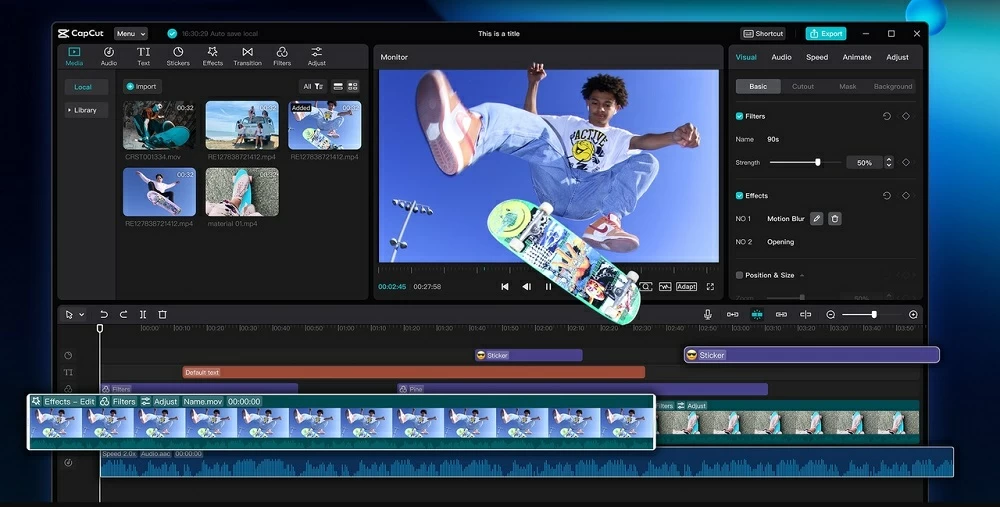
CapCut PC Video Editor gives a user-friendly way to create such filler shots through its AI features. With it, you can create stock-style images that can be used as extra visuals in your edit.
Although there are paid tools in CapCut Desktop that cost money, the free feature still gives content creators decent alternatives to perfect their editing skills. AI-generated stock-style images improve video quality and storytelling.
AI Stock-Style Filler Shots for Practice Editing
Filler shots are short visuals that are placed between main clips. They may be cutaways, seamless links, or simple scenes that smooth out the rhythm of a video. Without filler shots, edits become jerky or frenetic.
You do not need to utilize a camera or stock library to get these clips using CapCut Desktop Video Editor. Its AI image generator is capable of producing stock-type images that can be used as filler shots. This gives you pre-existing content to try out, test, and rehearse new edits.
Collaboration with AI filler shots helps create editing abilities without taking up the time of shooting new material. You are able to test out the pacing, clean up transitions, and observe how filler shots alter the rhythm of a piece. It is time-efficient in that you do not have to spend hours scouring stock websites.
All of these images can be used in a variety of situations. They can be placed in school work by students, added to vlog silences by YouTubers, and product commercials by businesses. Only using the paid version of CapCut PC, advanced styles can be achieved; however, free software is more than sufficient for productive practice.
Reasons to Practice With AI Filler Shots
(a) Easy Access
One of the biggest editing issues is having enough clips to practice. Filler shots can be produced right away using CapCut Desktop Video Editor. There are no cameras required, or you need to buy stock sites.
(b) Creative Flexibility
Filler shots give you a chance to play around with style, mood, and tone. You can play around with cityscape, outdoor, or abstract shots through the AI image generator. This leaves space to learn how shots with different varieties can change the mood of a scene.
(c) Enhance Storytelling
Good videos guide the audience step by step. Filler shots play a huge role in guiding attention. Through practice with AI visuals, you'll be able to master the process of keeping attention and providing depth to your edits.
(d) Save Time
You might spend hours digging through stock websites. You can create what you need in minutes with AI filler shots and stay focused on editing.
(e) Clean Exports
CapCut PC gives you the ability to export edits without watermarks, making practice projects look professional. It also features other AI tools like an AI avatar, giving creators other ways to try out digital images in their projects.
Practice editing is faster and easier with AI, but you can always refine and polish your work inside CapCut PC for the best results.
Steps to Practice Editing with AI Stock-Style Images
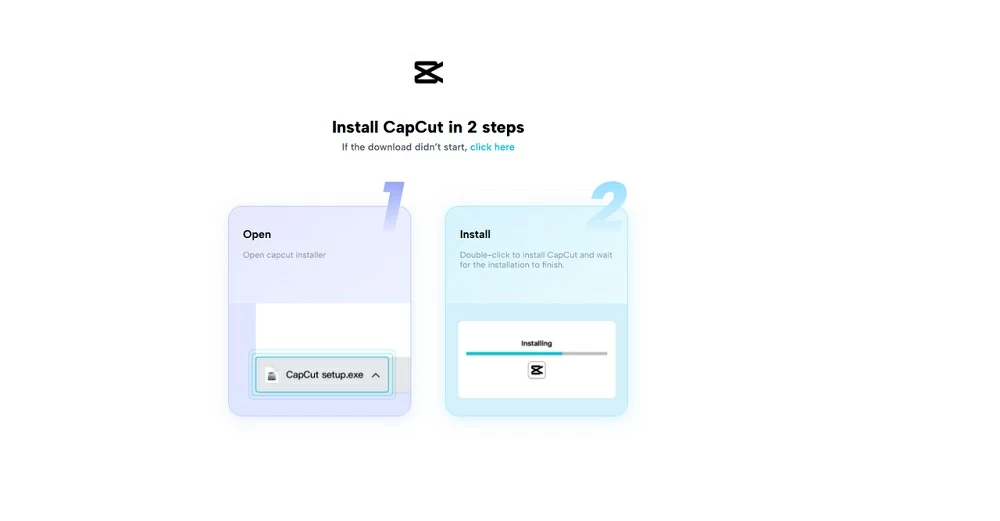
Step 1: Download CapCut Desktop Video Editor
Begin by downloading the CapCut PC solely from its official website. This ensures you download a safe version with full features. Install it on your computer or laptop for easy access. The first version is free, but some of the advanced AI features may require you to pay.
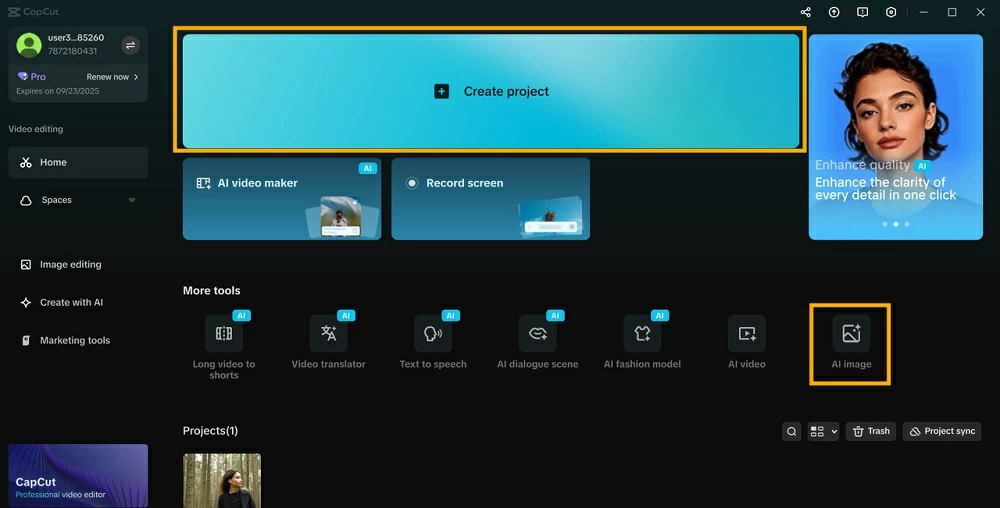
Step 2: Begin a New Project or Import Clips
Open CapCut PC. To start from scratch, click New Project. If you already have a video and want to enhance it with filler shots, import it directly into the editor.
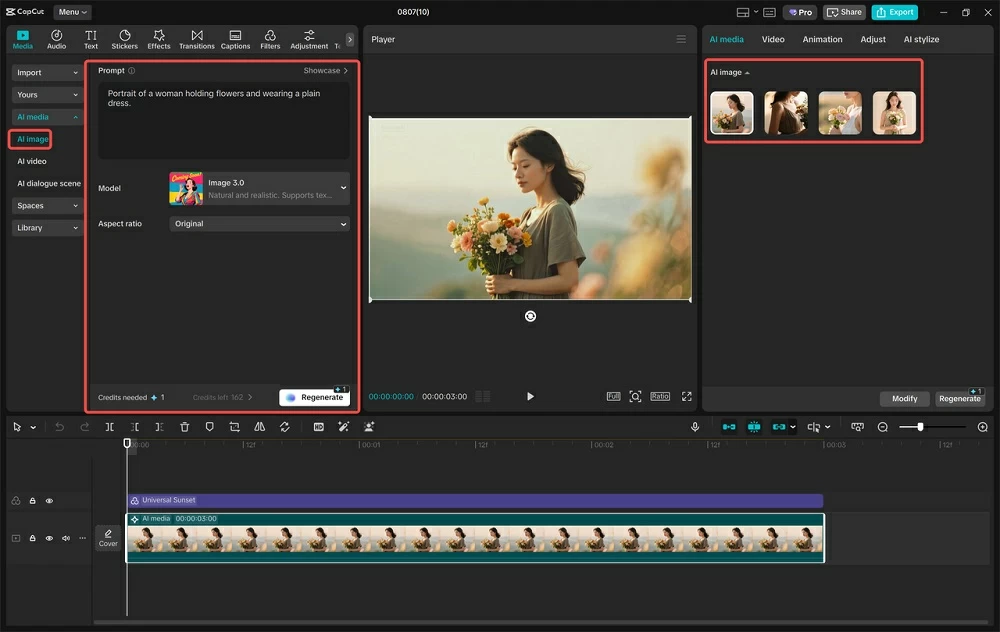
Step 3: Generate with AI Image Generator
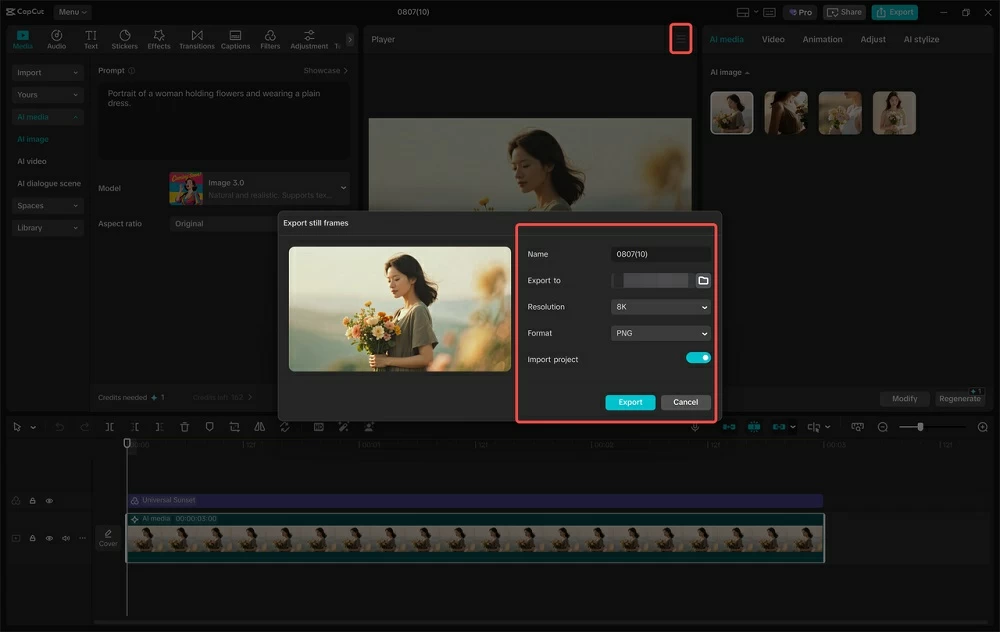
From the left menu, select AI Image Generator. Type a short, descriptive prompt such as "Portrait of a woman holding flowers and wearing a plain dress." Select from the available variations to create stock-style images that align with the tone of your project.
Step 4: Insert and Edit Filler Shots
Drag the generated images into the timeline. Add transitions, filters, or text overlays to make the flow smoother. Use these filler shots to bridge gaps and give your edit a more polished rhythm.
Step 5: Export and Review
Click "Export still frames" in the top-right corner. Set your resolution and frame rate, then save the video to your device. Play it back to review how filler shots improve pacing and strengthen the overall look of your edit.
Conclusion
AI-generated stock-style filler shots in CapCut Desktop Video Editor give creators a quick way of practicing editing. They help you with testing cuts, pacing, and scene flow without needing extra footage.
Filler shots can be tiny, but they can play a massive role in narrative. They smooth scene changes, level out the chronology, and keep the attention of the viewer on the key message.
CapCut PC can be downloaded and installed for free from the website, although some top-rank AI functions are not free. However, the free ones are strong enough for training and technique building.
Start by using the AI Image Generator and see how filler shots can improve your edits. Try adding AI filler shots to your next edit and see how seamless your video becomes.