iPhone & iPad Data Recovery User Guide

Rob Parsons Updated on Apr 15, 2022 4:52 PM
Check out detailed tutorial on How to back up and restore iPhone & iPad data
iOS Data Recovery for Mac is a comprehensive data recovery tool that gets your data back with ease. It is adept in retrieving your lost data and information directly from iOS devices(iPhone, iPad and iPod), from iTunes backup as well as iCloud backup.
What Types of Data are Restorable with this Program?
Contacts, Call history, Text Messages & iMessages, Notes, Reminder, Calendar, Safari history, Safari bookmark, WhatsApp conversations, Voice memos, photos, videos, voicemails, audios, documents.
This post will demonstrate to you there effective ways to recover your data:
To begin with, please get iOS Data Recovery for Mac downloaded and installed on your Mac.
Option 1: Recover from Device Internal Memory
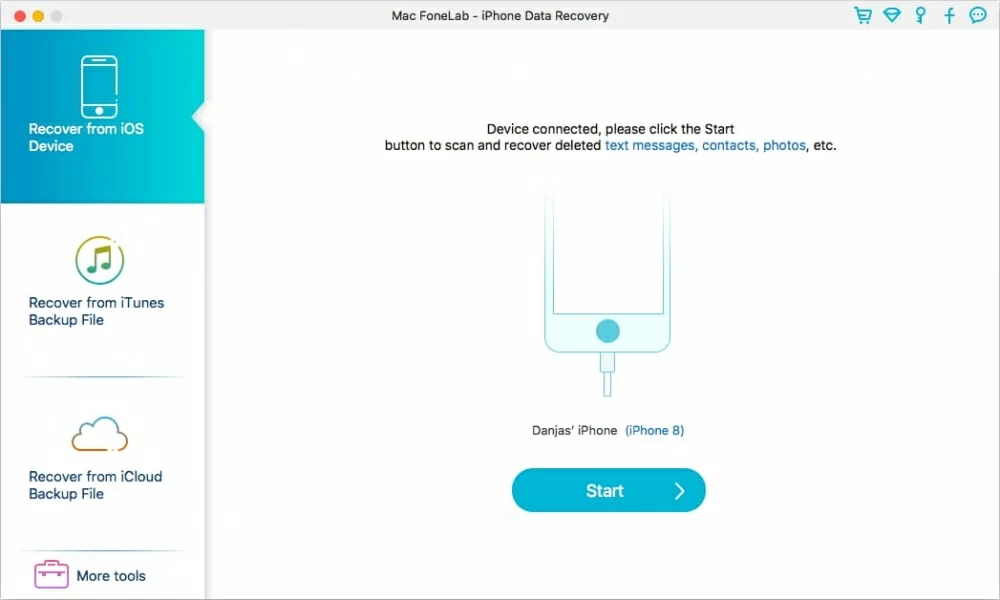
Step 1: Connect your iOS device
Run the recovery software on your Mac and you will be greeted with an elegant and intuitive interface. You can spot three recovery modes which are placed on the left side: Recover from iOS Device, Recover from iTunes Backup File, Recover from iCloud Backup File.
Grab a USB cable to hook up your iOS device (iPhone, iPad, iPod) with the computer. Once successful connection is established, the software will detect your device and show the relevant name and version on the pane.
Step 2: Scan your iOS device
Click "Start Scan" (below the device's icon) and the software will start to analyze your device for deleted files. Please wait for a while until the scanning process is finished.
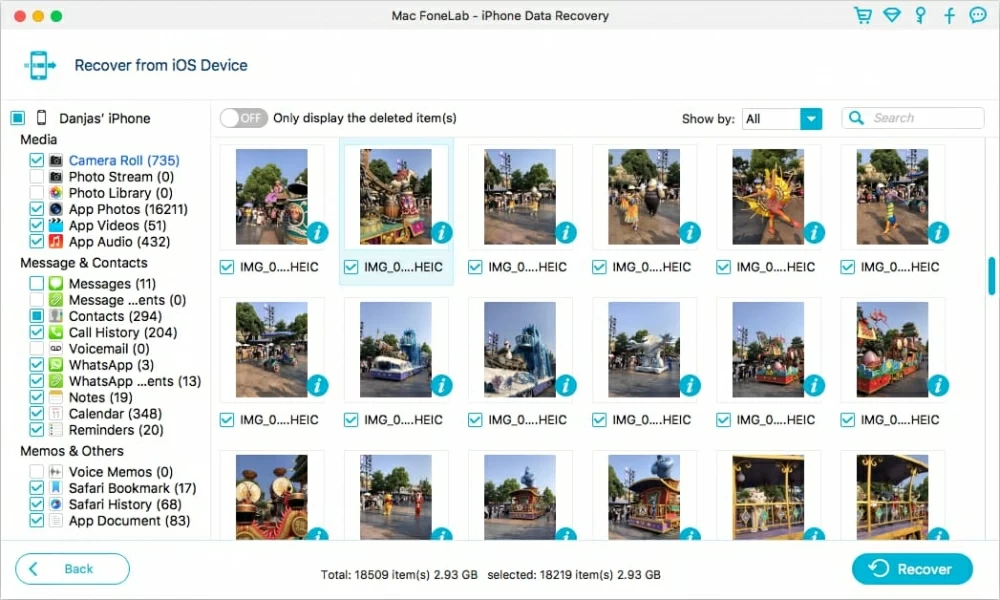
The software will display all the available data on the left side: camera roll, photo library, app photos, app videos, app audios, messages, message attachments, contacts, call history, voicemail, Whatsapp, Whatsapp attachments, notes, calendar, reminders, safari bookmarks, safari history and app documents.
Step 3: Preview
On the left side, you can see the data arranged by three different category: Media, Message and Contacts as well as Memos and Others. Choose any data type as you want and you can see the items on the right side.
If you toggle the button "Only display the deleted item(s)", it filters out the files and only show the deleted data. This method saves you a lot of efforts.
Step 4: Recover the lost files
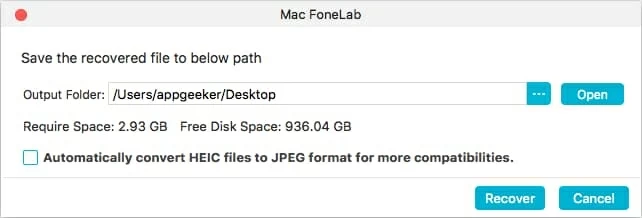
Choose the types of data on the left and items on the right by ticking in the box. Next, click "Recover" at the bottom right corner. Then, a dialog box will show up for you to choose the output folder to save the files.
Click "Recover" one more time and software will begin to retrieve your data to the computer.
Option 2: Recover from iTunes Backup
If your iOS device is not with you or you just switch to a new device, then you can extract backup data from iTunes on your computer using this software.
Step 1: Run the program and choose "Recover from iTunes Backup File" mode
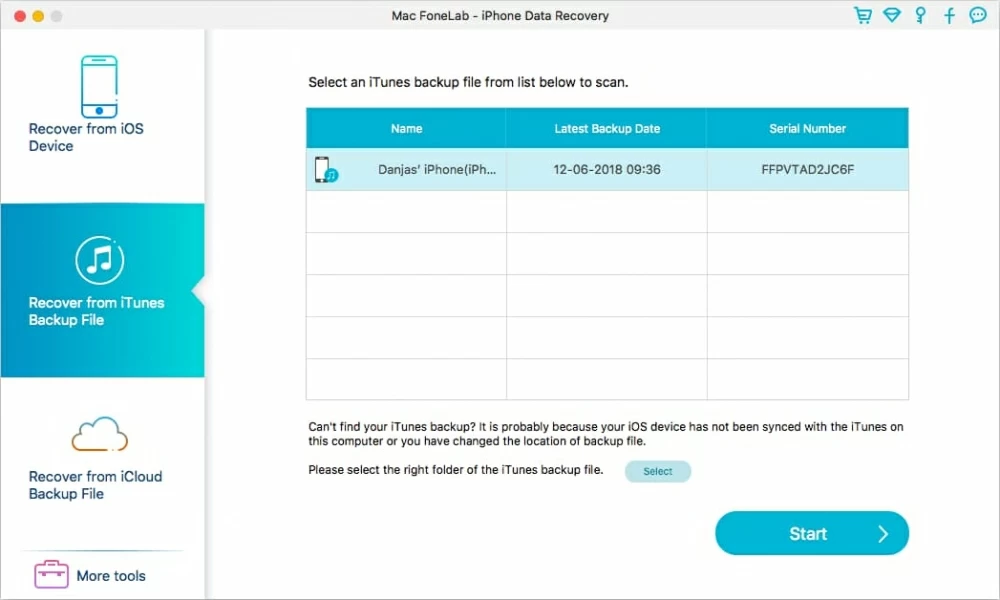
Choose the "Recover from iTunes Backup File" mode on the main interface.
The program will load a lot of iTunes backup files from your computer and these files are arranged by backup date.
For the encrypted iTunes backup with LOCK icon, you need to unlock it with password.
Step 2: Scan data from iTunes Backup File
Select the right iTunes backup which contains the data you want to recover, click "Start Scan" on the bottom right corner and the software starts to analyze your backup data. This scanning process may take a while, depending on the amount of data.
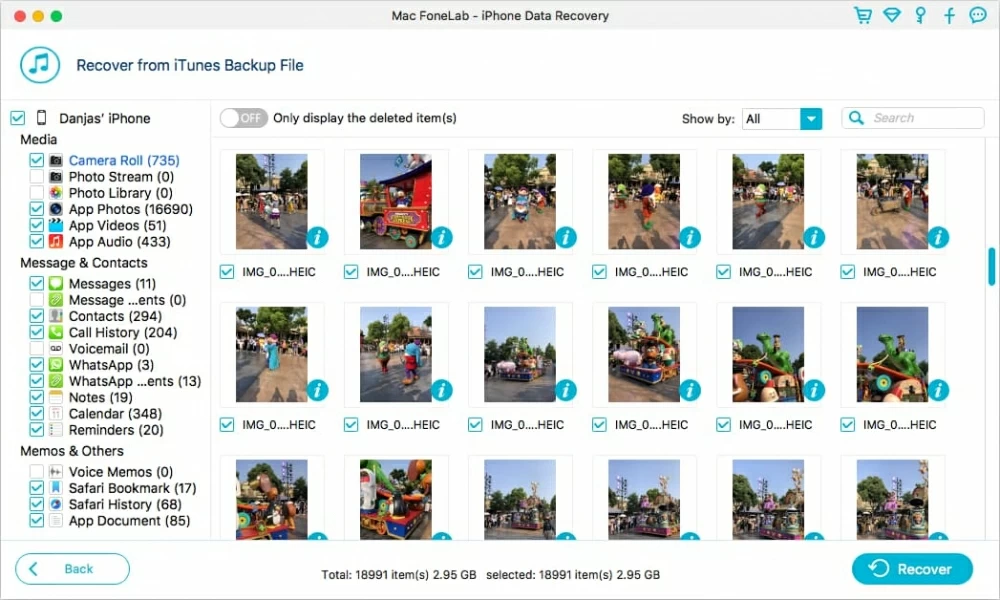
After the scanning process comes to an end, all the accessible stuff from the iTunes backup will appear on the window and arranged by Media, Message & Contacts and Memos & Others.
Step 3: Preview and recover your lost data
Just like the method that is mentioned above, you can click the data type and make a preview of all the available files.
Now, selectively tick in the box beside the data type on the left and tick in the box below the items on the right.
After that, click "Recover" at the bottom-right corner. At this time, a dialog box will pop up for you to choose a path to store the files. After you are all set, click "Recover" one more time and let the software starts to retrieve your data to the computer.
Note: On the upper-right corner, a search box is available for you to quickly locate what you want.
Note: If you are using this program to restore data from iTunes backup, please make sure that iTunes is not launched on your Mac.
Option 3: Restore from iCloud Backup
If you have an Apple ID and back up your device to iCloud before, then you can restore your data from iCloud backup.
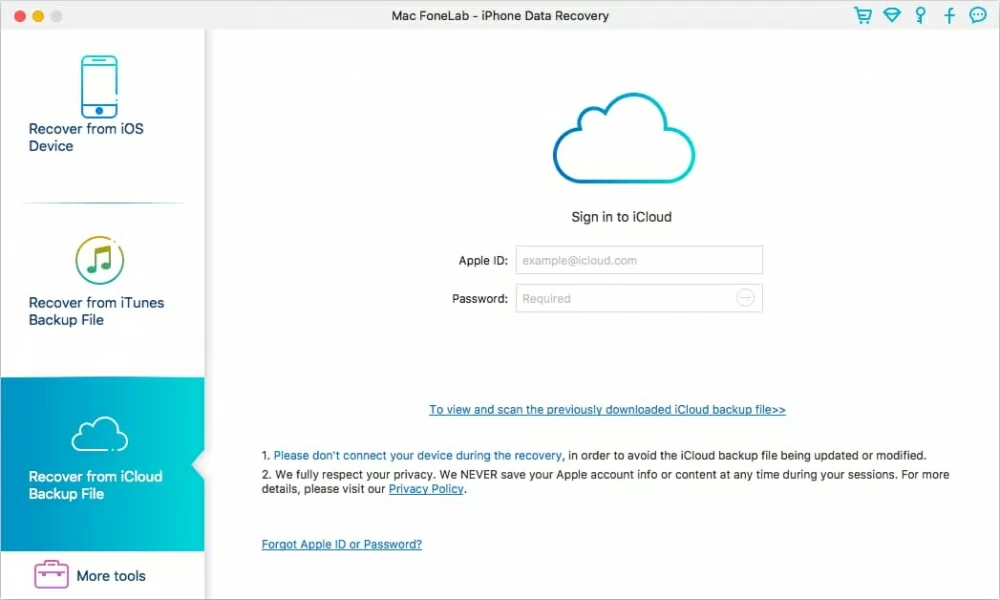
Step 1: Log in your iCloud Account
Back to the main window and choose mode three "Recover from iCloud Backup File". Then, sign in to iCloud.
Note: iOS Data Recovery for Mac respects your privacy and never remembers your Apple account and password during the process.
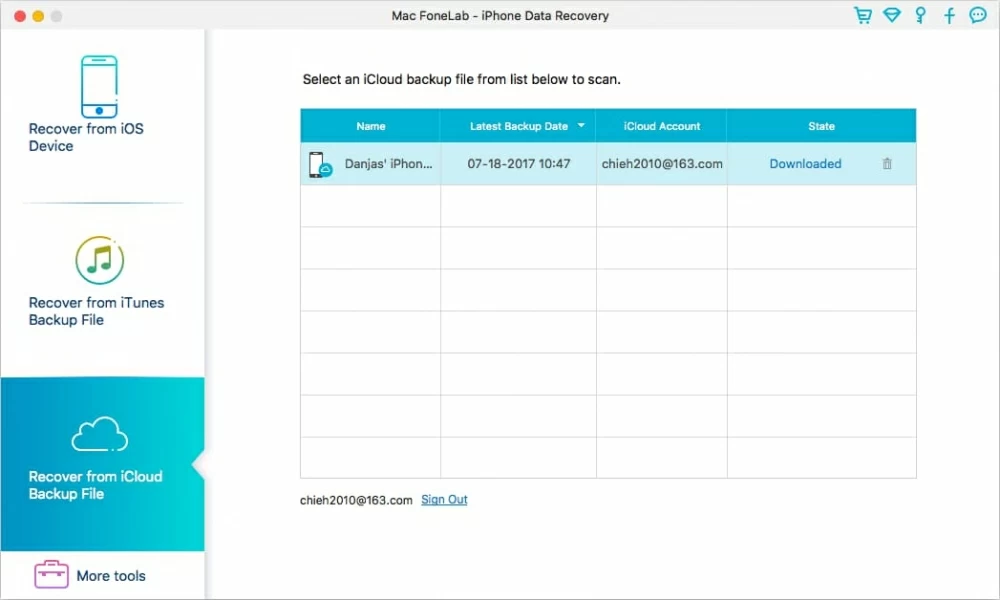
Step 2: Access your iCloud backup files and select one to download
After you sign in to iCloud, you can see several iCloud backups on the list. Choose one which contains the data you want to regain and click "Download".
Then, you can see a window pops up displaying all kinds of data. Choose the right data types to download and click "Next". The software will start to download the backup files to the computer. The process might take a while, please wait patiently.
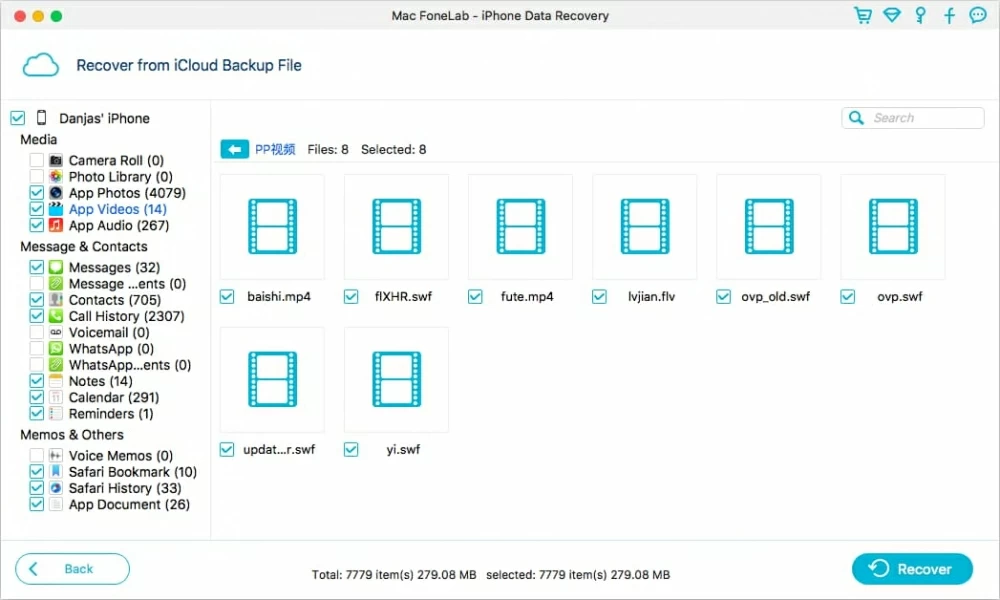
Step 3: Preview and start recovering data
After the software downloads the chosen files, you can see the data types on the left side arranged by specific category.
You can click the data type and preview the items. Select the data on the left along with the items on the right by checking the box.
Finally, click "Recover" at the bottom right corner and a window will be presented to you, from which you can appoint a output folder to save your selected data on the computer.
Now, click "Recover" again and the software begins to retrieve your data to the computer. Wait until the process comes to an end.
That's it!