Lost Contacts on iPhone X Without Backup, How to Do?


Backup iPhone to transfer data over to a new phone? You may be interested in iTransfer and Phone Transfer.
If you're fully in on your iPhone then you should have years of contact list, photos and other precious data stored in the memory, but like any storage solution, backing up your phone is critical—your device could be lost, damaged, or replaced with a new one. In this article, we'll discuss three excellent backup solutions to back up an iPhone, and remember to do it regularly. Similar processes for creating a backup can be used to back up iPhone before getting a new one.
Why You Should Create iPhone Backup
Backing up iPhone, simply put, is a matter of copying and saving the information of the device in case failures occur. The main function of the data backup is to restore data and settings to the iPhone—as it can be incredibly frustrating to have to set up from the scratch. Creating a backup of your old phone also provides a good way to transfer your information to a new device you've upgraded to or replaced with.
Best Methods to Back Up an iPhone
There are three backup routes for backing up iPhone data. One is using iCloud - a cloud based backup method, another is to make a backup on computer with iTunes & macOS Catalina Finder or a solid third-party backup software tool. It's smart to understand the types of the backup and get the one that suits your need.
Back up iPhone with iCloud
If you're using an iPhone and are a loyal user, then you're more than likely entrenched in iCloud. It's a wise place to sync and back up data on the iPhone to the cloud server over Wi-Fi network connection. It doesn't back up anything in the device. For example, the data already synced with iCloud and those purchased contents, like music and apps in iTunes won't be backed up (also see what does an iCloud backup include?) The backups made within iCloud is always encrypted.
Note that syncing with iCloud does not make a backup file of the iPhone. If you delete a photo in Photos app on the iPhone, it gets deleted on all devices using the same Apple ID. You can't restore the data to the phone when it's replaced, lost or damaged.
Backing iPhone up in iCloud is easy. Just follow these insrtuctions.
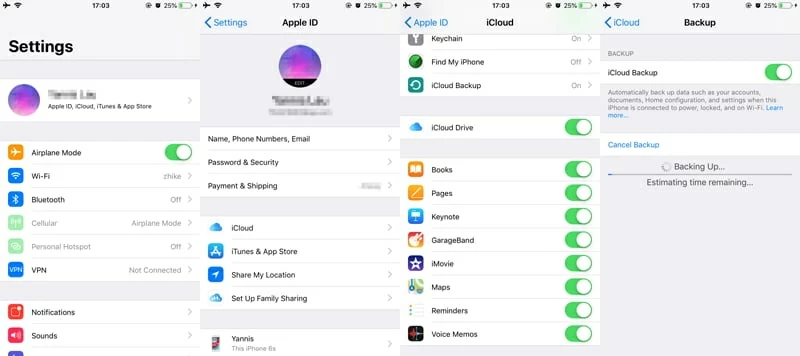
Make sure you have enough iCloud storage to store the backup, or you will need to upgrade the plan. There's only 5 GB free storage space provided in iCloud, which will be filled up quickly by the quality photos and videos.
In fact, iCloud offers more than just file storage but also an automated backup feature. To let iCloud automatically back up with iCloud backup, you need to:
Back up using iTunes & Finder
It's true that two backups are better than one, and thus you need to keep a local backup copy by backing up iPhone using iTunes or Finder. Almost all data and settings can be backed up to the computer, but note that iTunes no longer backs up apps - they will reinstall from the App Store whenever you restore from a backup. Initiating a local backup is simple - you just need a USB cable, the latest version of iTunes or Finder installed on your PC or Mac, and a bit of time.
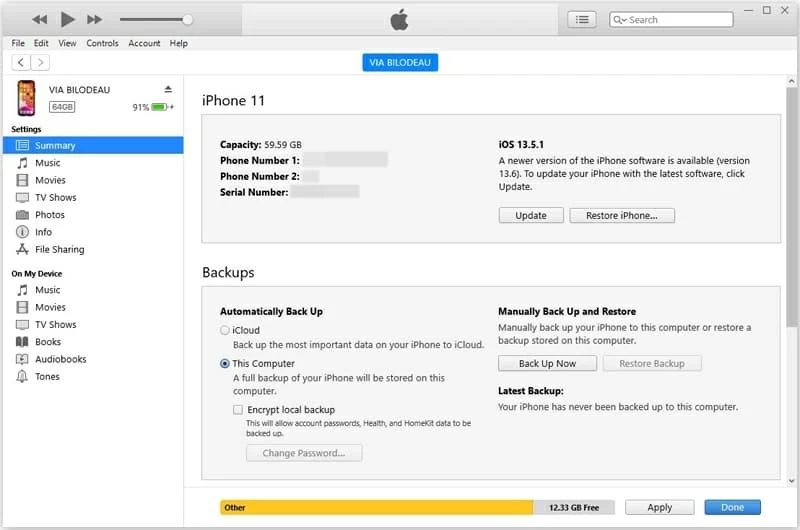
That's it! iTunes backs up files on iPhone to the computer, taking a significant amount of time. Unlike iCloud backup, you can get full control of the backups with iTunes. You can check them via Manage Backups in Finder, and File > Preferences > Devices in iTunes.
Use 3rd-party Backup Software for Backing Up iPhone
While you can always adhere to Apple official routes to create backup locally or store iPhone backups in the cloud server, iTunes and iCloud are never the consistent ways you should go. For example, iTunes could not back up your iPhone due to the errors, or you ever got the 'Not enough iCloud storage' alert using iCloud. To ease your headache, one good example of the program is iOS Data Backup & Restore.
It's a versatile application that allows you to back up nearly all data on iPhone in one place, but you don't have to back up everything every time - the software grants you to back up those contents newly added. Once you've connected iPhone to the computer, it will dig deep into the device's memory and back up whatever types of files with no syncing issues: iMessages, photos, videos, contacts, notes, call history, app documents, etc. It can create incremental backups of the iPhone, which is a must-have feature for any backup solution.
Plus, you'll find it packed with Restore feature, making it possible to restore a single file from the backup without having to perform a complete restore. You could either save the files at a readable and accessible format in the hard drive or bring the notes and contacts back to your device.
Tips: If yourdevice is glitchy, like getting stuck on Apple logo screen during startup, learn what to do. The toolkit also serves as an iOS system recovery.
Read on to find out how this utility works and master the tricks of backing up iPhone files, as well as restoring the backup. The process is basically the same whether you are using a PC or Mac.
Step 1: Choose backup mode and connect iPhone to computer
Download the program and then follow the setup wizard to install it on your computer. It will automatically open with an intuitive interface when the installation process completes.
First, from the bottom left corner of the window, choose "More Tools" option.
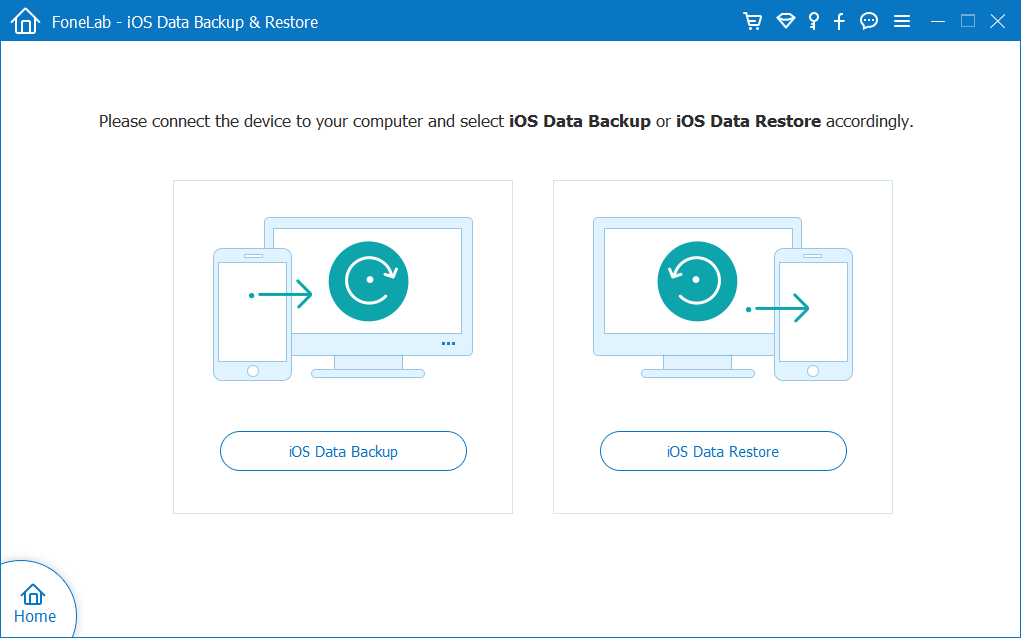
Now you will get to see three tabs on the opening window. For making a complete backup of iPhone, click "iOS Data Backup & Restore" tab to go into the next screen.
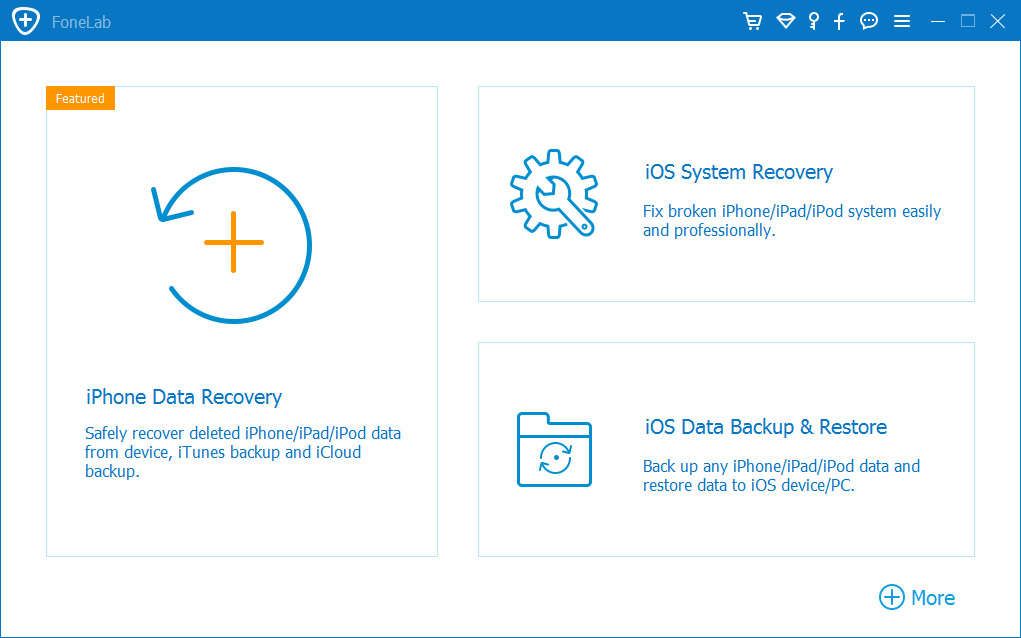
Then click on iOS Data Backup button to begin the backup process.
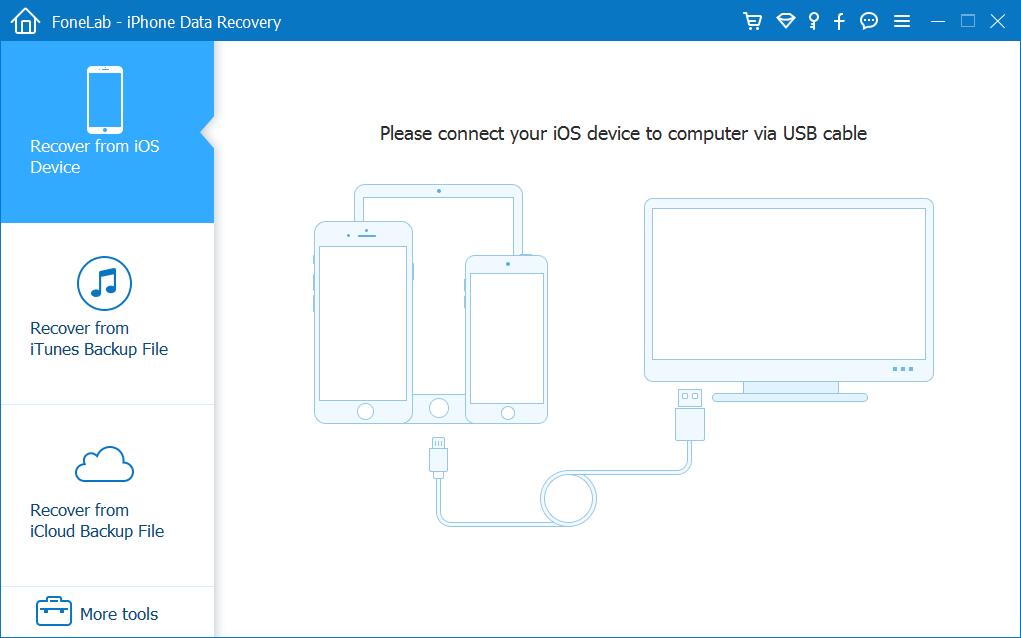
Now, connect your iPhone to the computer. With it attached well, select "Standard backup" option, or if you want your files locked securely with a password, check "Encrypted backup" option.
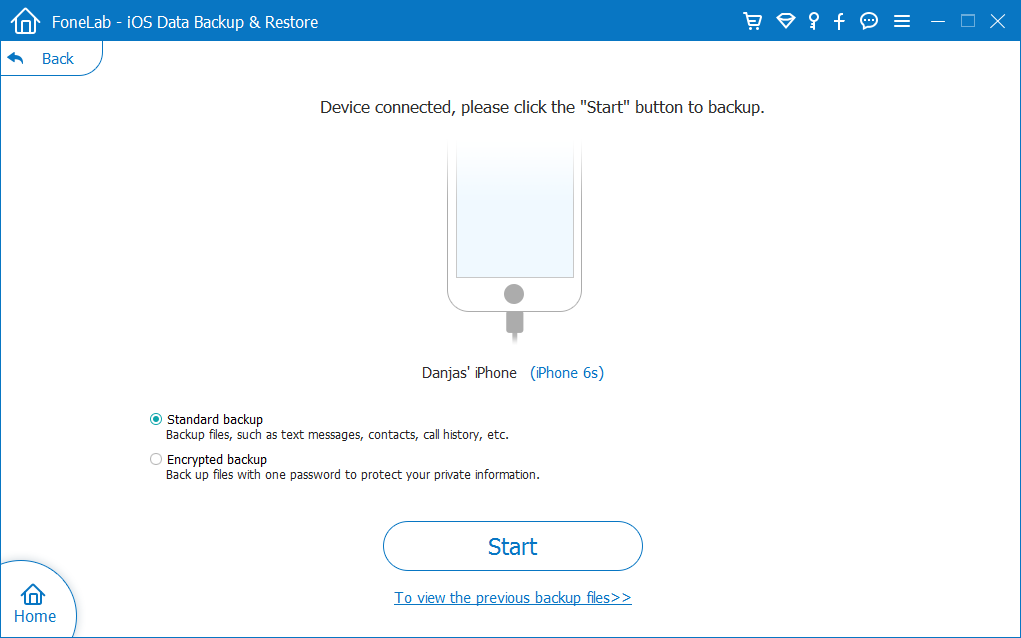
When you're done, press Start button.
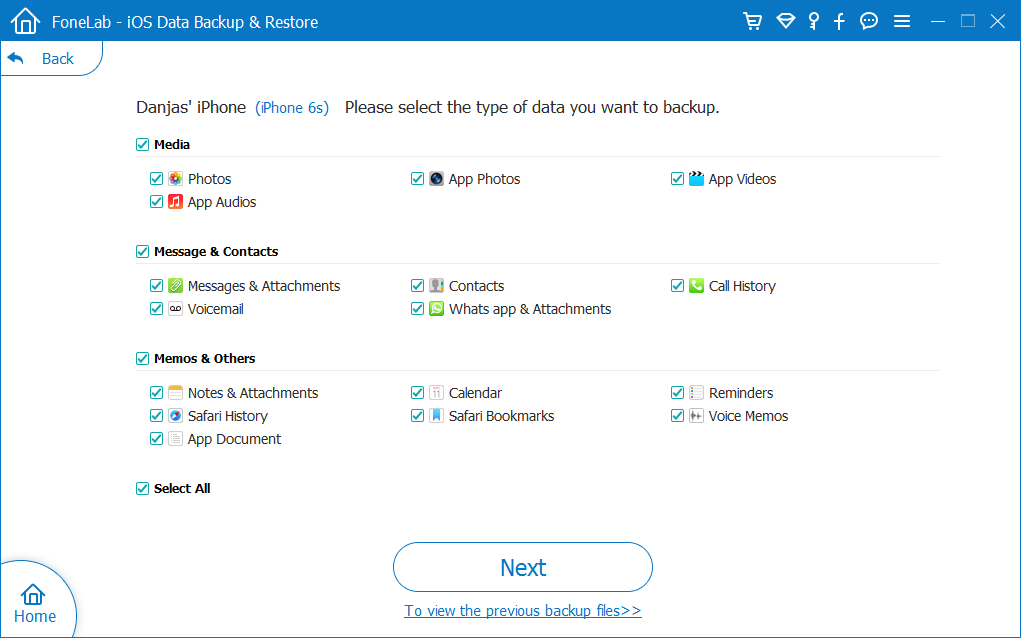
Step 2: Scan iPhone and choose types of data to back up
Soon, all the files on iPhone will be displayed into categories on the window, and you are allowed to choose desired items to back up by ticking the corresponding checkboxes. The more data you select, the longer of the backup time will take.
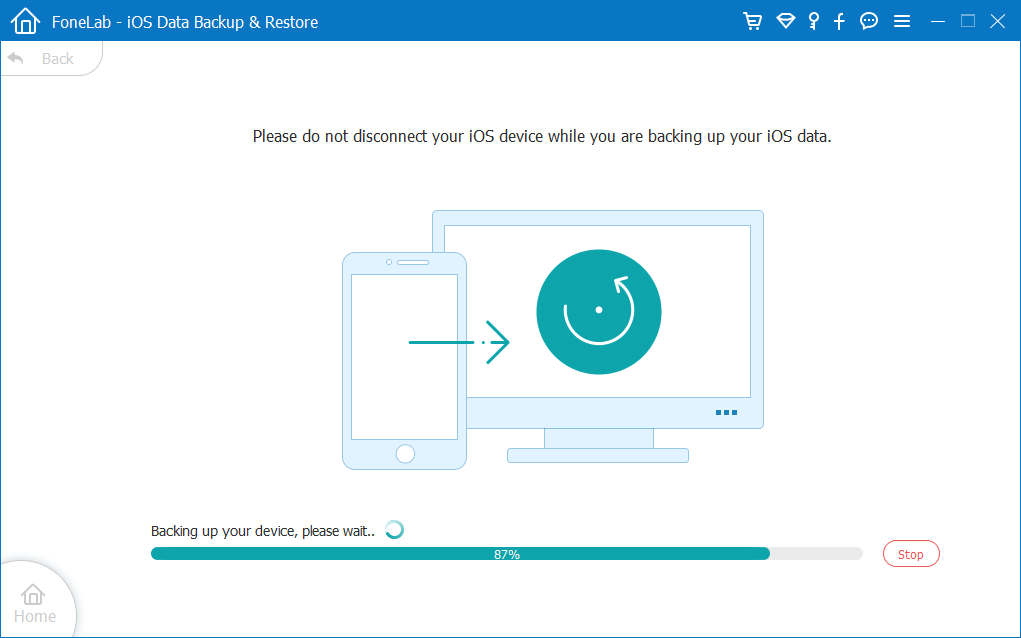
Step 3: Start iPhone backup process on computer
When you're satisfied with your selection, click the Next button. The program starts to work. You can monitor the backup process through a progress bar on the window, or you can pause the process by clicking the Stop button any time, but this will let you back to the previous step for selecting the types of stuff.
After that, a "Congratulations" window will automatically open, indicating the process of backing data up from iPhone to computer is completed successfully.
That's it! The backup of iPhone will store locally in case of a catastrophe.
Also Read: 5 Best iPhone Data Recovery Software Applications
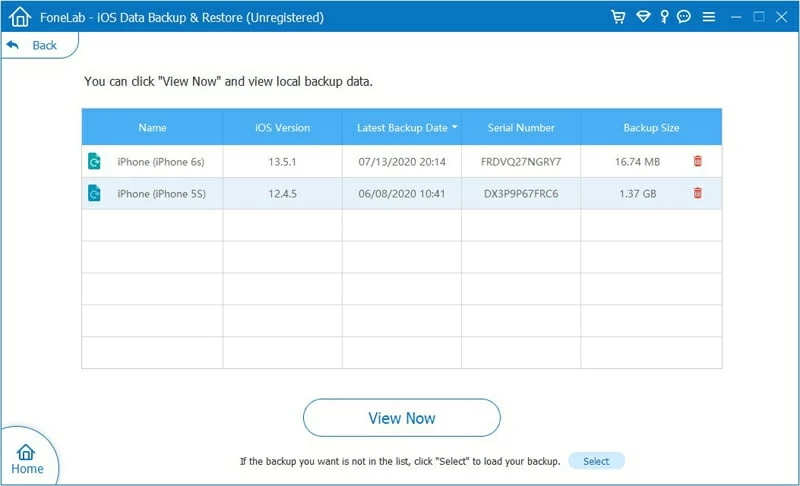
To restore a single file or more files from the backup:
Conclusion
So that's it, backing up iPhone is imperative and you've learnt about different ways to keep iPhone stuff safe around - if you prefer a complete backup of iPhone, Apple's official iTunes and iCloud may be the good choices; otherwise, iOS Data Backup & Restore is more appreciated.
iOS and Android ecosystem make the digital world go round. If you're using an Android phone, you will need to create a backup of the data to avoid losing anything. For you reference about how to back up your Android device you may visit our complete guide.