Video Converter for Windows user guide
Have a video file on PC and want to convert it to another format? With the right app, you can quickly convert your footage into a desired file format on your computer.

Support Updated on Jun 15, 2022 6:18 PM
Tip: If you're on a Mac computer, see Video Converter for Mac user guide.
Designed for both Windows and Mac users, Video Converter is amazingly flexible and offers everything you could need from a video conversion tool. It converts virtually any audio or visual file format within 3 simple basic steps, and provides a number of conversion settings for advanced users to have a control of the quality and size of output file. In addition, the program has plenty of pre-defined profiles for not only for handheld devices like iPhone, iPad, Android phones, tablets, but also PS5, Xbox One, TVs, etc.
Below we'll walk you through the steps on how to use this video converter to convert your files on a Windows computer, no matter you're using Windows 11, 10, 8, or older Windows 7 system.
Part One: How to convert video files on a Windows PC
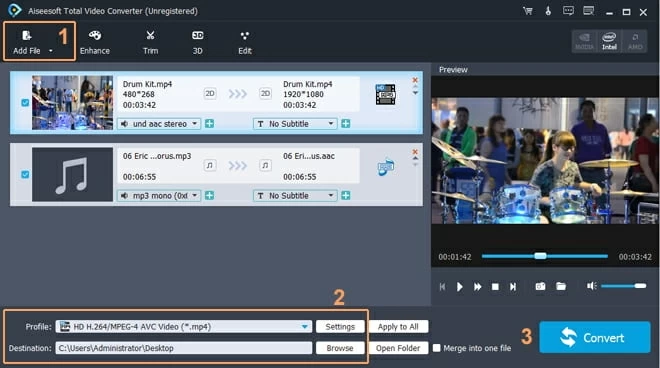
Step 1: Load videos
To add files, click the "Add Files" button on the left side of the program window, in the opening dialog box, browse your computer's video & audio files and select them to import. Alternatively, you can directly drag & drop video files into the program as well.
The program supports batch processing for the quick conversion of multiple files at one time.
Step 2: Select output formats
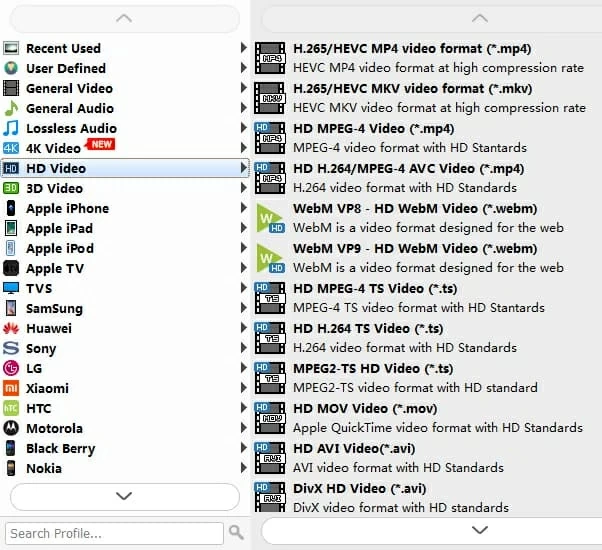
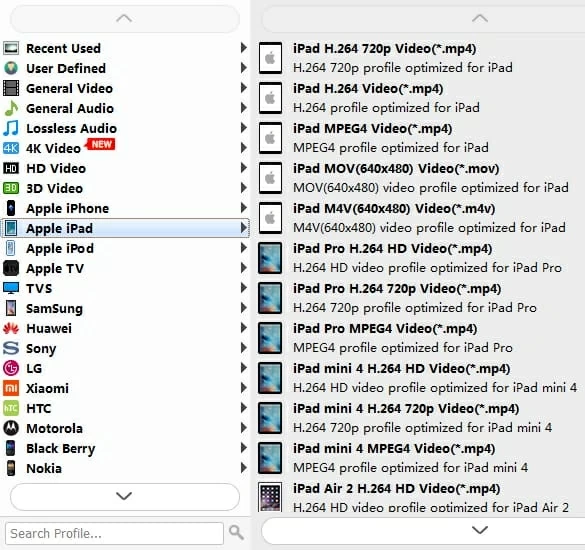
Click on the "Profile" drop-down menu on the lower left side of the window. this will bring up a panel where you can choose export output profile. The output file can be in a number of formats including: MP4, AVI, MOV, M4V, MKV, WebM, WMV, VOB, XviD, DivX, H.264, ProRes, MP3, AAC, AC3, M4A, WMA, WAV, FLAC, APE, AIFF, and more.
The program also gives you a host of presets for simplify the output choosing, such as Apple products, Android phone, tablets, TVs, websites, and more.
Once you have made the format selection, back to the main window.
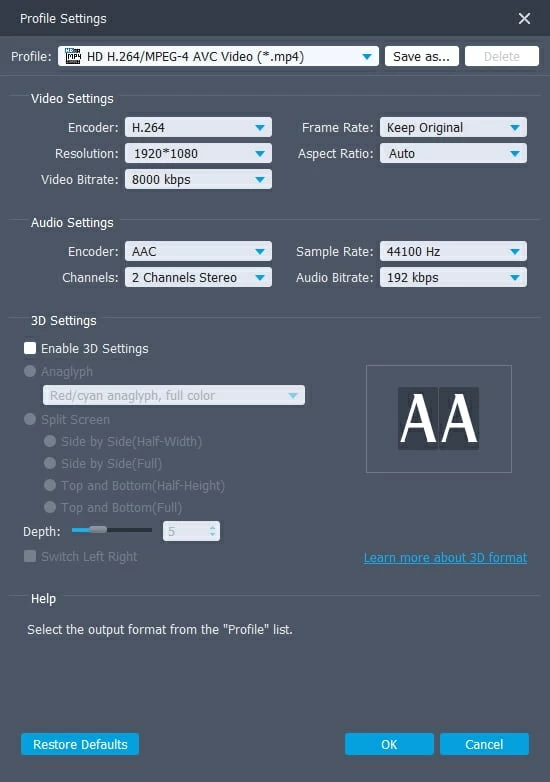
For advanced users, the program gives you ability to furthermore tweak the advanced conversion settings to have control over the quality of output video. To do this, click on the "Settings" button (next to "Profile" menu) located at the lower center corner of the window, this will get you into a Profile Settings panel, as picture shown below.
Step 3: Start conversion
Finally, press the blue "Convert" button at the lower right corner to begin conversion process. The time varies, depending on the size of your source files, your computer hardware, and the conversion settings you configured.
Part Two: Make basic edits
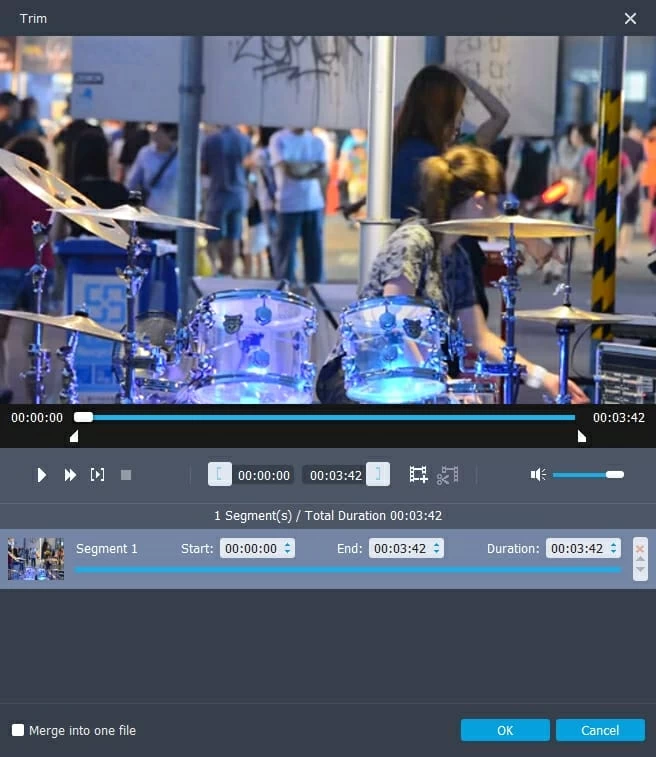
If you want to perform some basic editing on video before conversion, you can hit the Edit or Trim image icon on the top bar. This will open an editing window like this.
In Trim window:
Trim: Split a video in several parts. To do this, move the slider below the preview window to set the the beginning and end of the video, or enter the exact time in Start Time and End Time fields on the right pane to create the first segment.
Again, click the "New Clip" icon (next to End Time field) to repeat the above process of moving the slider and marking the start and end positions to make other segments of the video.
In Edit window
Rotation: Revolve the video to the needed angle. You can achieve horizontal flip & vertical flip, or realize to rotate 90° clockwise and rotate 90° counterclockwise.
3D: Tick "Enable 3D Settings" option. Then you could select 3D effect, adjust 3D Depth and get instant preview of 3D effect.
Crop: Choose an output aspect ratio: Keep Original, Full Screen, 16:9, 4:3, letter box and pan & scan. You can drag the rectangular selection box to set the displaying area, and rotate the video screen horizontally or vertically.
Effects: Apply special effects to personalize your video, such as old film, negative, grey and emboss etc. Or you can leave it as No effect.
Enhance: In this tab, you can upscale your video resolution to get superb video quality, and remove video noise.
Watermark: The option to add image and text watermarks is included and you can set the transparency, vertical and horizontal space for text watermarks, as well as custom the font, color, size and style.