Screen Recorder for Mac guide - Audio Recorder tool

Support Updated on Dec 13, 2022 2:23 PM
Tip: If you're running a Windows PC and want to capture audio, see here.
Before you actually start recording your sound with Audio Recorder tool built in Screen Recorder, please download the application from the links below and install it on your desktop. The process is pretty simple, and it's almost identical on both Mac and Windows computers.
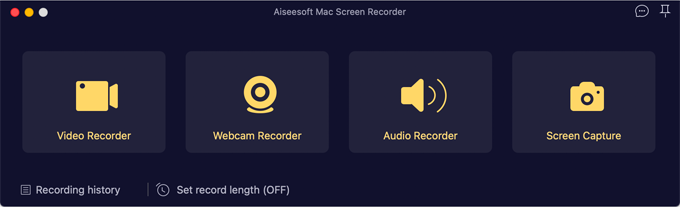
Step 1: Run the app and select Audio Recorder
Open Screen Recorder for Mac on your computer and select which tool you want to use.
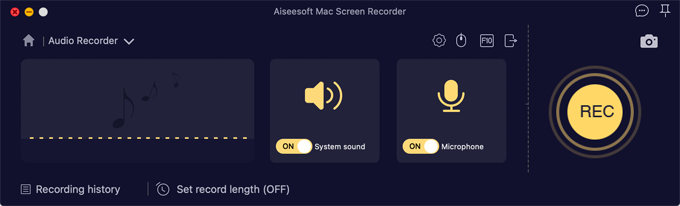
To record sound from Mac, select Audio Recorder on the interface. Below is a Audio Recorder window: sound source are on the center, preferences are on the upper right side, REC button is on the right.
Step 2: Select your audio source
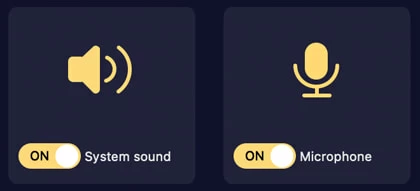
Decide if you want to record Mac's internal sound or/and audio from microphone. There are options for push-to-mute and push-to-talk for both computer sound and microphone.
System Sound: capture the internal sound from computer such as app/website alerts, or the audio playing from your computer speakers.
Microphone audio: catch audio from your computer's built-in microphone.
If you want to include specific audio sources in your recording, simply turn the respective switches to ON position.
Step 3: Start recording
When you're ready, click the REC button in the right side of the screen, and the countdown will begin...3...2...1. After that, the software starts capturing what you're speaking and/or the internal system sound from the Mac.
The audio recording toolbar appears. You can temporarily pause and resume your recording at any time.
Step 4: Stop recording and save the audio
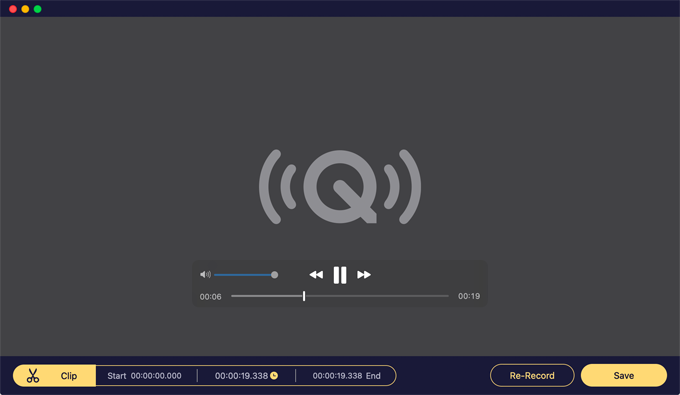
Once you're done, you can save the recording as a audio files on your computer by pressing the Stop button. Your captured audio will open up in the software. From there, you can preview and edit the audio before saving it.
To skip previewing and editing the recording, you can just click the Save button in the lower right corner of the screen to save it to your Mac. It then opens the Recording history window from where it allows you to play, rename, open the folder, share or delete the recordings as you want.
By default, the recorded audio will be saved in MP3 file format.
Tip: you can also click the Recording History option located in the lower left corner of the program main screen to see your recordings history.
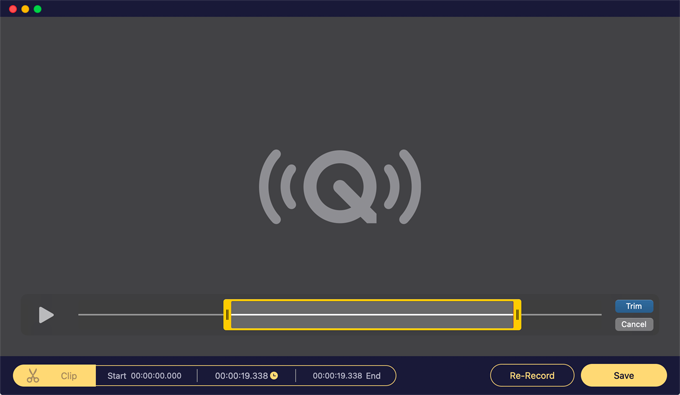
Edit the audio (optional)
Before saving your video recording, the software comes with a basic trimming tool on the screen to help you trim the beginning and end of your audio.
To do this, click the Clip button located in the lower left corner of the screen.
It will present you with a new clip bar. Simply move the Beginning slider to the point you need. The same goes for End, followed by Trim button.
Tips
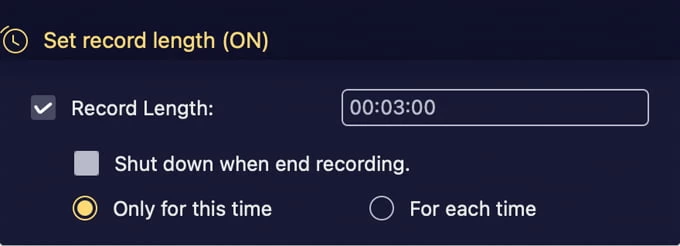
Set record length
At the bottom of the main screen of the software, it gives you more flexibilities to enhance your recording experience.
Click the default Set record length (OFF) button.
In the open window, set how long you want to record the video, and decide if it shuts down your computer after stopping recording. You can apply this setting to just this time, or for tasks.
Also, you're able to tweak screen recorder preferences, including Recording, Output, Mouse, and Hotkeys.
See Screen Recorder Preferences.