
How to Screen Record Gameplay on Mac with Sound


Tip: If you're running a Mac and want to use Screen Recorder to capture audio, see here.
Before you actually start recording your sound with Audio Recorder tool built in Screen Recorder, you'll want to download the software by clicking the links below. Install it to your either PC or Mac as you would any other application.
Click the Screen Recorder icon on your desktop after installing the software to open it. You will get its main interface, like the image shown below.
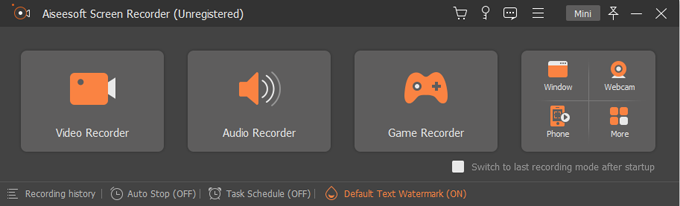
The process of capturing audio is similar to recording the screen, but here you need to choose the second icon named Audio Recorder.
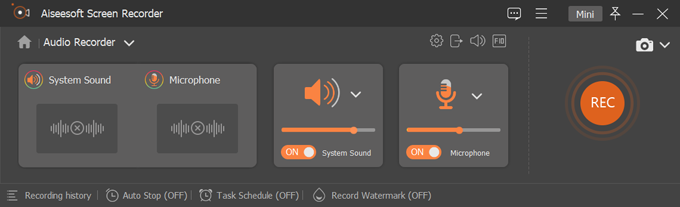
Decide which source of audio track you want to capture from.
System Sound: capture the internal sound from computer such as app/website alerts, or the audio playing from your computer speakers.
Microphone audio: catch the external sound from your computer's built-in microphone or from a attached USB microphone. The software will capture the audio from the default microphone if you do not choose a microphone. You can select from your desired microphone device by clicking the down arrow next to the icon.
You can turn the switch to ON position separately to select either of them, or enable both to include an audio track from your computer's own audio output and from a microphone.
Go ahead and move the control slider left and right to adjust the volume of the audio.
If necessary, you can click the down arrow next to audio or microphone icon and select Sound Check from the drop-down menu to test if this device is picking up the audio you need.
Tip: If you are recording your microphone, make sure you have a microphone device connected to your computer.
When you have adjusted all necessary settings, you are ready to start audio recording. Click the Rec button in the right side of the screen, and the countdown will begin...3...2...1.
After that, the software starts capturing what you're speaking and/or the sound from the Windows.

It lets you track the process from the progress bar. You can temporarily pause and resume your recording at any time.

Once complete, click the Stop (the red square) button. Your captured audio will open up in the software. From there, you can preview and edit the audio before saving it.
![]()
To skip previewing and editing the recording, you can just click the Done button in the lower right corner of the screen to save it to your computer.
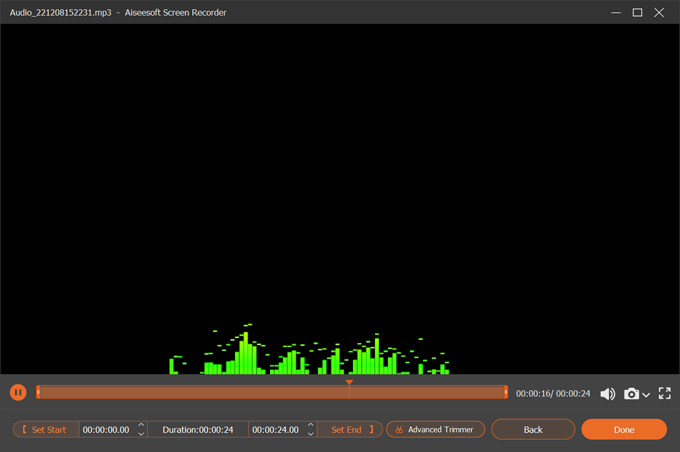
To check how your recording looks like, click the Play icon located in the bottom left corner.
![]()
The software comes with a basic trimming tool on the screen to help you trim the beginning and end of your audio. You can do this using 3 ways:

You can also click the Advanced Trimmer button near the Set End to have a further editing on the audio recording.

It comes with options to split the audio, merge multiple segments into a single one, fade in or out while playing, adjust output settings (resolution, formats, bit rate, sample rate, codec, channel, etc.) in the Output field, and rename the audio.
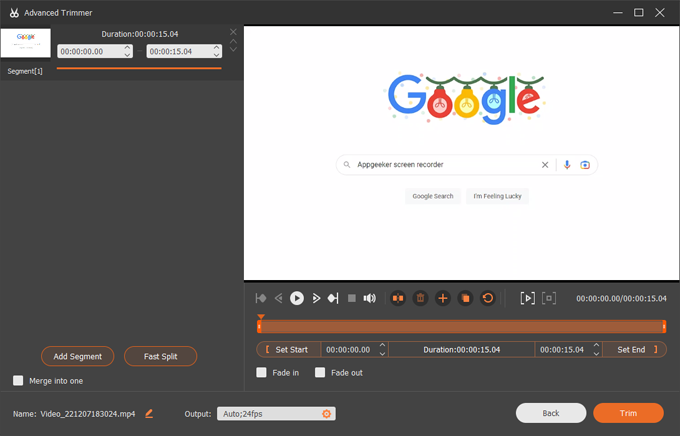
If the recording is acceptable, click the Done button in the bottom right corner. The software will save it to the default location automatically on your computer and open the Recording history window. You can choose to view, rename, open the folder, share or delete the recordings as you want.
Also, you can click the Recording History option located in the lower left corner of the program main screen to see your recordings history.
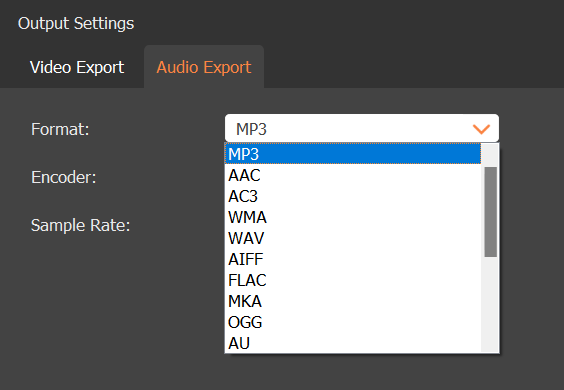
By default, the recorded audio will be output in MP3 format.
Tip: the software allows you to select from a list of audio formats before you export the audio recording. To do so, in Advanced Trimmer screen bottom center (see image above) select Output > Audio Export > Format.
The Screen Recorder application gives you various of settings that can be tweaked for recording.
Also, you're able to tweak screen recorder preferences, including Recording, Output, Sound, Camera, Mouse and Keystroke, Hotkeys and more.


