How to use Window Recorder tool in Screen Recorder app

Support Updated on Dec 12, 2022 9:04 AM
Before you actually start recording an app window or a web browser with Window Recorder tool built in Screen Recorder, you'll want to download the software by clicking the links below. Install it to your either PC or Mac as you would any other application.
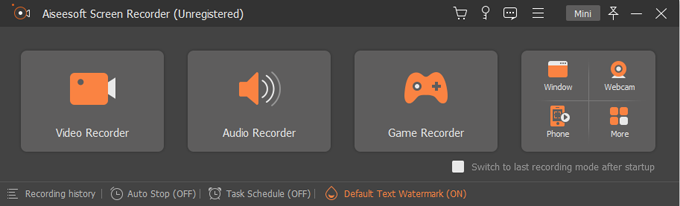
Step 1: Run the app and select Window Recorder
Open the software after it's installed.
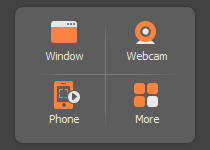
To capture a window from your browser, app and any anything else, select Window icon in the upper right corner.
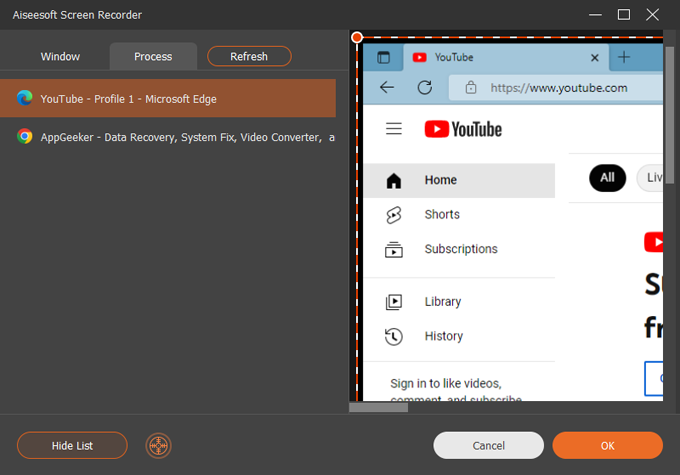
Step 2: Select a window or process to record
In the next screen that opens, select a window or process you want to record from, and then you will see a preview of that selected window on the right panel. Be sure that you have already opened the application or window you want to capture on the screen.
By default, the software will automatically catch the full frame of the active window or process. But you can drag the handles to adjust the selection on the right preview screen.
Tip: one of the major differences between Video Recorder and Window Recorder is that, once an active app or browser is selected, the latter recorder will catch hold of the whole screen with pixel accuracy — you don't need to manually select the recording area.
Once the recording area is confirmed, click OK to back to main interface.
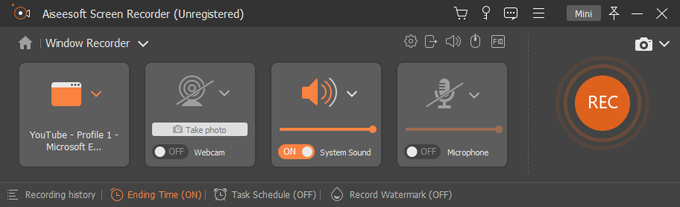
Step 3: Add your audio source or/and webcam
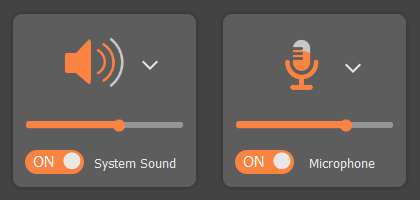
Go ahead to choose other recording settings you may want, including microphone audio, system audio, and a webcam.
Select either your computer sound or microphone, or both.
The software includes several audio inputs you can utilize, enabling you to record a screen that includes an audio track from either Windows sound (sounds from applications and websites) or microphone. You can also choose to record both of them.
To do so, toggle the switch beside System Sound or/and Microphone to ON position. Then you can configure each one that you require separately. See Audio Settings.
Tip: If there are more than one microphone device attached, click down arrow to select a microphone device you need.
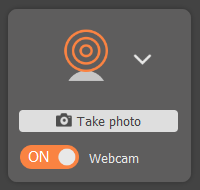
Select Webcam (optional)
You can also use a built-in camera or connect a USB webcam of your choice to produce a picture-in-picture video.
To do this, toggle the switch near Webcam to ON position and a camera opens. You can then drag and resize the webcam frame.
The software can detect any cameras attached to your computer. You'll want to click the down arrow next to the camera icon to select the desired one. To configure your camera settings, see Camera Settings.
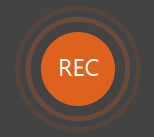
Step 4: Start recording the window
When you've set everything up as desired, click on the red Rec button on the right side of the program window to start recording.
You'll be presented with a float bar with a ton of flexibility (task scheduling, recording annotation, screenshot capture, and settings tweaking) while you're recording your footage. See Float Bar Controls.
If you need more time to prepare, just pause the process.
Step 5: Stop recording
Once you are finished recording your video of the screen, click the Stop button (the red square icon) to end the recording.
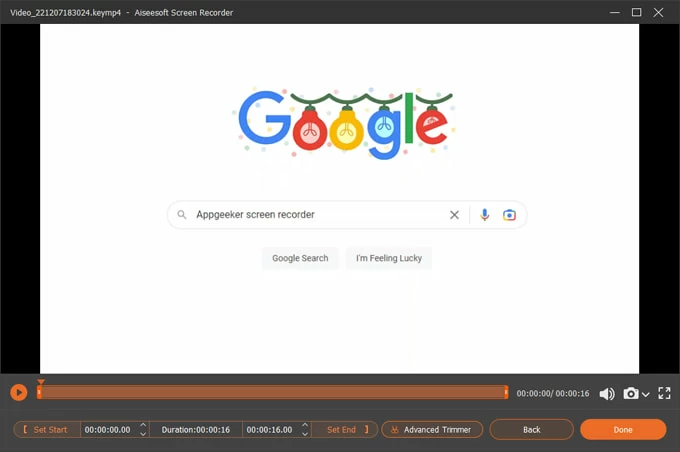
Step 6: Preview, edit, and save the recording
Once stopped, the software will open a new window where you can preview, edit your recording, as well as take screenshots.
If the recording is acceptable and want to skip these options, click on the Done button in the lower right corner of the window to save it to your computer.
Edit the video (optional)
At the bottom of the preview window, you can to trim the beginning and end of your video to remove the unwanted parts of the recording. There are 3 different ways to handle this:
- Click the Set Start option on the trimming bar, then slide the beginning to the correct location in preview bar. The same goes for Set End.
- Enter the accurate time in the beginning and end field.
- Use the down or up arrow to fine-tune the beginning and end time.
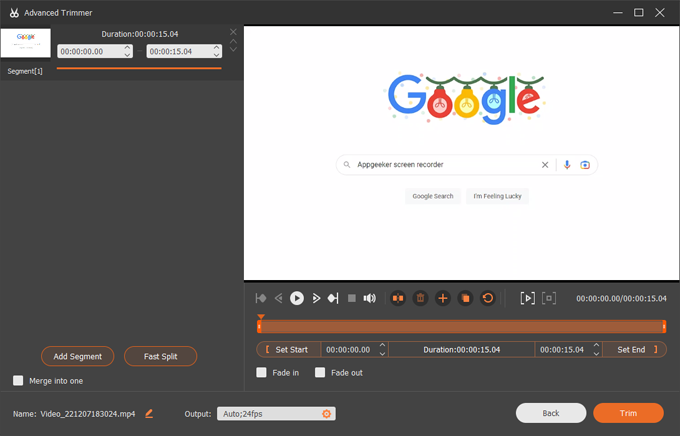
If needed, you can also click the Advanced Trimmer button near the Set End to have a further editing on the video: split, merge, output, rename, etc.
Save the recording
If the recording is acceptable, click the Done button in the bottom right corner to save your recording, outputting to MP4 format.
Tip: you can click the Recording History option located in the lower left corner of the program main screen to see your recordings history.
More...
The Screen Recorder application gives you various of settings that can be tweaked for recording.
See recording settings.
Also, you're able to tweak screen recorder preferences, including Recording, Output, Sound, Camera, Mouse and Keystroke, Hotkeys and more.
See Screen Recorder Preferences.