How to use Webcam Recorder tool in Screen Recorder app

Support Updated on Dec 13, 2022 11:58 AM
Tip: If you're running a Mac and want to capture your webcam, see here.
Before you start recording your live video with Webcam Recorder tool built in Screen Recorder, you'll want to download the software by clicking the links below. Install it to your either PC or Mac as you would any other application.
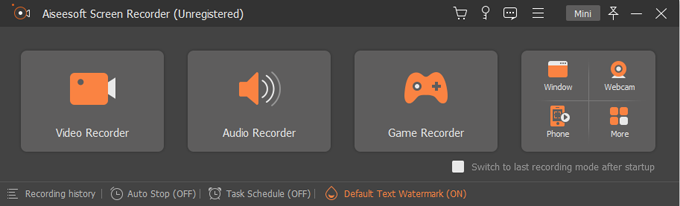
Step 1: Run the app and select Webcam Recorder
When you open the Screen Recorder application on your computer, you will get its main screen with intuitive design.
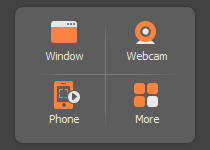
To record a built-in webcam or external camera device, hit Webcam icon in the right side.
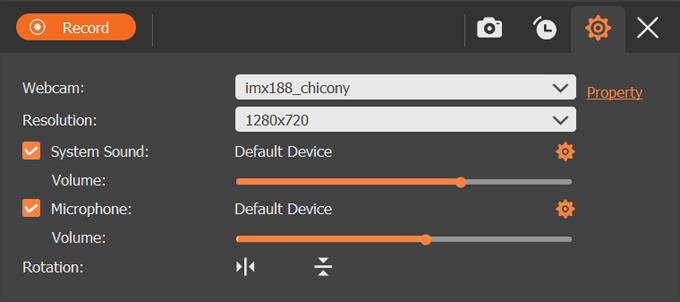
Step 2: Tweak recording settings
Once the Webcam Recorder opens, you'll see a live preview of your webcam.
And a toolbox appears beneath the live window at the same time. From there, it gives you more controls over the webcam recording. such as the ability to select a webcam device if there is more than one camera connected, change resolution, enable recording audio using a microphone device or/and system speaker, rotate the camera, and take a screenshot.
Do note, make sure your webcam is connected to your PC.
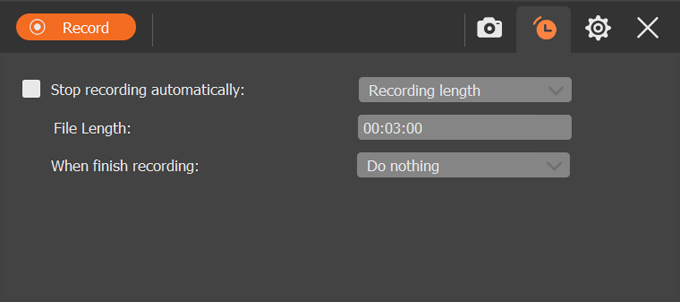
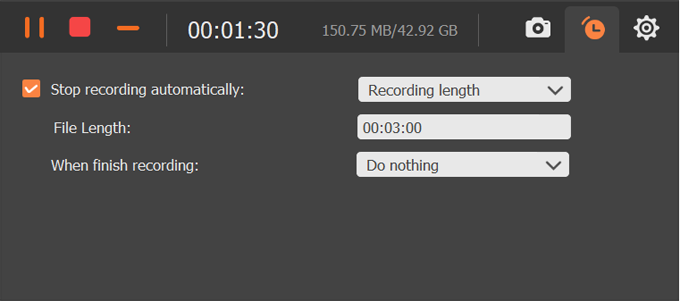
By clicking the Clock icon, you can enter recording schedule screen. With it, you can enable Stop Recording automatically option, and set your file length, as well as the action you wish to perform after recording is finished. For example, you can have the software automatically shut down your computer if you don't want the computer to stay on all night once the recording is done.
Step 3: Start recording live video from webcam
When ready, click the Record button (see image above) in the upper left corner of the window, and let the program capture live video from the connected or built-in webcam.
A float bar will appear under the recording frame of the webcam with controls for temporarily pausing recording, stopping recording, taking snapshots, setting schedule plan, and adjusting some other recording settings.
Settings:
Task Schedule
Step 4: Stop recording
When you want to finalize your video of the webcam, click the Stop button (the red square icon) to end the recording.
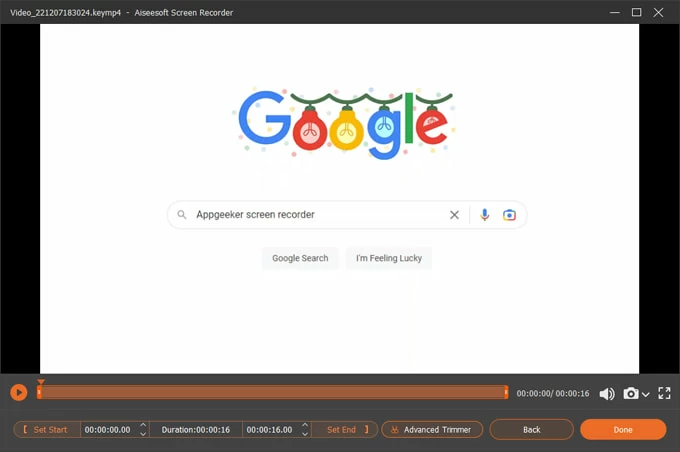
Step 5: Preview, edit, and save the recording
Your captured video of webcam will open up in the software. From there, you can take a preview, edit the video, and take screenshots.
If you don't want to do anything else, just press the Done button in the lower right corner to save your footage. If it is not acceptable and you would like to do a new recording, select the Back button.
Edit the video (optional)
The software comes with a basic trimming tool on the screen to help you trim the beginning and end of your video. You can do this using 3 ways:
- Click the Set Start option on the trimming bar, then slide the beginning to the correct location in preview bar. The same goes for Set End.
- Enter the accurate time in the beginning and end field.
- Use the down or up arrow to fine-tune the beginning and end time.
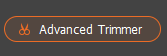
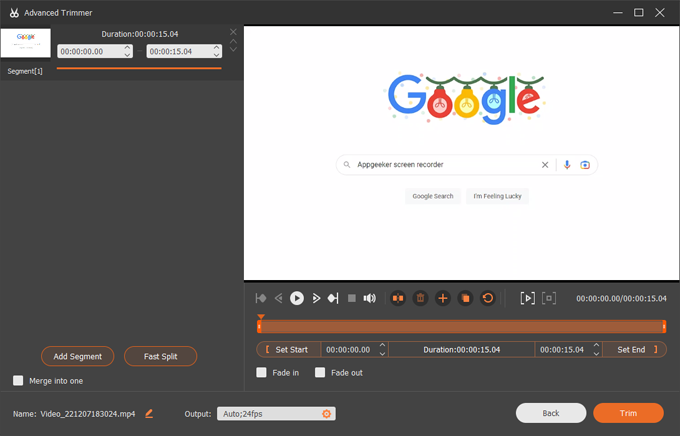
You can also click the Advanced Trimmer button near the Set End to have a further editing on the video.
It comes with options to split the video, merge multiple segments into a single one, fade in or out while playing, adjust output settings (resolution, formats, fps, codec, etc.) in the Output field, and rename the video.
Save the recording
If the webcam recording is acceptable, click the Done button in the bottom right corner. The software will save it to the default location automatically on your computer and open the Recording history window. You can choose to view, rename, open the folder, share or delete the recordings as you want.
By default, the recorded video will be output in MP4 (H.264 + AAC) format.
Tip: Alternatively, you can click the Recording History option located in the lower left corner of the program main screen to see your recordings history.
More Tips and Tricks
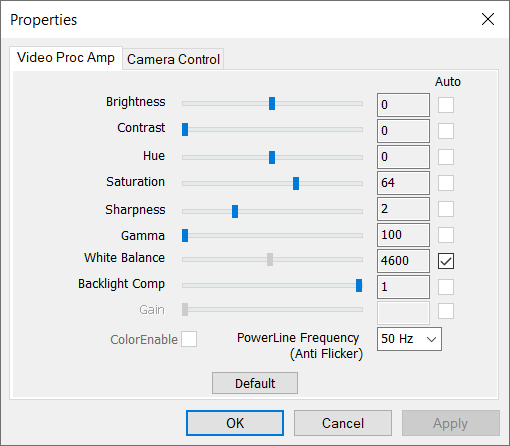
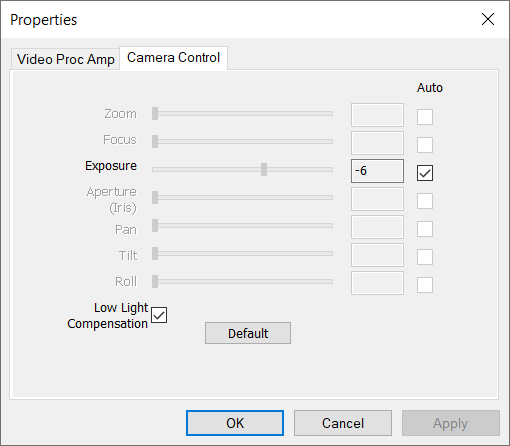
Webcam property
Before your webcam are recording, you can take advantage of the Toolbox included in the float bar to tweak some of settings about the webcam.
1. Click Property on the right side of Webcam field, see image above.
2. In the new window that opens, configure anything you like. You may leave everything to their default values if you don't know what you're doing.
Video Proc Amp:
Camera Control:
More...
The Screen Recorder application gives you various of settings that can be tweaked for recording.
See recording settings.
Also, you're able to tweak screen recorder preferences, including Recording, Output, Sound, Camera, Mouse and Keystroke, Hotkeys and more.
See Screen Recorder Preferences.