Where do AirDrop files & photos go

We can use AirDrop to share and receive photos, documents, etc. with other Apple devices nearby. In this article, we will teach you how to AirDrop from iPad to Mac.

AirDrop is a convenient file-sharing feature available on Apple devices that allows users to easily transfer files wirelessly between their iPad and Mac. It eliminates the need for cables, emails, or other external storage devices, making it a quick and hassle-free method to share files.
Maybe you're curious about how to AirDrop from iPad to Mac. In this article, you'll learn how to transfer files from your iPad to your Mac via AirDrop. It is a process that can also be used to share files between a Mac and an iPhone.
![]()
You can easily AirDrop from your iPad to your Mac in just a few steps.
Tip: If AirDrop doesn't work, try a third-party tool, iPhone Data Transfer, which can transfer multiple file types (e.g., pictures, music, videos, etc.) across devices with one click, including but not limited to data transfer from iPad to Mac, iPad to PC, or vice versa.
Table of Contents
AirDrop is the main feature added to iPadOS 13, which allows for quick file transfers from iPad / iPhone to Mac. AirDrop allows you to effortlessly share various types of content, such as photos, videos, websites, and locations, with Apple devices and Mac computers in close proximity through wireless communication.
How to AirDrop from iPad to Mac successfully? First, it is vital to log in using your Apple ID. Second, you'll need to open AirDrop on your iPad and Mac separately, and then you can AirDrop from iPad to Mac.
Are you tired of sending files through emails or using USB drives to transfer data from iPad to Mac? Read on to discover how you can easily take advantage of AirDrop and enjoy the benefits of AirDrop from iPad to Mac.
On Mac:
Step 1: Open "Finder" on your Mac.
Step 2: Click on "AirDrop" in the sidebar (or you can also access it from the Go menu).
Step 3: In the AirDrop window, select "Allow me to be discovered by: Everyone" or "Contacts Only" depending on your preference.
Step 4: Make sure your Mac has Bluetooth and Wi-Fi turned on.

To turn on AirDrop on Mac, choose Contacts Only or Everyone.
On iPad:
Step 1: Swipe down from the top-right corner of the screen to open "Control Center".
Step 2: Press and hold the network settings card in the top-left corner (it looks like a Wi-Fi/Bluetooth icon).
Step 3: Long press on "AirDrop" in the expanded network settings.
Step 4: Select "Everyone" or "Contacts Only" based on your preference.

To turn on AirDrop on iPad, choose Contacts Only or Everyone.
Now, both your Mac and iPad have AirDrop enabled and can easily share files, photos, and more wirelessly.
To AirDrop files from your iPad to your Mac, make sure Personal Hotspot is turned off on both iPad and Mac, and make sure iPad and Mac are within Bluetooth and Wi-Fi range. Let's take the airdrop photos as an example and follow these steps.
Step 1: On your iPad, open the "Photos" app and select the photos you want to AirDrop.
Step 2: Tap on the "Share" button, which is represented by a square with an arrow pointing upwards. And then click on the "AirDrop" icon that appears in the app list.

Select photos and click on the Share and AirDrop icons respectively.
Step 3: Click on the name of your Mac When the AirDrop screen appears, you can see icons for all AirDrop-compatible devices within range. When the file has been sent, the icon will show "Sent".

Choose to AirDrop photos to Mac.
Step 4: Select "Accept" when you get a pop-up reminder on your Mac desktop.

Click to accept the picture from the iPad on the Mac.
You can not only AirDrop from iPad to Mac, but also AirDrop from Mac to iPad. With AirDrop, sharing documents, photos, videos, and more becomes a breeze. Let's dive in and learn how to AirDrop from Mac to iPad!
Step 1: On your Mac, open the "Finder" and locate the file you want to AirDrop to your iPad.
Step 2: Right-click on the file and select "Share" from the drop-down menu. In the Share menu, you should see the "AirDrop" icon. Click on it.
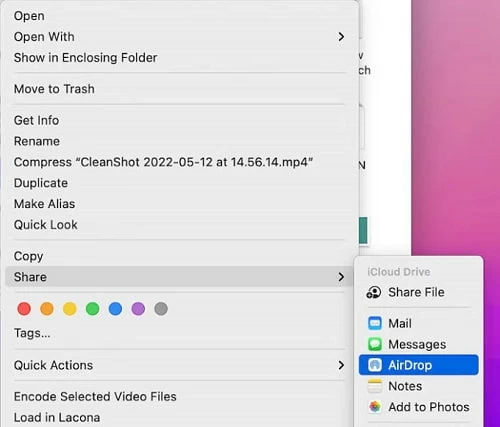
Select AirDrop from the Share menu.
Step 3: Look for your iPad name in the list and tap when the list of available AirDrop recipients appears.
Step 4: Tap "Accept" to get AirDrop files. Because on your iPad, you will receive an AirDrop notification with the option to accept or decline the file.
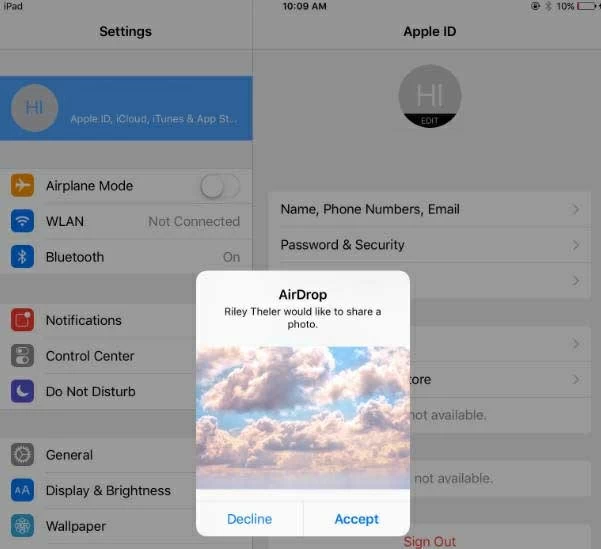
Opt-in to accept AirDropped images on your iPad.
The file will be airdropped from your Mac to your iPad. You can access the file in the appropriate app or location on your iPad.
As convenient as it is to use AirDrop to transfer files from iPad to Mac, it has its limitations, such as failed transfers, slow speeds, or devices not being detected. Besides, AirDrop only works between Apple devices, which restricts its usefulness when sharing files with non-Apple users.
Therefore, it is salient for you to learn how to transfer files from iPad to Mac without AirDrop. iPhone Data Transfer is a very secure, fast transferring software that can detect the device quickly and can also transfer files from iPad / iPhone to Mac / PC. It is not limited by file size, file type, quantity, or computer system, you just need to prepare a data cable.
Step 1: Download and install AppGeeker iPhone Data Transfer on your Mac. Then launch the program on your Mac.
Step 2: Connect your iPad to your Mac using a USB cable. Make sure your iPad is unlocked and trusted on your Mac.
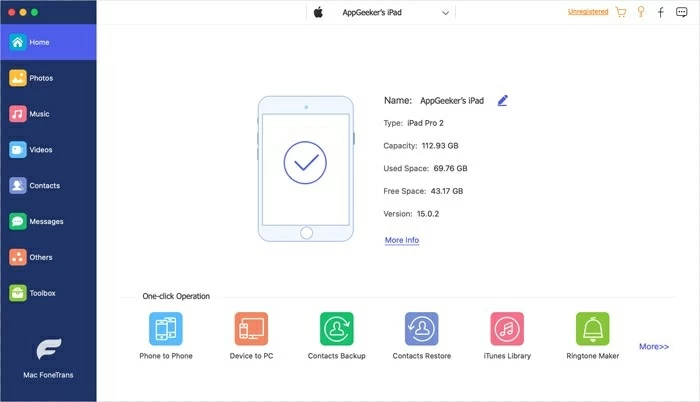
Connect the iPad and Mac, and open the main menu of the software.
Step 3: Click on the desired file type from the left sidebar, such as Photos, Music, Videos, Contacts, etc. Then select the files you want to transfer by checking the box next to them.
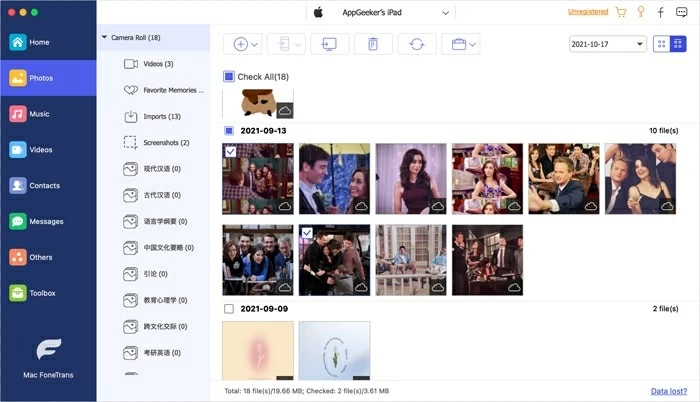
Check the file types you want to transfer to Mac.
Step 4: Click on the "Export to PC" button at the top, choose a destination folder on your Mac to save the exported files. Then click on the "OK" button to start the transfer process.

Click on the "Export to PC" button at the top of the program's interface.
Step 5: Wait for the transfer to complete. Once finished, you can access the transferred files on your Mac.
Tip: iPhone Data Transfer also allows you to transfer files from your Mac to your iPad using similar steps. Simply select the files you want to transfer from your Mac, choose the "Add" button, and select your iPad as the destination device.
Conclusion:
Now you have learned how to AirDrop from iPad to Mac. AirDrop is a convenient way to share files from iPad to Mac. In case AirDrop doesn't work, you need to use a tool like iPhone Data Transfer to help you transfer files between iOS devices or between an iDevice and a PC. With these methods, you can easily transfer or AirDrop files from iPhone / iPad to Mac. Let's get this efficient transfer tool now!