How to Copy Contact from ZTE Android Phone to iPhone


Apple AirDrop is a file-sharing tool introduced in OS X Lion 10.7 and iOS 7. It offers a simple way for users to transfer files including photos, videos, notes, contacts, voice memos, Safari, passbook passes, map location among supported Mac computers and iOS devices without an Internet connection.
Before you get started, it's worth pointing out that AirDrop won't work on all Mac and iOS device. You need to know if your device has AirDrop built in.
1) If you want to transfer files from a iOS device to a Mac or vice versa, your iOS device (iPhone, iPad, iPod) need to be running iOS 7 or newer, and your Mac needs OS X Yosemite (10.10) or later installed. Both has Wi-Fi and Bluetoolth activated, they don't need to be on a specific Wi-Fi network, though.
2) If you want to use AirDrop to share files from one iOS device to another, both devices must be running iOS 7 or later, and have both Wi-Fi and Bluetooth enabled. You can use AirDrop on any of the following devices:
3) If you want to share files between two Mac computers using AirDrop, unlike you do that between an iOS device and Mac, you don't need the latest and greatest hardware or OS—both Macs simply need OS X 10.7 Lion or later. Also, you have Wi-Fi and Bluetooth turned on.
The following we'll walk you through the steps of how to set up AirDrop to transfer photos from an iPhone to a Mac and vice versa, for example.
Step 1: Turn on AirDrop on your iPhone and Mac
1. Turn on AirDrop on iPhone
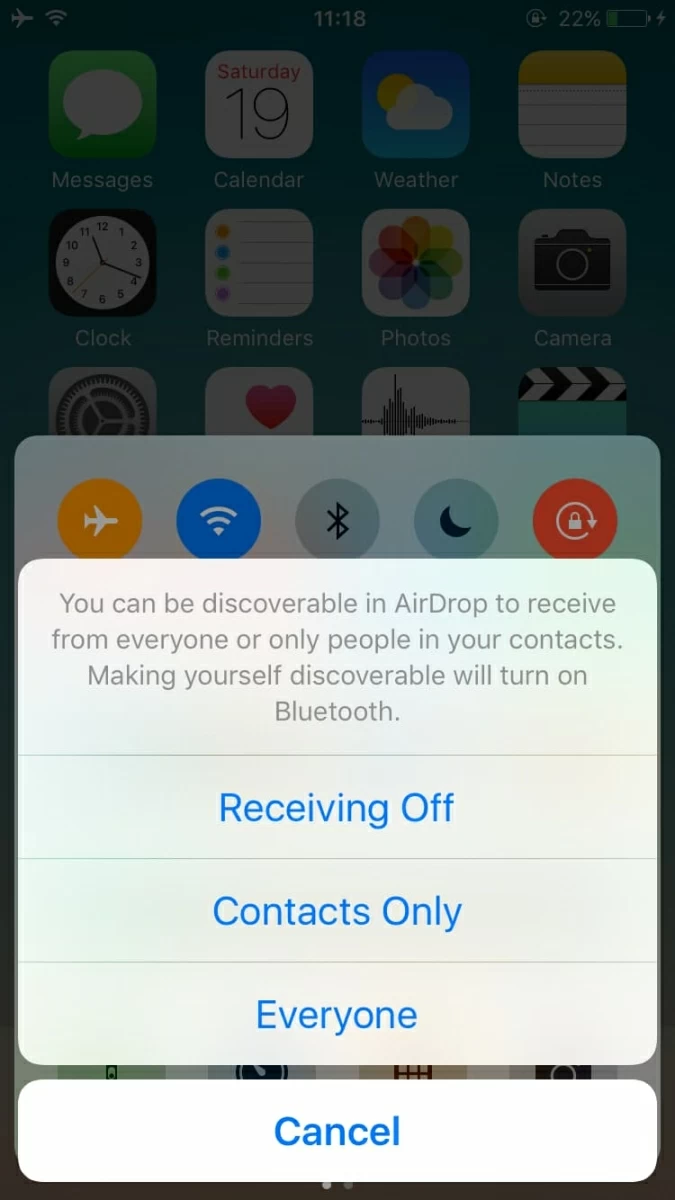
You can do this easily by swiping up on the iPhone screen to bring up the Control Centre, and tapping the AirDrop: Receiving Off.

In the resulting menu, you'll have to choose who you want to share files with: Contacts Only or Everyone.
Contacts Only is just what is sound like, only the people in your Contacts app will know you're using AirDrop. Everyone lets any nearby iOS device or Mac in range (about 30 feet) can see your device. We recommend setting AirDrop to Everyone option so that you can leave aside the situation of someone who isn't in your Contacts app.
2. Turn on AirDrop on Mac computer
There are two ways to open AirDrop.
On your Mac, you can either open a Finder Window and select AirDrop which listed as an option on the left sidebar, or go to the Finder top menu, and click Go > AirDrop.
Now your Mac will begin searching for nearby users that are using AirDrop. Give it a few seconds, you'll hopefully see the iPhone (and other devices that're using AirDrop) you wish to share with listed on the right blank area.
Step 2: Share content
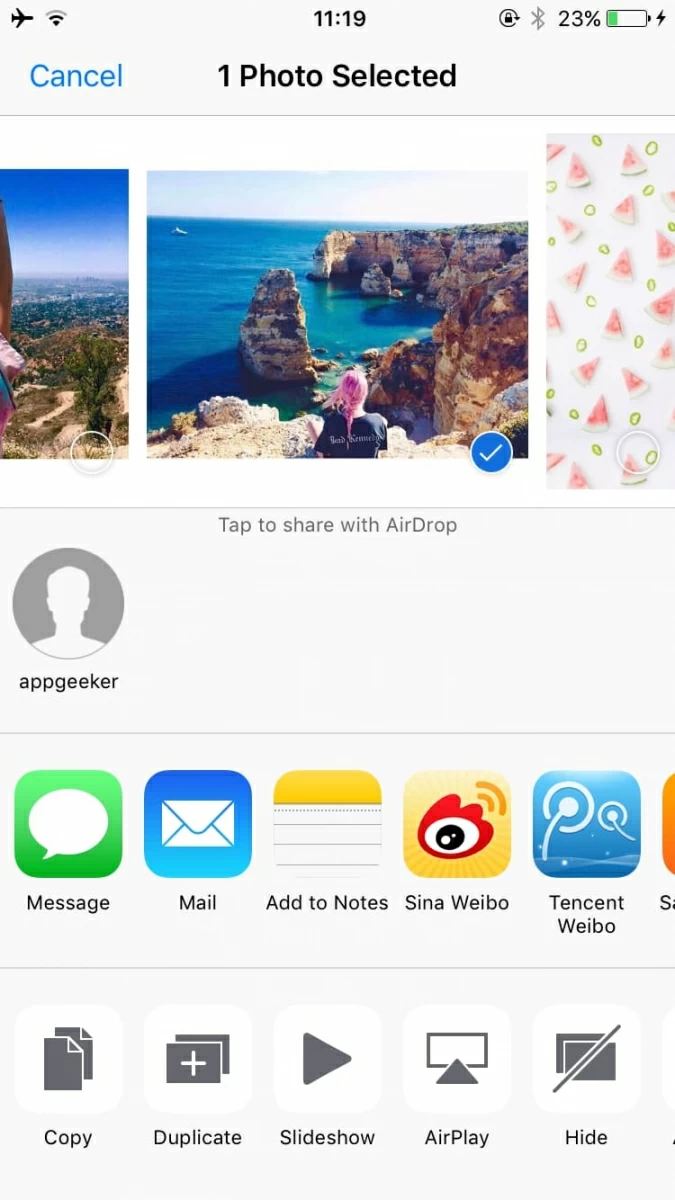
Go back to your iPhone, first select the photo (or any other content) you want to send to your Mac, and tap the share icon in the lower left side, which looks like a box with an arrow coming out of it, as the image shown below.

Next, you'll see a menu with several options for sharing such as: Message, Mail, Add to Notes, but you should also see a sections that says Tap to Share with AirDrop, from there you'll see available nearby AirDrop users you can send files to.
Now, Tap the device name who you wish to share file(s) with, a share notification will send to your Mac.
Step 3: Tap "Accept" to receive photo files from iPhone
In the AirDrop window on the receiving Mac, a message appears with a a preview of the content the sending device trying to share. In this case, you just click the Accept button, and the transfer should start.
The resulting files will be saved in the Mac's Downloads folder, and opened in the appropriate app. For example, a photo will appear in the Photos app and websites will open in Safari.

See more: how to move content from iPhone to LG phone and vice versa with Phone Transfer tool
How to AirDrop Photos (and other files) from Mac to your iPhone, iPad or iPod
If you want to transfer file from a Mac to your portable iPhone, iPad or iPod, the process is similar to sending through an iOS device for Mac. When the available iOS devices are in view, simply drag and drop the file onto the name of the device you want to send it to.
Step 1
Open a Finder window on your Mac and select AirDrop in the sidebar or go to menu bar and click on Go > AirDrop. Then in the AirDrop window, choose Allow me to be discovered by Everyone, or Allow me to be discovered by Contact Only. To raise your chances of your iPhone seeing your Mac and vice versa we suggest selecting Everyone option.
On your iPhone, Swipe up Control Contre to turn AirDrop to Contact Only or Everyone.
Step 2
You now should see the iPhone name displaying in the AirDrop window on your Mac that you're ready for sending files to.
Next, you drop photo(s) onto the name representing the iPhone, an alert on your iPhone will immediately prompt you whether to accept or decline the file.
Step 3
Simply tap Accept and the impage will send.
Pretty soon you will find the photo was saved in your Camera Roll on iPhone.
That's it!