
How to turn off iCloud Photos on iPhone

AirDrop easily connects nearby Apple devices in a snap. Simply turn on AirDrop and share your photos, videos and more with a simple toggle!


Get to know how to turn on AirDrop on iPhone, iPad and Mac with ease.
AirDrop is a wireless file-sharing feature built into Apple devices that securely share your photos, videos, websites, locations, documents and other data with a nearby iPhone, iPad or Mac. It uses a combination of Wi-Fi and Bluetooth to establish a peer-to-peer network between Apple devices, so the files can be transferred from one to another.
This guide will tell you how to turn on AirDrop step by step, so you can easily turn on AirDrop on your iPhone, iPad or Mac to transfer data wirelessly. And if AirDrop isn't working or your iPhone can't turn on AirDrop, try an alternative solution like iPhone Data Transfer for seamless file transfer between Apple devices, without limitations on file size or quantity.
Table of Contents
When you turn on AirDrop, it's easy to make close-range data transfer between two Apple devices wirelessly, including pictures, videos, texts, contacts, documents and media files like playlists and attachments. There's no size limit of the file.
AirDrop uses Wi-Fi and Bluetooth to create a private network between two Apple devices to share and receive files. To use AirDrop, both the source and target devices should have AirDrop enabled and be within close proximity to each other.
The process to turn on AirDrop may vary depending on the specific device and OS version you're using. Here's how to turn AirDrop on accordingly on iPhone, iPad and Mac:
To make AirDrop turn on with your iPhone or iPad, ensure that your Apple device has Wi-Fi and Bluetooth connection and is close to the target device you want to send files to or receive files from. Here's how to enable AirDrop on iPhone or iPad from the Control Center:
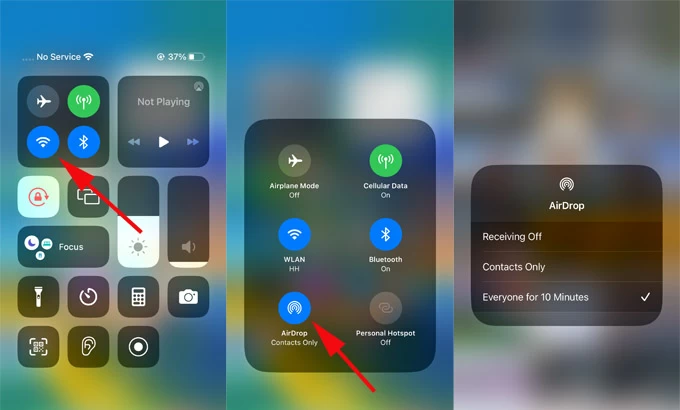
1. Access Control Center on your iPhone or iPad.
2. Press and hold anywhere on the network settings card in the top left.
Tip: You'll also see the Wi-Fi and Bluetooth connection from here, make sure they are turned on. If your Personal Hotspot is on, turn it off first.
3. Tap and hold AirDrop icon for a short while to select who can AirDrop files to you.
After you turn AirDrop on, it can transfer photos from iPhone to iPhone or iPad in seconds. You can also change the AirDrop settings by accessing iPhone or iPad Settings > General > AirDrop.
When you need to transfer photos from Mac to iPhone or other Apple devices, turn on AirDrop on Mac to share files instantly with your iPhone, iPad, or another Mac nearby. Go through the following steps to turn AirDrop on and use it on your Mac:
Turn on AirDrop in Mac's Finder
1. Open a Finder window on your Mac.
2. From Finder's sidebar, choose AirDrop.
3. At the bottom of the AirDrop window, click the selector Allow me to be discovered by and choose to receive AirDrop files from Contacts Only or Everyone.

Enable AirDrop in Mac Control Center
Alternatively, open the Control Center on macOS to quickly let AirDrop turn on and decide who can send files to you using AirDrop.
1. At the top of Mac screen, click to open Control Center from the menu bar.
2. From the pop-up settings, enable the AirDrop option. Also, make sure the Wi-Fi is connected and Bluetooth is on.
3. Click the right arrow next to AirDrop and select Contacts Only or Everyone.

Tip: The Contacts Only option is available for macOS 10.12 or above. If your Mac doesn't have it, choose Everyone or update your macOS version.
Once you turn on AirDrop on your iPhone, iPad or Mac, sharing files between Apple devices is a breeze, whether you want to transfer files from iPhone to Mac or iPad, or vice versa.
To AirDrop files from iPhone or iPad, make sure your iPhone or iPad and the target Apple device are within the Wi-Fi and Bluetooth range, or the transfer will fail even the AirDrop is turned on.
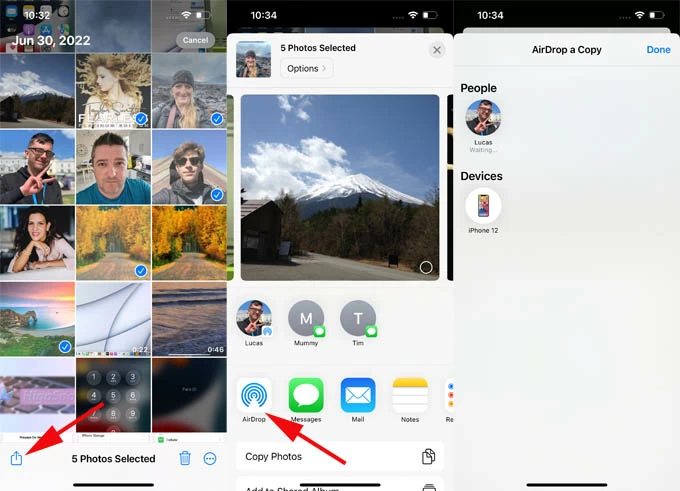
1. Find a file on the sending iPhone or iPad that you want to AirDrop.
2. Select the file and tap Share button from expanded menu.
3. Choose AirDrop. Other AirDrop devices in short distance will display in a row.
4. Select an AirDrop user from the sharing screen.
5. On the receiving device, tap Accept in the AirDrop notification. You may accept and open up the AirDrop file within the same app it was send from.
Note: If you AirDrop files between your own Apple devices under the same Apple ID, there will be no AirDrop message asking for Decline or Accept. Your device will accept and save the AirDrop files automatically, and you can find where do AirDrop files go after that.
When you turn on AirDrop on Mac, you can send files from your Mac to another AirDrop enabled device like iPhone, iPad, iPod or Mac wirelessly. Before you start, put the target Apple device close to your Mac and ensure Wi-Fi and Bluetooth connection to turn AirDrop on.
1. On your Mac, open a file that you want to share with AirDrop.
2. Click the Share button at the top of the app window.
3. Pick AirDrop from the offering option menu, and choose an AirDrop recipient.
4. On the target device, select Accept when AirDrop notification pops up.
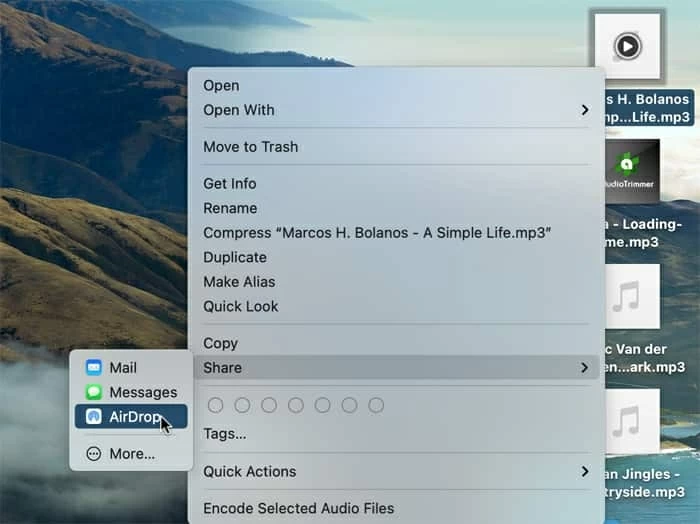
Tip: In addition, you may also proceed with AirDrop shortcut: Control-click the file > Share > AirDrop, and choose a nearby AirDrop device to share with.
AirDrop shares files between Apple devices wirelessly, but it does have platform restrictions and limited file compatibility, especially when it comes to music files or a large number of different files in individual apps. Therefore, trying to use an alternative file-transferring app would bring you more convenience and flexibility when AirDrop not working well.
The all-round iPhone Data Transfer is particularly designed for Apple users to manage and transfer files between Apple devices and even across Windows platform. Supporting a wider range of file types and offering hyper-fast and bulk transfer, you can either transfer files between Apple devices or across iOS and Windows without limitations, not relying on AirDrop or Wi-Fi.
Transfer files from or to iPhone when AirDrop can't turn on or work:
1. Connect iPhone with your computer and run the program.
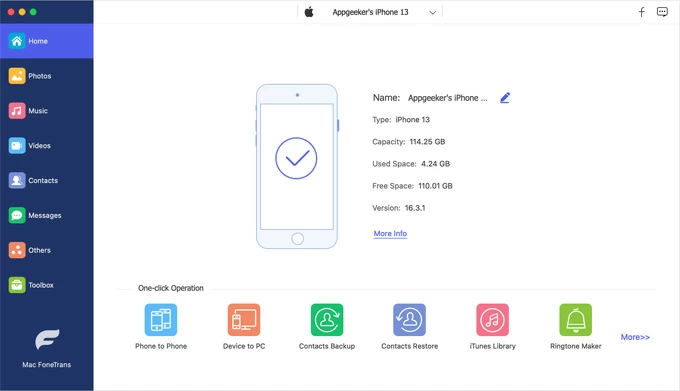
2. Select a file type you want to transfer in the left menu. For example, if you want to transfer music files, go to Music.
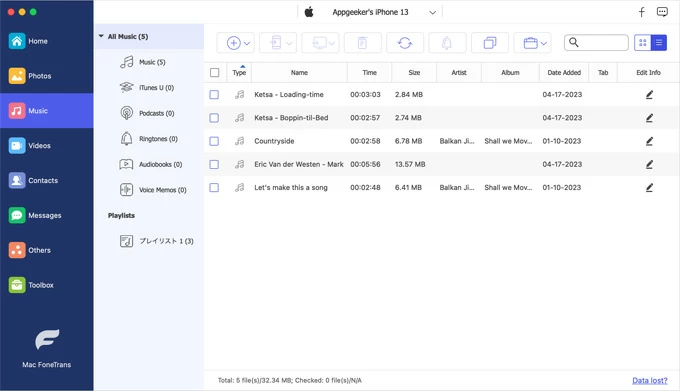
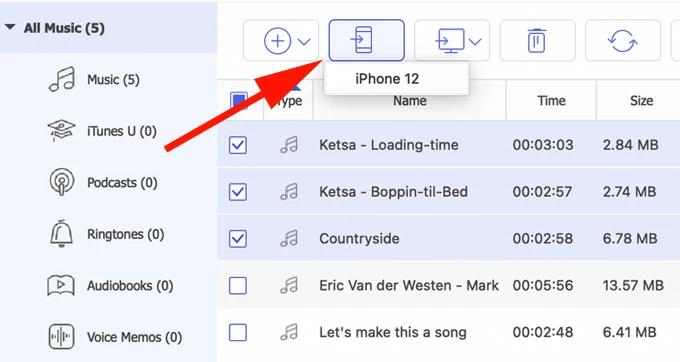
3. Choose any music files on iPhone, or select them all; then do any of the following:
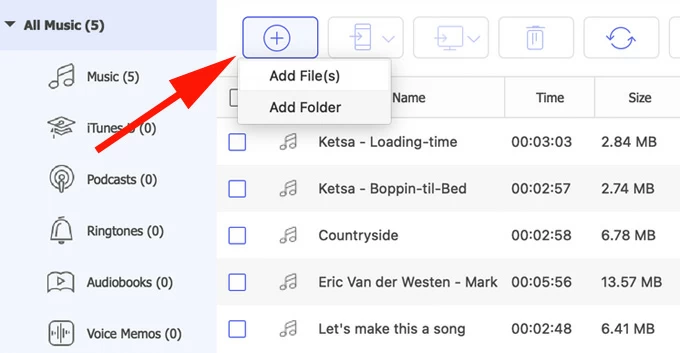
4. To transfer files to your iPhone, click the plus button at the top. This allows you to choose and add files from a Mac, PC, or another connected iDevice to your iPhone selectively. Keep your iPhone connected until the transfer process is done.
Apple users can turn on AirDrop on their iPhone, iPad and Mac for wireless file transfer easily, which will use the Wi-Fi and Bluetooth connection. By following the steps mentioned above, everyone can turn on AirDrop and use it without hassle. Even if you don't how to turn on AirDrop, there are still alternative ways available to transfer data between Apple devices effortlessly.