
How to Record PowerPoint with a Webcam

Do you want to make a video recording of yourself while presenting a PowerPoint to check your performance? This article will guide you step-by-step in specific.


Recording the ppt presentation with a webcam is hard since the webcam window will be hidden.
The next time you present a PowerPoint and are fearful that you will forget key information, don't worry. You can quickly record yourself to ensure that you do not forget any important points or facts. The trouble is how to record yourself when presenting a PowerPoint.
There are many ways to record themselves to ensure one doesn't forget their presentation content. This short and simple manual will show you how to accomplish exactly that. Now, let's delve into this article and find a perfect method to record yourself when presenting a PowerPoint.
Table of Contents
Yes, you can. What we call a "PowerPoint presentation" is a sequence of slides you can use to present and discuss various topics. When using a Windows computer, PowerPoint from Microsoft offers a wide range of choices for personalizing presentations. PowerPoint allows you to add visual elements such as pictures, tables, charts, movies, and links to your presentation to make it stand out from the crowd.
Even if you're not the most tech-savvy person, you'll be able to make a polished presentation with the help of the program's user-friendly features and pre-made templates. To give your audience the best possible experience watching your presentation, use PowerPoint to display all relevant visuals in full view (instead of behind slides). You'll need to know how to record your presentation with your face once you've mastered PowerPoint's fundamentals and made your slides.
The purpose of a PowerPoint presentation is to supplement your spoken presentation, not replace it entirely. You can record a PPT on Windows and Mac both. Within the confines of the Microsoft PowerPoint software, you can record video, audio, or simply your slide presentation.
Step 1: Once PowerPoint is open, go to Recording in the menu bar at the very top. A drop-down menu including Record Slide Show and Screen Recording will appear.
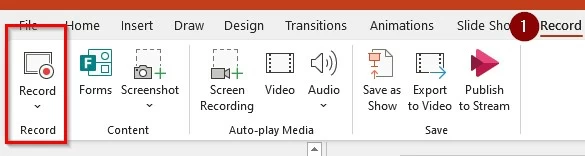
Step 2: Click Record Slide Show to capture your slideshow with music or moving pictures. During the recording process, you can adjust the microphone and webcam in the top-right corner.
Step 3: Once you finish the recording and exit the slide show, the recording process of your face will be cut into pieces and automatically input in the bottom-right corner of your screen.
Step 4: If you choose Screen Recording, not only will your slideshow be recorded, but so will your face and other activities on the screen with the sound from the microphone. The downside is that if you maximize the windows of the PPT, the webcam window will be hidden behind the PPT. To record the presentation and your face at the same time, you have to build the space for the webcam window in the recording area.
Step 5: After you hit the Screen Recording button, you'll be able to set the precise region of your display that you want to record.
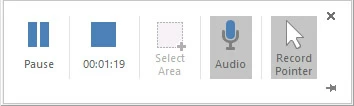
Step 6: In the recording toolbar, the Audio button should be grayed out before you start recording. Enable it to record your sound when recording.
Step 7: Press the record button, and your computer's mic and surroundings will start collecting the presentation with your face.
The two PowerPoint-inbuilt recording features have their pros and cons. You can choose the feature that fits your situation more.
On a Mac, you also can record yourself when presenting a PowerPoint. This section will teach you how to use a webcam when recording PowerPoint presentations on Mac computers without the necessity to download or install any additional software on your Mac. The built-in program QuickTime Player allows you to record your presentation as well as your face.
The steps that need to be taken to record your presentation using a Mac are as follows:
Step 1: Launch the QuickTime program by navigating to the Launchpad.
Step 2: Open the webcam app you like to use and set it Float on Top from the menu at the very top so that your camera application is shown on top of all the other apps. Then adjust the size of the camera window. You can move the camera to whatever position you choose on the screen.
Step 3: Open the PowerPoint presentation.
Step 4: Open the File menu on the top-left screen and go to the New Movie Recording option to open the screenshot toolbar. If you use the Mojave and later macOS versions, you can open the screenshot toolbar by using the combination Command + Shift + 5.

Step 5: Click the Option to choose the audio source as the microphone.
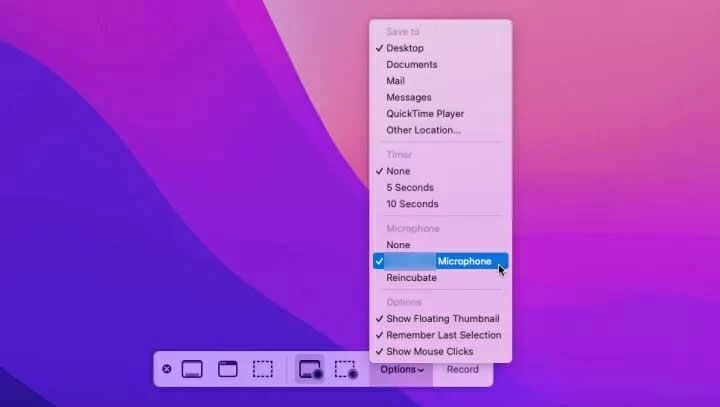
Step 6: Then hit the Record button. Right now, both the screen and the presentation from your camera are being recorded.
Step 7: When you are ready to stop recording, simultaneously hit the Command + Control + Esc buttons on your keyboard.
QuickTime Player can only record the audio from the microphone. It is convenient for a PPT presenter to capture his voice, while if there's a video or a piece of audio needs to play during the presentation, the internal sound from the computer can't be captured. If you want to record the internal audio simultaneously, you need to resort to a reliable third-party tool.
On both Windows and Mac, AppGeeker Screen Recorder is one of the most dependable applications that you can use to record your face with presentations on your computer. It is one of a kind since it was developed to function with various recording formats, including the capability to record 4K video and high-quality audio.
It includes both the sound from the outside and the sound from the device. Using AppGeeker Screen Recorder, you are available to record your face at the same time without the necessity to pin the webcam window or build the space for the window. This all-in-one program will astound you with its plethora of functions, which can take the place of all other screen recording applications that you can have used in the past. To record the PowerPoint presentation process with your face, download AppGeeker Screen Recorder first, then launch the Screen Recorder application located on your computer.
Step 1: Choose the Video Reorder option to record your PPTs screen.

Step 2: You can record your full desktop or screen by selecting the Full option or clicking on the Custom option and dragging to pick a specific screen section to record.
Toggle on the button of the webcam to ensure that you can record yourself when presenting a PowerPoint.
Record sounds from your computer and microphone by turning on System Sound and activating the Microphone.

Step 3: To begin recording, you can press the REC button once ready.
Step 4: Once you have finished recording all the activity on the screen, click the button labeled Stop Recording located on the toolbar's left, then preview the recording and check your performance.
![]()
Step 5: Hit the Done button to export the screen recording on your computer.
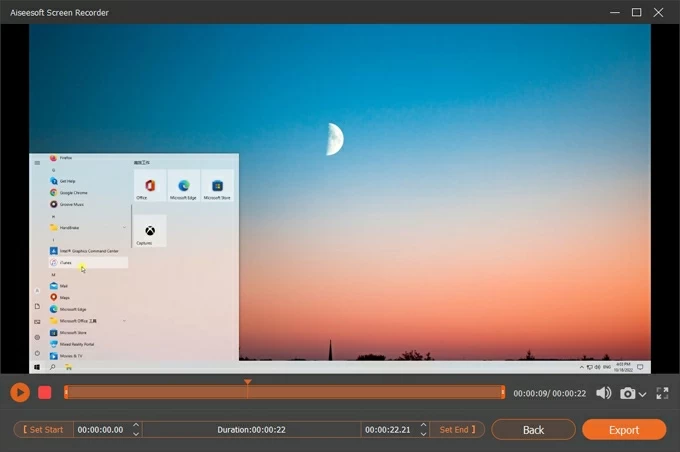
The Xbox Game Bar's primary purpose is to capture gameplay footage; however, it can be used for any video recording. However, switching to recording another window after Game Bar has begun recording is impossible. This is because Game Bar can only capture one program screen at a time, often the last session you clicked into.


