
How to Record YouTube Videos on Mac

If you want to record your favorite audio on Chrome, Safari, Firefox, or other web browsers, this article sums up the easiest methods to record browser audio. Read on to learn more!


Pick the right method for recording website audio according to the recommendations in this article.
More people like surfing on websites, and sometimes you may find some interesting audio like background music, songs, audiobooks etc. but they can't be downloaded, then you will want to record audio from your browser to save them. If you wonder how to record audio from website, then browser audio recorders will be your savior.
Whether you are using Chrome, Safari, Firefox or other web browsers, you can use the browser audio recorder extension to capture audio from website. Or if you want to clearly record browser audio with no time limit, Appgeeker Screen Recorder will allow you to highly customize your browser audio recording.
In today's post, we'll find out once and for all the best way to record audio from a browser, and we'll look at:
To record audio from website, the first choice is Appgeeker Screen Recorder, a software that is designed for easy audio recording. It not only records audio in high quality or even lossless by advanced algorithms, but also reduces microphone noise.
It can record any audio content from browsers, including live streaming, MV, movies, music, online meetings, audiobooks and more. The software also allows you to set a task schedule to automatically start your website audio recordings. In addition, you can use its editing tools to split or trim your captured browser audio for different purposes.
Key features of AppGeeker Screen Recorder:
Let's walk you through how to record browser audio via Appgeeker Screen Recorder:
Step 1. Launch the software on your computer once you have downloaded and installed it.

Step 2. Select "Audio Recorder" tab and set the audio input. To capture the audio from the browser, enable "System Sound"; if you also want to capture yourself speaking in a web page, for example if you are having an online meeting, you can turn on both the "System Sound" and "Microphone" options.
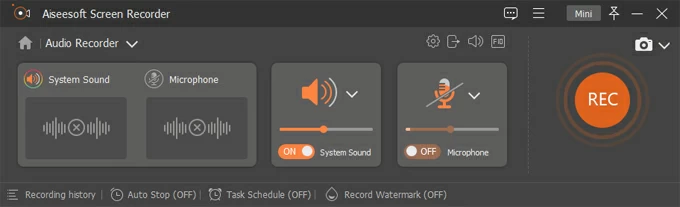
Step 3. Click the "REC" button on the right to start capturing audio from website.
Step 4. To end the recording, hit the "Stop" button on the floating panel. You can also click the clock icon for preset audio recording if needed.

In the preview page, you can use Advanced Trimmer tool, such as Fast Split, Trim, Add Segment, and others to adjust your recorded browser audio. After that, click "Done" to download the audio to your computer.
If you want to record YouTube audio on your browser or record YouTube video on your PC, this software can also fulfill your needs.
There are actually extensions for Chrome or Firefox that let you record audio from the website. Here's how to record website audio on Chrome or Firefox with browser extensions.
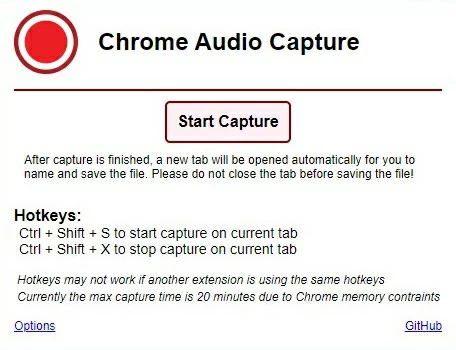
As one of the main website audio capture extensions for Chrome, Chrome Audio Capture can record any audio that is playing on the active tab. It can initiate audio recording from multiple tabs on Chrome at the same time. Moreover, the recording will not stop even if you mute the website you are currently recording.
1. Search Chrome Audio Capture in Chrome browser and open the page.
2. Click "Add to chrome" and select the "Add extension" option in the pop-up query window.
3. Open the web page you want to record audio and find the extension in the top right corner of the page.
4. Hit "Start Capture" to start recording.
5. Click the "Save Capture" option when you finish. The page after the jump will show the encoding progress, wait for the encoding process to finish, then click "Save Capture" again and select your destination folder to save the recorded file in .mp3 format.
Note:
Live Recorder is a Firefox extension that lets you capture audio from Firefox online and in real time. Freely capturing audio from Firefox to a local directory is possible with its assistance, but occasionally the recording may become unstable, necessitating a reload.
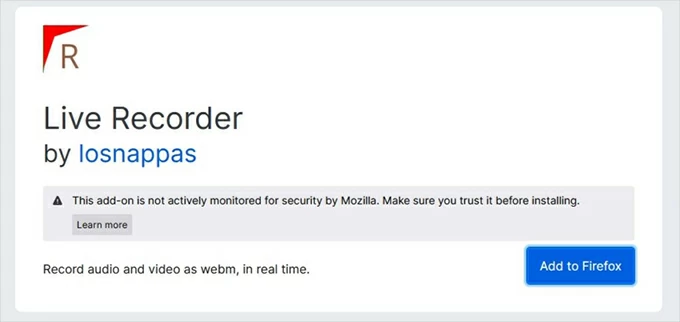
And it should be noted that Live Recorder can only store recorded website audio in WEBM format, you need to convert it to MP3 format for unlimited playback.
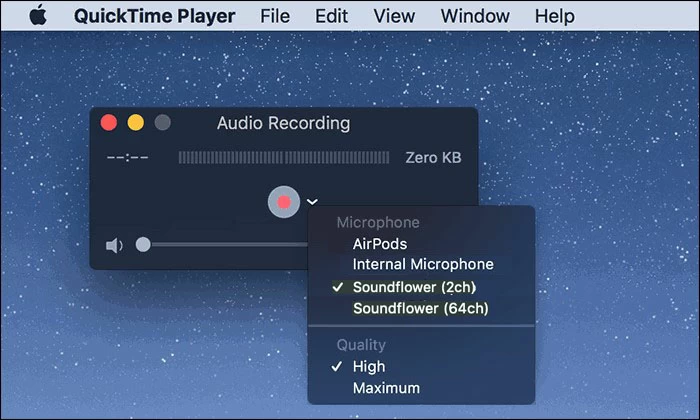
If you're using a Mac, the QuickTime Player that comes with macOS can meet your needs for recording browser audio. But only if you configure an additional sound driver as an output source, such as Soundflower, so that QuickTime Player can capture internal audio from Mac, including sounds from web pages.
1. Change your Mac's audio output source. Go to System Preferences and select the "Sound" icon. Then select "Soundflower (2ch)" as the output source in Output tab.
2. Run QuickTime Player. Click on "File" in the top menu bar and select "New Audio Record".
3. Set the audio source for recording. You'll see a small down arrow next to the red record button. Click on it and select "Soundflower (2ch)" here.
4. Start recording. Click the "Record" button to start recording audio from website, and all the sounds from your Mac will be captured.
5. Once finished, click the "Stop" button and head to File > Save to save the recording.
For Windows computer, you can record audio from the website for free using the built-in Voice Recorder. However, to capture audio from browser using Microsoft's audio recorder, you first have to enable Stereo Mix in the sound system, which will disable the microphone input and prevent you from recording the sound from the microphone.
1. Navigate to Settings > System > Sound > Sound Control Panel.
2. Click on "Recording" in the pop-up Sound window, and you will see the Stereo Mix option.
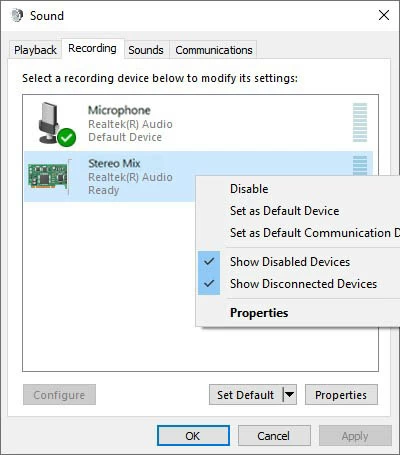
Tip: If you don't see the Stereo Mix option, click on a random blank space in this panel and make sure that both the "View Disabled Devices" and "View Disconnected Devices" options are checked.
3. Right-click "Stereo Mix" and click "Enable" to activate it, then click "OK" in the bottom right corner to save your changed settings.
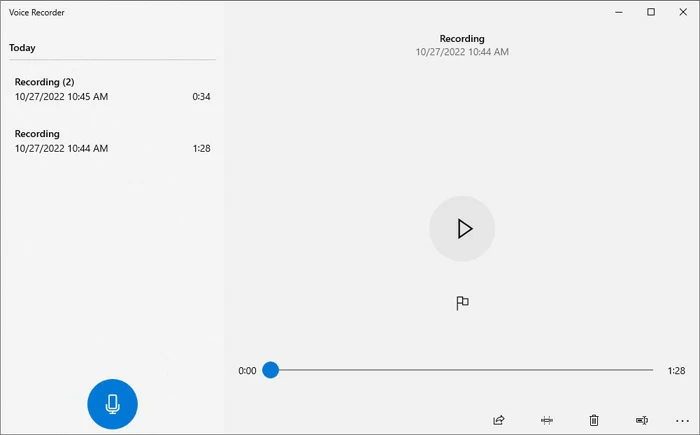
4. Run Voice Recorder on your PC to begin recording audio from your browser.
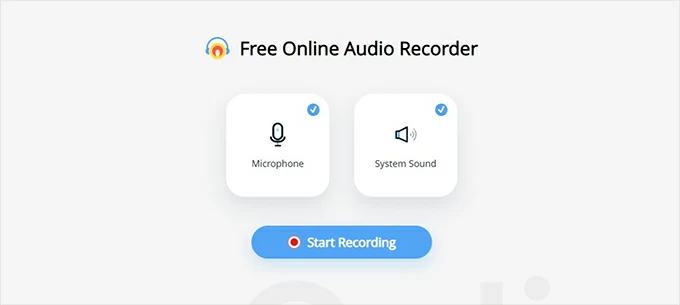
In addition to browser extensions, to record audio from browser without downloading recording software, an online website audio recorder is a good choice, such as Apowersoft Free Online Recorder. It can record audio from any tab of a web page and capture sound from computer.
Note:
Conclusion
If you're still hesitant about which method to use to record audio from browser, consider asking how many output formats it offers, whether it supports stable extended recording, or whether it offers lossless resolution and a personalized recording schedule. Considering these factors, Appgeeker Screen Recorder is undoubtedly the best way to meet the above criteria. Don't hesitate to give it a try now!


