
How to Record MP3 Audio in Windows 10

Find your Snipping Tool not working on your Windows machine? If you suffer from this annoying issue, find solutions on this page!

Snipping Tool is a Windows built-in application allowing you to take screenshots as well as screen recordings. Although it is simple and easy to use, there are some Snipping Tool is not working issues on Windows 10 and 11 like the screenshot shortcut key not responding, or an error message when taking a screenshot.
Not knowing what to do? Read the following instructions and solve Snipping Tool not working on Windows 10/11 with ease.
Table of Contents
It is essential for you to know how Snipping Tool works before troubleshooting. Snipping Tool can help you make a screenshot as well as annotate it quickly:
After grabbing the screen, you can find the screenshot in Notifications or paste it to other apps. Additionally, it offers more features that allow users to record videos on Windows 11 without hassle.
This is an official solution to solve Snipping Tool not working on Windows 10/11 since it's a non-security update to fix the normal opening and use of particular apps, including Snipping Tool.
Check and update your Windows:

It's known to all that running excessive tasks is a common cause of computer crash. To avoid Snipping Tool not working in Windows 10/11 or even turning your computer into a brick, it's high time you performed a clean boot for Windows:
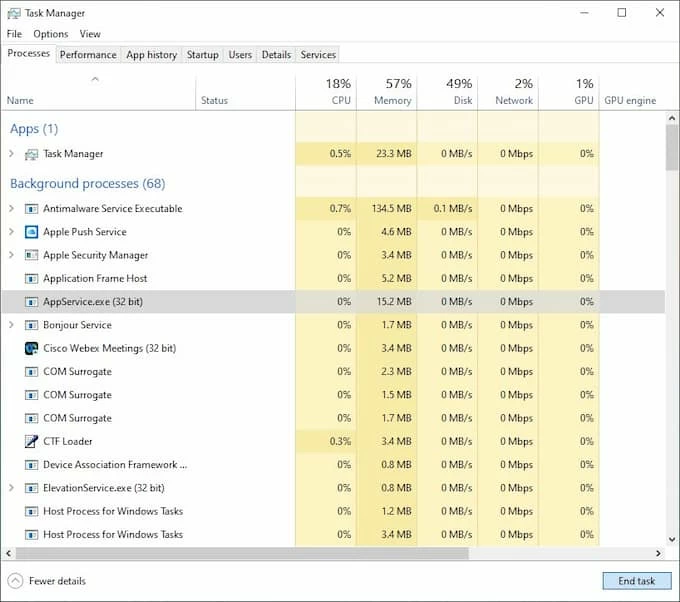
Step 1: Right-click on the Windows icon and find Task Manager.
Step 2: Close the unnecessary programs to release process.
Step 3: Open Snipping Tool again to see if it works.
Actually, the Snipping Tool offers help to reset and repair itself officially when it is not working right on a Windows 11 PC or laptop. Here are the steps to get Snipping Tool working again:
Step 1: Go to Settings > Apps, search for Snipping Tool in the list and select Advanced Options.
Step 2: In the pop-up window, click Repair and wait for a checkmark to appear.
Step 3: If you find Snipping Tool is still not working on Windows, you can reset it on your computer, which is under the Repair button.
Once the reset process finishes, restart the program to see whether it can record screen on your Windows laptop again.
Windows System offers masses of ways to minimize distractions to make it easier for you to focus on tasks, which includes Focus Assist. This feature really helps when you want to do important work, but it may prevent you from using Snipping Tool or seeing the floating capture as it disables notifications. Learn how to disable Focus Assist:
Do you enable the Snipping Tool on your Windows to have access permissions to take screenshots? Check on your machine if it's the reason the Snipping Tool not working!

A failed download or unsuccessful update probably leads to Windows Snipping Tool not working right. To solve this problem, you can uninstall and reinstall the program.
Step 1: As before, open Installed apps in Settings and find Snipping Tool, click Uninstall and wait for its automatic unloading.
Step 2: Once it's done, you can reinstall the app from the Microsoft Store.
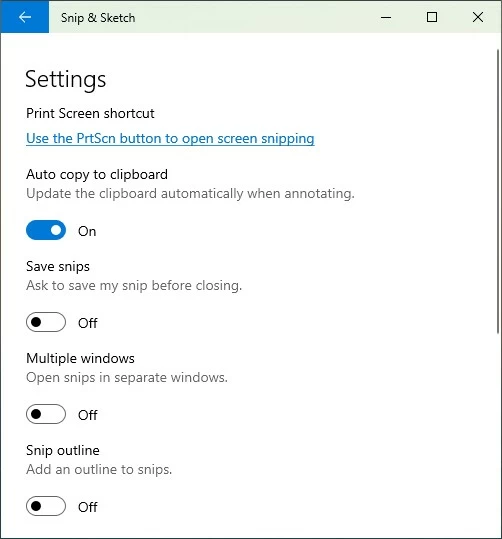
Instead of saving the screenshots to your computer, Snipping Tool will copy the pictures to the clipboard automatically if you have the feature on. To turn it off, you'll need to first launch Snipping Tool on your Windows, select the three-dot option and find Settings. In the pop-up window, you can click off auto copy to clipboard.
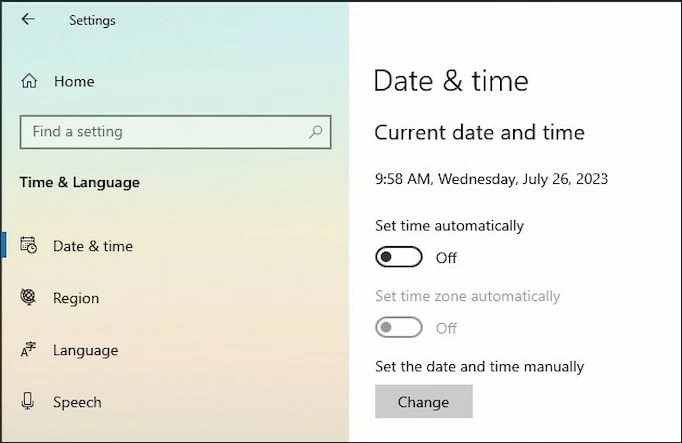
Snipping Tool is not working possibly because of the faulty time setting related to the app's digital certificate. To avoid the app crash, you can disable automatic time temporarily:
1. Open Settings, select Time & Language and go to Date & Time.
2. Click off the Set time automatically button and set the date and time manually.
3. Don't forget to set the correct time when using the computer normally.
Snipping Tool is an indispensable utility of Windows 10/11 to capture screenshots in people's daily life and work, so we attach great importance to its normal running. Since we have discussed 8 useful solutions to Snipping Tool not working in the above article, you can fix the problem easily.


