
How to Screen Record Desktop on Windows 10

If you want to record your activities or want to record a video being played on Windows 11, then this article will give you instructions on how to record videos on a Windows 11 PC.

Many different options are available to meet your needs for recording video on Windows 11.
Many users find that they need to capture video clips for multiple reasons. By recording what you are doing on your desktop, you can share invaluable tutorials, show gameplay, or simply keep a copy of the processes you are performing. No matter why you want to get one, you will need to know how to take a video record on Windows 11.
Luckily, Windows 10 and Windows 11 have a built-in tool that you can immediately use to capture your video on computer. The Xbox Game Bar tool is already installed on your computer and you can start recording videos with the right combination of keys.
Even though the Xbox Game Bar tool is very easy to use, it also has its limitations. If you are looking for a more dependable video recorder for Windows 11, you can try a third-party tool. And AppGeeker Screen Recorder is a great option to complete the task with ease.
Table of Contents
The first method that shows you how to record videos on Windows 11 is to use the system's built-in tool, the Xbox Game Bar.
If you're not a gamer, you probably know by now that there's a built-in recording tool in both Windows 10 and Windows 11 called the Xbox Game Bar. In essence, this is a gaming overlay that is highly customizable and enables you to perform various tasks while gaming. Nevertheless, its functions can be useful to every user, regardless of whether they are gamers.
In more detail, the Xbox Game Bar is a fantastic tool that allows you to use several widgets, such as Spotify, your Xbox achievements, and even your Xbox social to communicate with your friends. But one of the top features of this tool is that you can start recording both your screen's video and audio on Windows 11 with just a few taps on the keyboard.
However, Game Bar cannot record the desktop and File Explorer, and it can only record one running program at a time.
Tip: If you want to record full-screen Windows 11 video and need more advanced video editing features, then you can click here to jump to the way to use the video recording tool.
Learning how to record a video on Windows 11 with the Xbox Game Bar tool is an easy process. The great thing is that the tool is already installed on your PC and you don't need to download it. For this reason, you can immediately start capturing your video.
Step 1. Decide what you wish to record
The first step is to decide what you want to capture and launch that application or load the website on the Windows 11 computer.
Step 2. Start video recording
When you are ready, click the Windows key + Alt + R to start video recording. You can view the recording through the small box that appears on the screen, including the recording duration.

Press Windows key + Alt + R to start recording your selected activity.
Tip: You can also use Windows Key + G to open the Game Bar widget and select the Start Recording button in the Capture section.
Step 3. Perform your task
Then, simply perform the task you wish to capture.
Step 4. Stop the recording
When you have completed the task, tap the Windows Key + Alt + R once more to stop the recording. You can also click the little stop button in the recording box. When you see the message "Game clip recorded" on your screen, you can be sure that the recording is over.

"Game clip recorded" means your recording has been saved.
Step 5. Find the recorded video
You will be able to access your video recordings by clicking on "Game clip recorded", or from the Captures folder.
You can view the recorded videos by using the Windows key + G and opening Captures > See my captures.
Read Later: How to record computer screen from Mac
This video recording tool coming with Windows 11 is very handy on many occasions as you can access it whenever you need it. To make things even better, you can also configure it so that it meets your demands.
You can access the configuration options by tapping the Windows key and navigating to Settings > Gaming > Captures. There you will see many configuration options available, allowing you to customize your video recording to your needs.
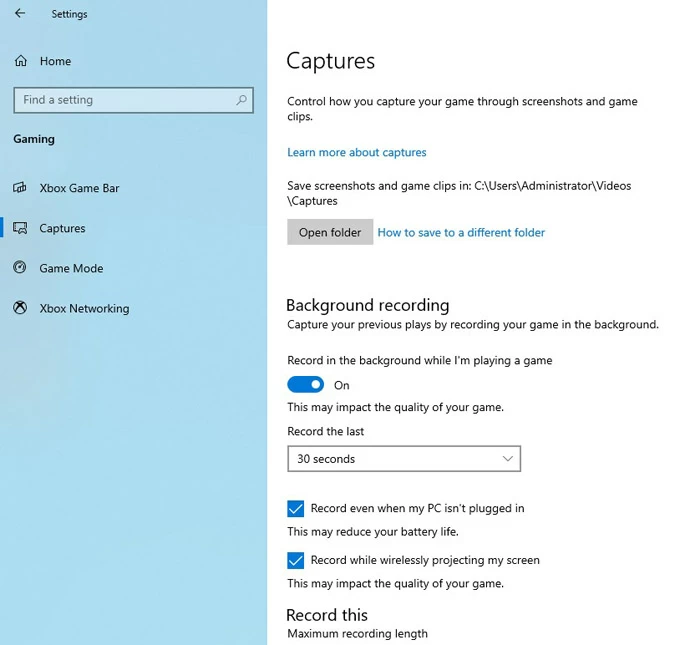
Head to Settings > Gaming > Captures to change the configuration according to your needs.
AppGeeker Screen Recorder is one of the most reliable apps that you can use to record a video on your Windows 11 PC. It is unique in that it is designed specifically to work with many different types of recording, boasting the ability to record 4K video along with high-quality audio, including external and internal sound. This all-in-one software will amaze you with its numerous features that replace all the other screen recording apps you might have tried.
Here is how to record video on your Windows 11 PC using AppGeeker Screen Recorder:
1. Download the app and run it on your PC. On the main page, click the "Video Recorder" option.

2. Once you do this, you will see all the settings for your video recording. You can specify the size of your recording by selecting "Full" or "Custom." During this step, you can also adjust your sound sources (Sound System & Microphone).
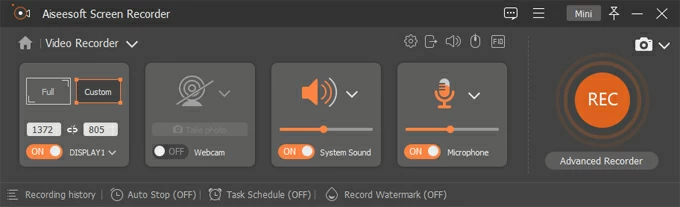
3. Then click on the big "REC" button to start your recording. The app will give you a few seconds to prepare yourself as the capturing will begin after the 3-second countdown.
Note:
4. When you have completed the task, you can end the recording by clicking the stop icon located on the left side of the taskbar.

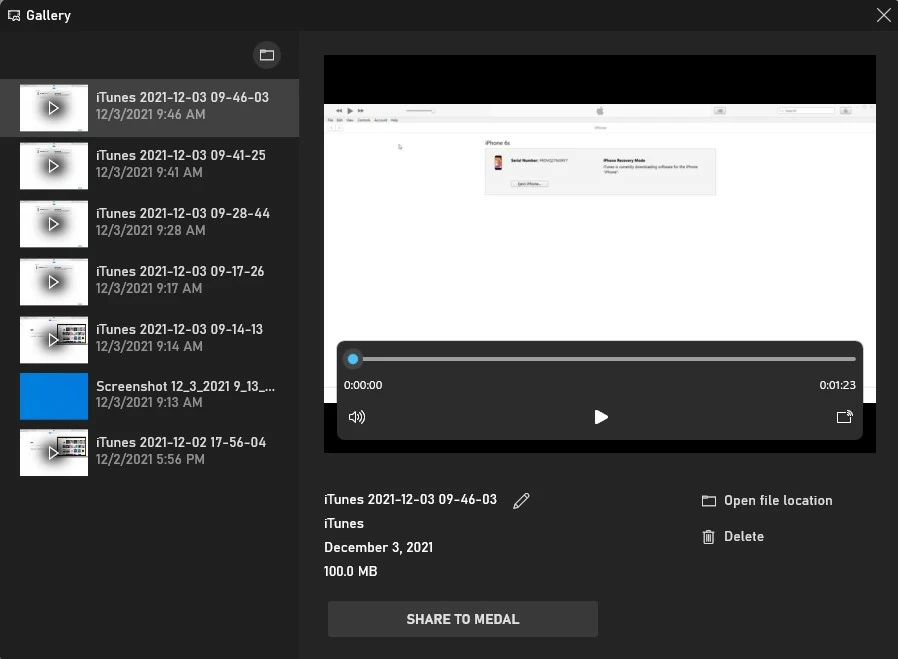
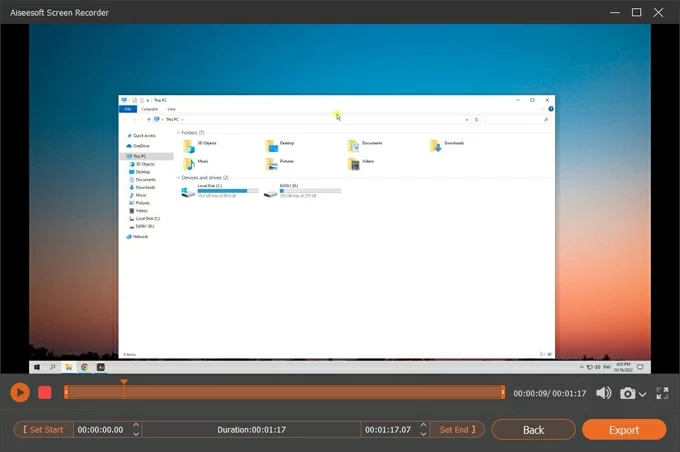
5. After clicking the stop icon, you will get a preview of the video. You can either click the "Done" button or choose to edit the video. Once you have saved it, you will be able to find it in the Recording history section.
Other tools, in addition to AppGeeker Screen Recorder, can assist you with making video recordings on Windows 11. One of the most well-known applications is OBS Studio, which you can download on your computer and use for free to record videos played on Windows 11.
Here are the steps to record videos on Windows 11 via OBS:
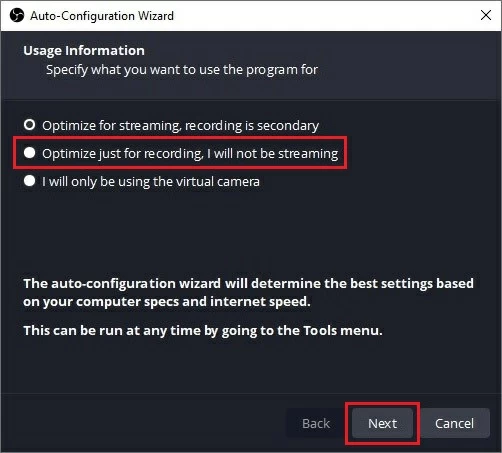
1. Download the app on your computer. During the installation process, select the "Optimize just for recording, I will not be streaming" option. Then, the app's auto-configuration wizard will automatically detect and select the best choices for your device.
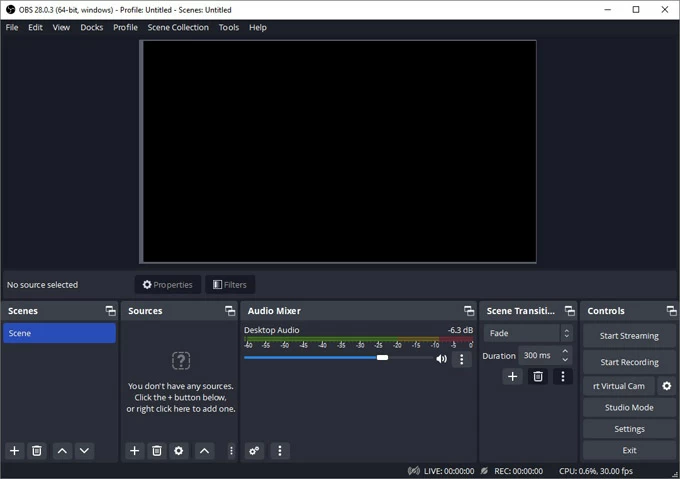
2. On the main screen, click the "+" icon under the Scenes section to add a new scene.
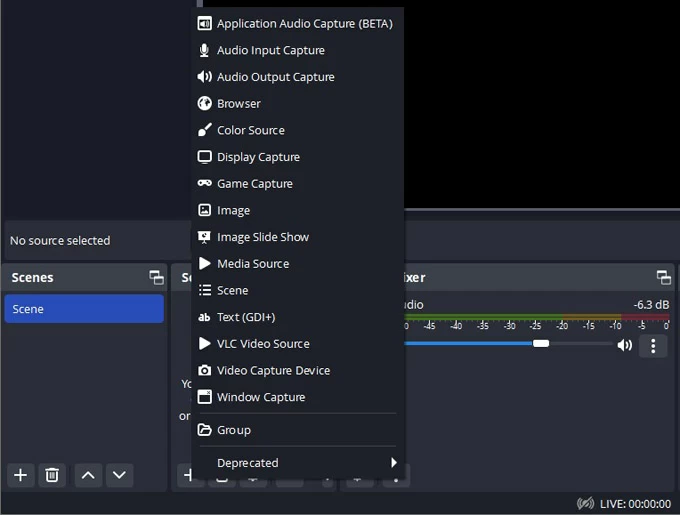
3. Then, locate and click the "+" icon under the Sources section to add "Display Capture." And adjust the volume levels of your audio sources in Audio Mixer.
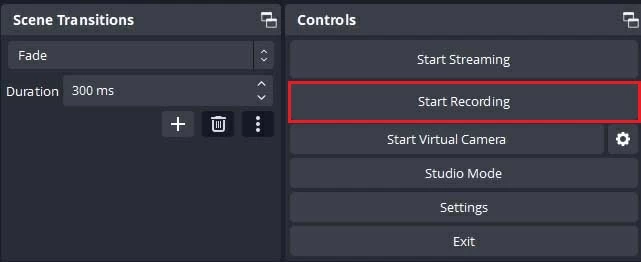
4. Once you are ready, locate and click the "Start Recording" button that you will find under the Controls section.
5. Complete the task you wish to capture and then click the "Stop Recording" button.
Learn More: How to record audio on computer
If you think it's too complicated to record video with OBS on a Win 11 computer, you can also choose Microsoft PowerPoint as an alternative. Even though it doesn't provide you with numerous functions, it can capture the screen contents of Windows 11 PC to compose a video.

The recorded video will be automatically added to your PowerPoint, then right-click on the video and select the Save Media as option to save the recorded video to your Windows 11 computer.
Actually, it's not difficult if you want to record videos of yourself on Windows 11, but you need one indispensable thing - a webcam. Windows 11 laptops usually come with a built-in webcam, while you will need to have an additional webcam if you have a Win11 desktop PC. To record video with a webcam on Windows 11 and 10, follow these steps:
1. In the Windows search field, type "Camera" to search for and open the application.
2. Select the camcorder icon to switch to video mode.
3. Click the "Video" button to start recording video.
4. Click the "Stop" button to end. The recorded webcam video will now be saved on your Windows 11 PC.
Tip: If you don't want to use an additional camera or you want to record Windows 11 screen and yourself at the same time, then use AppGeeker Screen Recorder, a powerful recording software to meet all your needs.


