
Using QuickTime to record screen and audio - A tutorial

Learn how to stop QuickTime screen recording on your Mac with this guide. Find out the steps to stop your recording effortlessly.

QuickTime is a versatile multimedia player developed by Apple Inc. It comes pre-installed on all Mac computers and offers various features, including video playback, audio recording, and screen recording. QuickTime's screen recording feature allows you to capture your entire screen or a specific portion of it, along with audio from your microphone. Whether you're a professional or a casual user, QuickTime's screen recording feature can be useful.
However, once you start a screen recording session using QuickTime, you might wonder how to stop QuickTime screen recording. This is because the "Stop" button is not very apparent. In this guide, we will walk you through the steps to stop QuickTime screen recording on your Mac.

It can't be easier to stop screen recording QuickTime on a Mac with simple and quick steps.
Tip: QuickTime Player can't record screen and system audio for Mac at the same time. Fortunately, there is a professional third-party tool AppGeeker Screen Recorder that can capture screen, system audio and microphone audio separately or together.
Table of Contents
One of QuickTime's most convenient features is the ease of recording your screen. You don't need to be skillful to start recording your Mac's screen, but you may have trouble ending QuickTime screen recording. This can happen if you can't find the "Stop" button.
Have you been plagued by this problem for a long time and want to find out how to stop screen record on Mac? Let's get started with the steps to stop QuickTime screen recording on Mac.
Step 1: Open the QuickTime Player application on your Mac. You can find it in the Applications folder or use Spotlight to search for it.
Step 2: Click on "File" in the menu bar located at the top of your screen. From the drop-down menu, select "New Screen Recording."
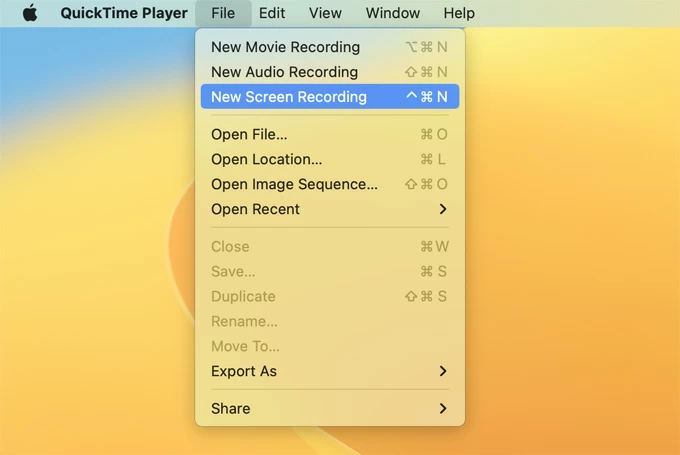
Under QuickTime Player's top menu bar, select New Screen Recording under File.
Step 3: Click on the small arrow next to the record button. This will open a menu where you can select the microphone input, show mouse clicks in recording, and choose the recording quality.
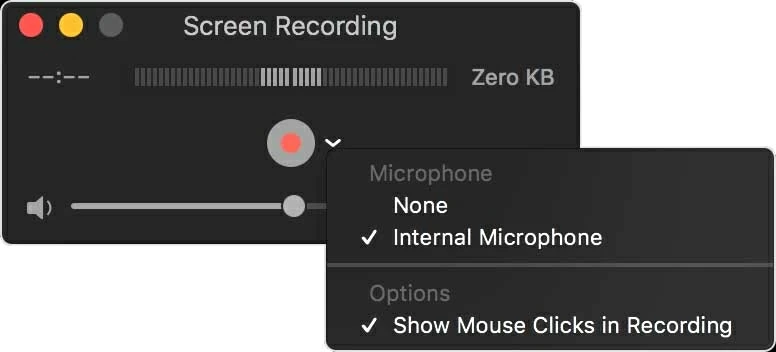
Customize microphone input and other settings by clicking on the small arrow next to the record button.
Step 4: Click anywhere on the screen to record the entire screen. If you want to record only a portion of the screen, click and drag to select the desired area.
Step 5: Click on the red record button to start Mac screen recording video.
Step 6: Hover over the recording bar and click "Stop" in the top menu bar to stop the QuickTime screen recording. If you can't find the recording bar, click the "Esc" button and the "Stop" command will appear.
![]()
Use the keyboard shortcut or stop button to exit QuickTime screen recording.
Step 7: Preview the video after QuickTime Player stop screen recording. Then save it by clicking on "File" > "Save". Finally, choose a location on Mac to save the video file and give it a name.

Choose a suitable location on your Mac to save the QuickTime recorded video.
Extra tips:
In addition to the above method, you can also end QuickTime screen recording with the help of keyboard shortcuts if you're using macOS 10.14 Mojave and later. Here's how to stop screen recording in QuickTime on Mac using shortcut:
Step 1: On a Mac, press the keyboard shortcut "Shift+Command+5" at the same time or use Launchpad to open Screenshot and display the tools.
Step 2: Select one of the two choices in the box below. One indicates recording the entire screen and the other indicates recording a portion of the screen. You can make a choice according to your needs.

Select to record the entire screen or a portion of the screen.
Step 3: Press the keyboard shortcut "Control + Command + R" to start recording, you can also click the "Record" button on the screenshot toolbar.
Step 4: Use "Control + Command + Esc" to stop recording Mac screen, or you can click the "Stop" button on the floating toolbar.

Use the keyboard shortcut "Control + Command + Esc" to stop recording the screen
Step 5: A preview thumbnail will appear in the bottom-right corner of the screen. You can click on it to open a window with playback controls. Then you can also click on the "Done" button to save the recording. Alternatively, you can use the keyboard shortcut "Command + S" to save the recording.
That's it! You can customize these keyboard shortcuts in the Shortcuts pane of Keyboard preferences. On your Mac, choose "Apple" menu > "System Preferences", click "Keyboard", and then click "Shortcuts".
Sometimes you can't stop QuickTime's screen recording using the "Stop" button. If QuickTime freezes, you may need to force quit the application and stop QuickTime from screen recording.
Step 1: Open Activity Monitor
Simply move to the "Applications" folder in Finder, open the "Utilities" folder, then double-click on "Activity Monitor" to launch it. Alternatively, you can go to Spotlight Search (F4) and type in Activity Monitor to open it.
Step 2: Locate QuickTime in Activity Monitor
In the Activity Monitor window, you will see a list of processes running on your Mac. Use the search bar in the top-right corner of the window and type "QuickTime". The list will update, and you should be able to see the QuickTime process.
Step 3: Select and Quit the QuickTime process
Click on the QuickTime process to select it. Once selected, click on the "X" button in the top-left corner of the "Activity Monitor" window. A confirmation dialog will appear asking if you want to quit the process. Click on the "Force Quit" button to stop the QuickTime screen recording.
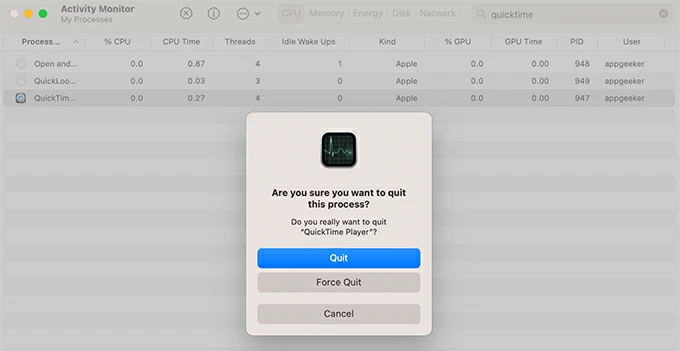
Click on the "Force Quit" button to stop the QuickTime screen recording
Note:
If QuickTime stops responding and you can't quit screen recording in QuickTime Player normally, then we can use Mac's built-in Force Quit function, here is a step-by-step guide to help you:
Step 1: Start by pressing the "Command + Option + Esc" keys on your keyboard simultaneously. This will bring up the Force Quit Applications window.
Step 2: Browse the "Force Application" window until you find "QuickTime Player". Highlight the app and press "Force Quit" to terminate the recording.
Step 3: A confirmation dialog box will appear, asking if you are sure you want to force quit QuickTime Player. Click on the "Force Quit" button to confirm.
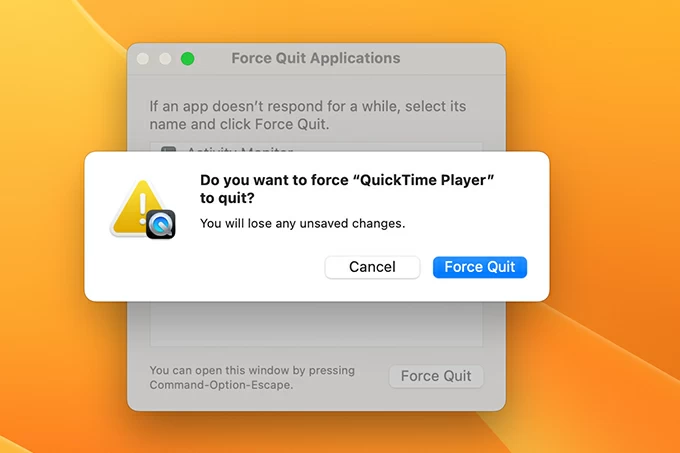
Confirm that you force quit QuickTime Player.
Although we can use QuickTime to create new recordings without installing any third-party software, it can also lead to a series of troublesome issues, such as quitting unexpectedly, not being able to stop Mac recording, getting stuck on finishing recording, etc.
To record screen smoothly and professionally on Mac, AppGeeker Screen Recorder is the best choice. It is a great app that allows macOS & Windows OS users to start and stop screen recording with ease. It comes with the following highlights.
Main Highlights:
Let's get started with the steps on how to stop screen recording on Mac using Screen Recorder.
Step 1: Download and install the AppGeeker Screen Recorder app on your Mac, then launch it.
Step 2: To screen record on Mac, select "Video Recorder" on the main interface.

There are four screen record modes for you to choose from.
Step 3: Customize the size of the screen to record, both full screen and custom size are available. You can choose to turn on the camera, system sound and microphone.
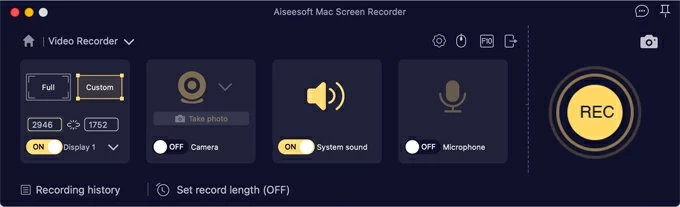
Customize the size of the recording screen on Mac and choose to turn on the sound or camera.
Step 4: Click on the "REC" button on the toolbar to start the screen recording.
Step 5: Click on the "Stop" button on the recording toolbar if you want to end the screen recording. It is the red square icon.
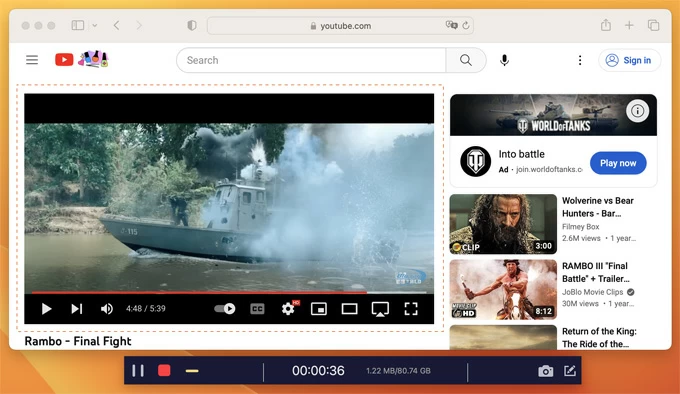
Press the red square button to exit screen recording on your Mac.
Step 6: When you stop Mac screen recording, preview the video and click "Save" button to save it on your Mac.
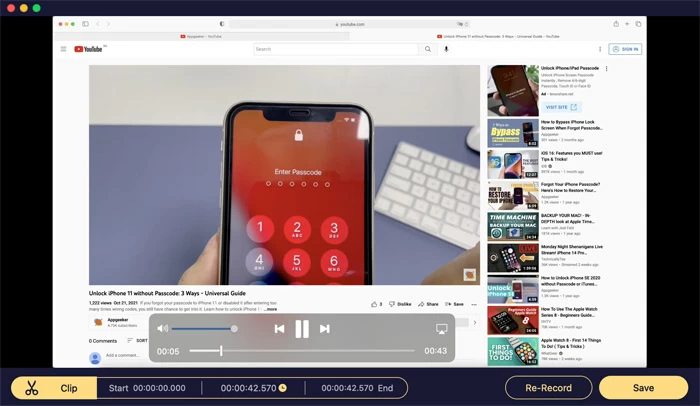
Save the recorded video on your Mac for easy viewing.
1. How do I stop QuickTime screen recording without stop button?
You can stop QuickTime recording by pressing "Command + Control + Esc" on your keyboard. If the QuickTime screen recording freezes, you can force quit QuickTime to stop the recording. Remember, QuickTime may not save your recording.
2. How to pause screen recording with QuickTime Player?
When recording screen using QuickTime, the pause button is hidden. To stop and resume a QuickTime screen recording on Mac, follow these steps.
First, click on QuickTime in the dock to make it active.Then, press the Esc key to bring up the Recording bar. While holding down the Alt (option) key, the Pause button will be revealed. Click on the Pause button to temporarily pause the recording. When you're ready to resume, simply click on the red button to continue.
3. How do I record myself and my screen at the same time with QuickTime?
QuickTime enables you to record yourself and your screen separately. To record yourself using QuickTime, begin by launching it on your Mac, select "New Movie Recording" under the "File". Then, navigate to the "View" menu and select "Float on top" to ensure that camera window remains visible above any other application on your screen.
Next, to record your screen using QuickTime, go to the "File" menu and choose "New Screen Recording". When you are ready to start recording, click the red "Record" button. Finally, press the "Command-Control-Esc" key to end QuickTime screen.
By the way, AppGeeker Mac Screen Recorder can help you record yourself and your screen at the same time. It's a one-stop screen recorder with basic editing tools for recording video from your Mac webcam, microphone, screen, speakers, and more!