
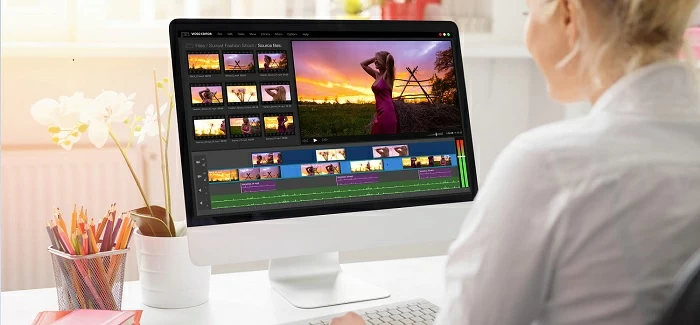
How to Record a Song on Your Computer

Besides being a built-in media player on Mac, QuickTime Player also doubles as a practical screen recorder. Here's how to use it to record screen and audio on Mac.

What you need to know before recording screen and audio by QuickTime Player:
To screen record Mac with sound via QuickTime Player can be easier than you think.
For Mac users, the built-in tool QuickTime Player can be of great help for recording screen and audio especially when you need to record a video on YouTube that is unable to download, or show others onscreen steps of using a software, or even display what technical glitches your computer is suffering from, etc. In spite of the reason, you can use QuickTime to screen record on Mac with audio in a breeze.
In the following parts, we'll focus on how to take a screen recording on Mac with audio using QuickTime Player. If you happen to be reading this article on your Mac, then you are all up for starting straight away to try this tool.
Selectively, you can use a comprehensive recording tool, AppGeeker Screen Recorder to record screen and audio for Mac, by which sound from your microphone and Mac can be captured at the same time during the screen recording.
Table of Contents
Record screen with sound from microphone via QuickTime
QuickTime screen recording with internal audio
Screen Recorder - Record screen with any audio instead of using QuickTime Player
With the ability to play, record and edit videos / audios, QuickTime Player is a built-in multifunctional media player as well as screen recorder on Mac. Thanks to its handy features and clean interface, it enjoys broad popularity among Mac users.
However, it still has some caveats, covering nonsupport of webcam recording, video exporting only in .mov format and failure to record both internal and external audio simultaneously.
Moreover, QuickTime Player is only available for Mac now, since Apple discontinued the support for Windows in 2016. If you are looking for how to record screen on Windows, you may check these articles for more details:
It's not hard at all to record screen and audio with QuickTime Player on your Mac. Depending on the audio that you need to capture, follow the tutorial below to begin the screen recording.
QuickTime Player allows you to record screen as well as audio from your selected microphone. Read on to check out the steps.
Step 1. Open what needs recording on your Mac, a game, a video or a browser, etc.
Step 2. Run QuickTime Player. You can search for it in the Launchpad if you can't find it.
Step 3. Click on File at the top left corner of the screen, and then select New Screen Recording.
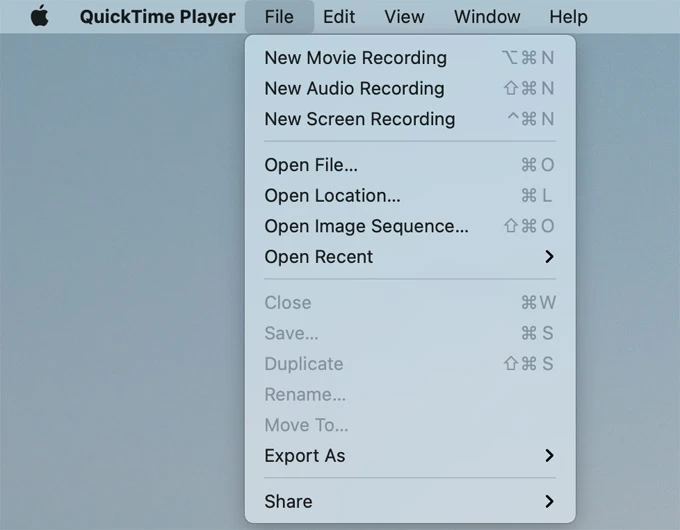
Start screen recording your Mac with audio from File > New Screen Recording in the QuickTime Player.
Step 4. You will be directed to the Screenshot toolbar, where different options are available. According to your recording requirement, select Record Entire Screen or Record Selected Portion.

With a shortcut of Shift + Command + 5, the Screenshot toolbar will also show up on your screen.
Step 5. Hit Options, and choose [your name] Microphone from the pop-up list, enabling you to record both screen and audio from your microphone.
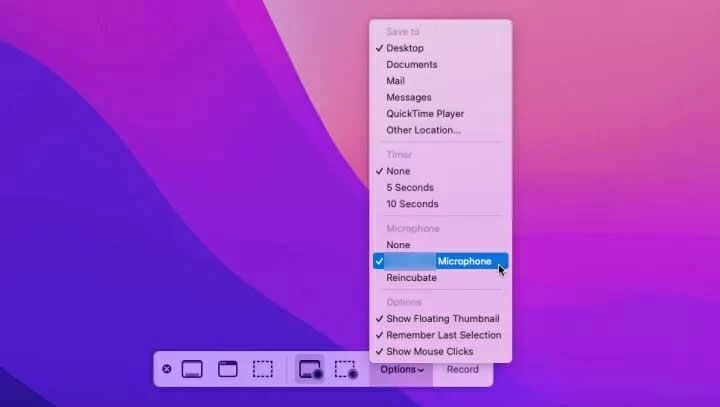
Select an appropriate microphone to capture what you speak about during the screen recording.
Step 6. Click Record to start capturing screen and external audio on your Mac.
Step 7. After recording what you want, hit Stop in the top menu bar. You can then review and edit the recording, and eventually export it from File > Save in .mov format.
Note:
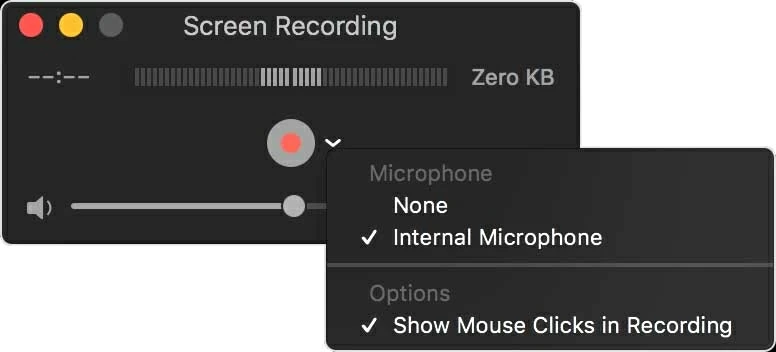
In the Screen Recording window, select Internal Microphone before screen recording with audio from microphone.
1. Similarly, open QuickTime Player and go to File > New Screen Recording.
2. With the Screen Recording window presented, hit the down arrow to select Internal Microphone for audio recording while capturing the screen.
3. Hit the Record button to start recording. Then click anywhere on the screen if you need to record the whole screen, or drag to select an area and hit Start Recording to capture the activity in the chosen area.
Tip: You can adjust the slider below the Record button to increase or lower the volume of the external audio during the screen recording.
4. Act as needed on your Mac, and hit the Stop button to cease the screen recording in QuickTime Player. After checking and editing the recorded file, you can rename and save it in your selected folder with the Save option in File.
Although QuickTime Player is an effective tool when it comes to recording screen and audio, it lacks the ability to directly record internal audio during screen recording due to security reason. However, you can still use QuickTime for recording screen with audio from Mac by simply downloading a plug-in like Soundflower and setting up the audio output source.
In order to get your Mac record screen with internal sound, you need to download and install Soundflower first on the computer. Next, hit the apple icon at the top menu bar, and go to System Preferences > Sound. In the Output section, choose Soundflower (2ch) as the sound output of your Mac.
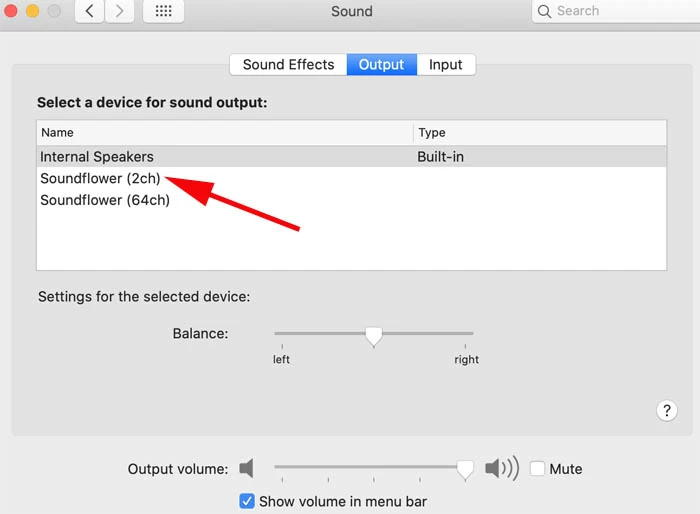
Pick Soundflower (2ch) for sound output in the Mac audio settings.
Open QuickTime Player, and hit the down arrow next to the Record button to select Soundflower (2ch) as the audio source. Later, you can take the above steps to record screen together with sound from Mac using QuickTime.
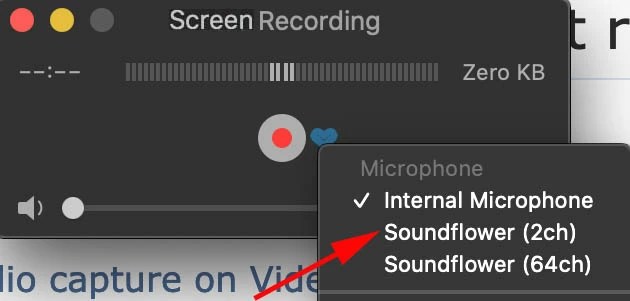
You''ll have to select Soundflower (2ch) in the recording options before capturing screen with system audio.
Note:
QuickTime Player is a satisfying screen recording tool, but there's a downside to it - it cannot record screen with internal and external sound at the same time. If you have this need, the AppGeeker Screen Recorder can be the optimal choice.
It is an ideal all-in-one recorder that's capable of recording video and audio simultaneously on Mac, as it can capture everything that's happening on your computer screen along with any audio, no matter it's internal and external sound; you can selectively record either or both. This makes recording and mixing system and microphone audio easier when screen recording.
Features of AppGeeker Screen Recorder:
Steps to record screen and audio on your Mac with this tool:
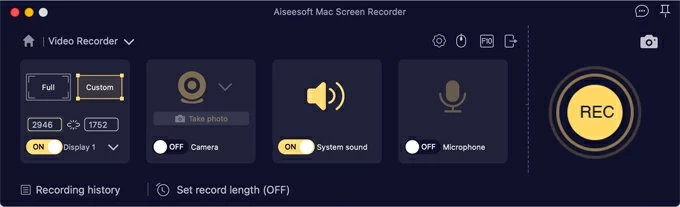
Step 1. Launch the AppGeeker Screen Recorder on your Mac. Open it and select Video Recorder in the main interface.

Step 2: Select a desired area for recording in the left, and switch on System sound or Microphone based on what audio needs to be captured.
Tip: Before recording, you can also customize other settings with the options available above Microphone, including showing the countdown, highlighting the mouse cursor, or making format adjustments and so on.
Step 3: Hit REC to start screen recording your Mac with any audio you want. In the recording process, you can see the recording time as well as the file size in real time.
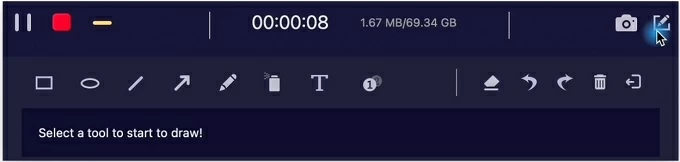
Step 4: Once done, just click the Stop button next to the pause button to stop the recording. You can then preview and clip the video before you export it to your computer.
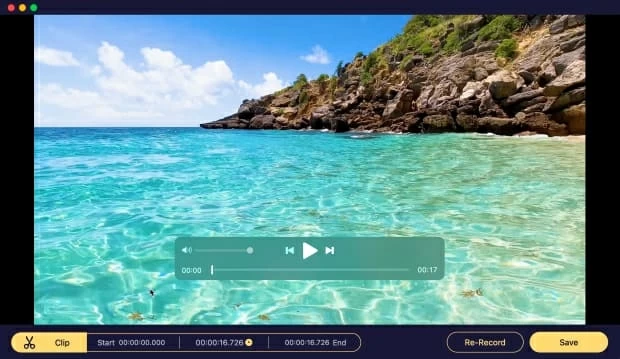
If the recorded video doesn't meet your requirement, there is a Re-record button for you to record the screen and audio from scratch.
Final words
As you have seen, it's not that complicated to record your Mac screen and audio via QuickTime Player. With this step-by-step guide, you can easily record screen with audio using the tool.
But should you want a more advanced option, the AppGeeker Screen Recorder would be the one, since it allows for more flexible and even complex screen recordings with different audios.
If QuickTime Player cannot fulfill your need, you can choose the latter to record screen better.