
How to Convert from WAV to Apple Lossless for Mac


WMA (Windows Media Audio) is audio format used mostly for music, adopting the very same principle as MP3 to reduce the file size. Thus WMA has come a long way and can be played by a growing number of media players for high-fidelity sound. However, since WMA is proprietary to Microsoft, and this should limit the possibilities of where and how you can use your files. That's to say, there are still many mainstream devices don't play WMA files well, say, any Apple gadget. If you have stored the songs in .wma in your collection, and you want to move to iPhone or other players for native playback, then you probably need to convert WMA to MP3, a more accessible and definitely the most well-supported format, before you can revel in your tunes.
When it comes to audio conversions on a Mac (or a PC), Video Converter for Mac (for Windows) is one of the robust and comprehensive software made specifically for converting media files on a Mac machine or Windows computer. Not only can it effectively convert between audio files, WMV straight to MP3 in this case is no exception, but also enables you to quickly convert a slew of video formats over to another for wide or native playback-removing the incompatibility on various devices without discarding the resulting file quality.
On the other hand, you're able to take the music tracks out of a video and save as any formats you desire, like M4A, M4R, WAV, AAC and many others and later you my put them into music players for portable listening. For instance, it's a wise choice for MKV footage to common MP3 soundtrack conversion for handheld media players. Apart from its primary function of conversion, it holds fundamental editing options for applying special effects on media files, and the output quality of the files is controllable based on its built-in advanced configurations.
Step 1: Add WMA Files from Local Folder
Click on "Add File" (see top-left place) to navigate to the local folder and load the audio files formatted in WMA to the conversion list.
Alternatively, you can directly drag the files onto the central area of the interface.

Step 2: Choose MP3 as Output and Configure the Parameters
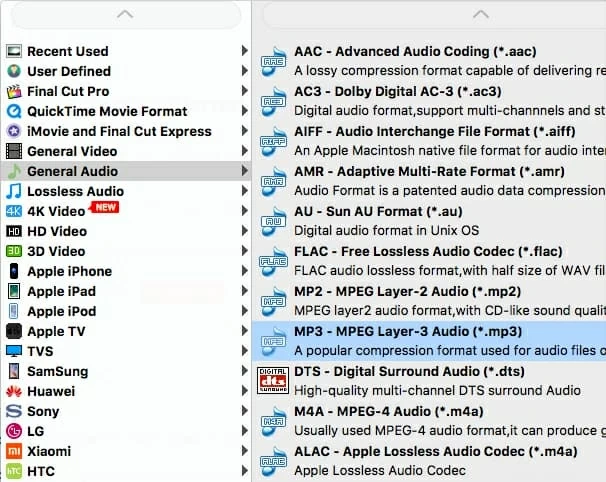
Once all your source WMV tune files have been uploaded, move your mouse cursor on "Profile" (see lower bottom side), press it to drop down a list with a wealth of profiles included like the screenshot below.
In this case performing the conversion directly form WAV to general MP3, we pick "MP3 – MPEG Layer-3 Audio (*.mp3)" in the opening "General Audio" category.
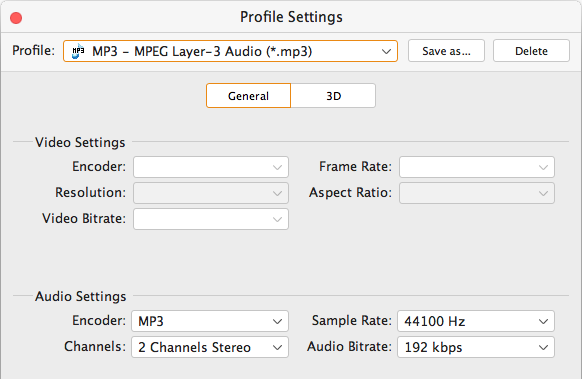
This is an optional part. Press "Settings" (beside "Profile") to gain access to the advanced settings for the final audios. You can tweak Sample Rate, Channels and Bitrate. For those who want to play MP3 files on iPod, 320 Kbps of Bitrate is recommended here.
There's also a way to let you know whether the resulting audio files is good enough for your expectation. Hover over the thumbnail of the file on the conversion list and press the "Play" button, then you files content will display on the "Preview" window, from which you can see the output quality is exactly the same as the original track.
Step 3: Specify Location for the Results and Start WMA to MP3 Conversion
When you're satisfied with all the settings, click "Browse" (under "Settings") and browse to a local folder where the output MP3 files will be stored or rename it in the "Destination" area.
Then simply hit "Convert" and wait for the WMA to MP3 conversion to finish in Mac.
That's it. You can now test your new MP3 file using any player that supports that format and then use it as you please: importing to iTunes or transferring to your handy devices. Enjoy yourself.

This method is easy, straightforward and gives good results. As long as the audio you use is not corrupt, the conversion should work smoothly.