
How to Record Gameplay on Win11

Many players make PS4 gameplay tutorials via the PC monitor. Get the right tools and follow our step-by-step guide to capture your favorite PS4 games on your PC.

Aside from the PS4 built-in recorder, you can capture PS4 games via a capture card. Without a capture card, desktop programs like OBS and AppGeeker Screen Recorder are great choices for PS4 game recording. Install them and follow the guide below to capture the PS4 games on your PC step by step.
The Ps4 offers free Multiplayer titles, superior exclusives, as well as controller and VR capabilities absent from the Xbox.
PS4 is a popular home video game console with hundreds of millions of users worldwide, spawning many game bloggers and players to share their gameplay on the internet. The point is PS4 gameplay recording on the console has limitations, hence users prefer to record the PS4 game on a computer monitor.
Recording PS4 gameplay on PC is a great way to share your favorite gaming experiences online. With the right tools, it's easy to make it and upload the gameplay to YouTube.
Table of Contents
Before we tackle the topic of recording PlayStation 4 games on PC, let us give you a rundown of the game recording tool, DVR, that comes with the PS4 console. This native recorder gives users the ability to share clips on YouTube and other social media sites directly from the console. It is set to only allow a 15-minute recording, but you can extend it to an hour. Anything longer than that will require you to find other options.
Let's delve into how to record PS4 gameplay with Digital Video Recorder.
1. On your PS4 controller, press the Share button.
2. Select the Capture Video option.
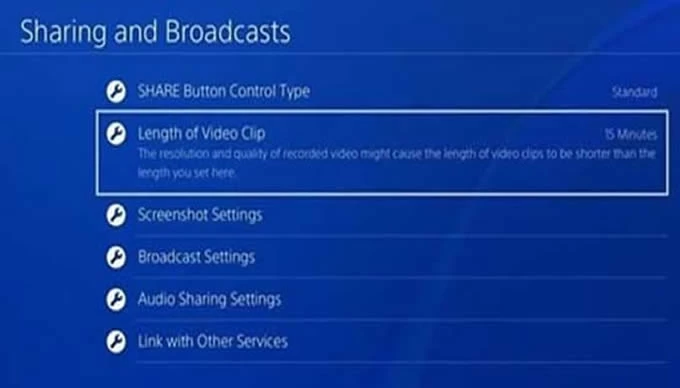
3. Choose the length of the video clip you want to record. You can choose the recording time as 30 seconds or 1/3/5/10/15/30/60 minutes.
To record the game with your voice at the same time, you can open the Audio Sharing Settings and select Include Microphone Audio in Video Clips.
4. Press the Share button twice. Or select the Start Recording option to start recording your PS4 games.
5. When you're finished recording, press the Share button twice again to Stop Recording.
6. Your video clip is now saved to your PS4 and can be accessed in the Capture Gallery. You can trim the game recording by pressing Options and going to Trim list.
Once you are done with these steps, you are available to save the PlayStation4 game clip to your computer or share it to game sites.
A capture card is the most preferred choice for PS4 gameplay recording on PC. It operates by taking video from one source and transferring it to another, hence it is a straightforward and productive way to capture your gaming with a laptop. In addition, capture cards come in a selection of hardware and software, allowing you to choose the one that is compatible with your device and satisfies your requirements.
To grab your gameplay with a capture card, you'll need to assemble some items: the PS4 console, an HDMI cable for connecting it to your computer, a capture card, a laptop with game capture software, a microphone (optional for recording your voice when playing), an external hard drive, a USB cable, and a game controller. After having these materials, you can start recording your PS4 games on the PC.
1. Connect the capture card to your pc with a USB cable. There're various types of capture cards. Make sure that your capture card is compatible with your computer's operating system.
2. Connect your PS4 to the capture card using the HDMI cable. You can see the HDMI IN port on the rear of the PlayStation 4 and the PC monitor. Once connected, you can see the game presented on your pc.
3. Install and launch the desktop recorder on your computer. To record the game on Windows PC, Xbox Game Bar is a reliable tool. It is the built-in recorder for Windows 10 and later versions.
4. Adjust the recording settings. Some older versions of PS4 games didn't allow players to record the gameplay using other devices. This adjustment includes changing the video and audio input sources, the video resolution, and the video file format.
Go to Settings on your PS4 and find System to change the settings in System Information.
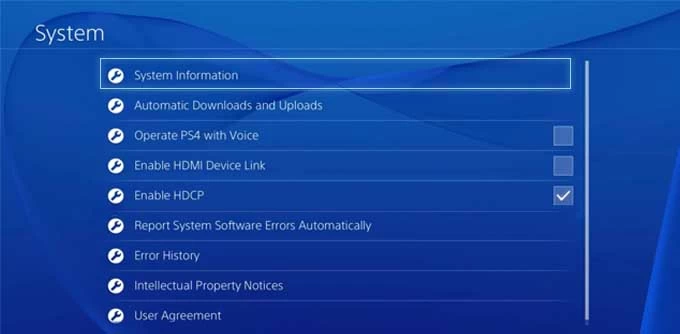
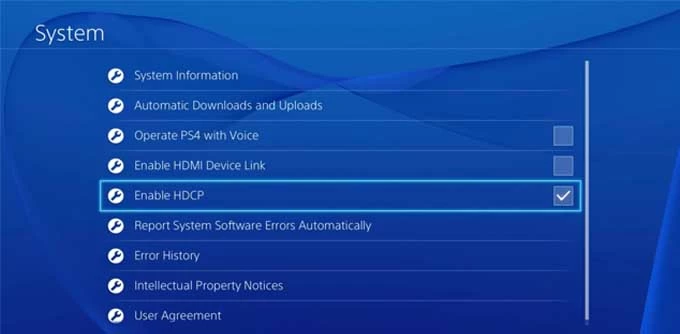
Then back to Settings and deselect Enable HDCP, or you can't record the PS4 games.
5. Start recording the PlayStation 4 game on the pc screen. The desktop recorder you use will record what's transpiring on your PS4 displayed on your pc.
6. Play your game on the PS4 while recording it on pc with a capture card.
7. Stop recording on your Windows computer when you are finished playing the game. Your recorded PS4 gameplay should now be available on your computer in the folder you set.
This method allows users to record PS4 gameplay in higher resolutions and better quality. But recording can include the cost of the capture card, the need to have a powerful enough PC, and the complexity of the setup. Additionally, lag can be an issue if the PC is not powerful enough to handle the PS4 gameplay recording and streaming.
Considering the drawbacks of using the capture card we mentioned above, there is a possibility that you don't want to record PS4 games on your PC via this tool and struggle with finding a capture card alternative for PS4 game recording. Fear not, with the help of certain programs, all your performance in the PS4 game will be captured on your pc. What you need to do is to follow the instructions below.
It doesn't matter if you're a Windows or Mac user, you can use AppGeeker Screen Recorder to capture your screen. Just connect your PS4 to your computer and you'll be able to record the gameplay.
AppGeeker Screen Recorder allows you to customize the recording parameters like frame rate, audio rate, recording formats (MP4, WAV, OGG, MOV, etc.), and game resolution to determine the output quality. AppGeeker Screen Recorder provides an easier way for PS4 players to record their games compared to the OBS Studio, and the recording settings are user-friendly for those who are new to it.
Download the AppGeeker Screen Recorder on your PC and follow the tutorial below to get the PS4 gameplay recording in detail.
Step 1. Download the PS Remote Play on your PC and launch it.
Step 2. Connect the PS4 to your computer.
Use an HDMI cable to connect the Play Station console to the computer. The gameplay will be transpired on the computer screen.
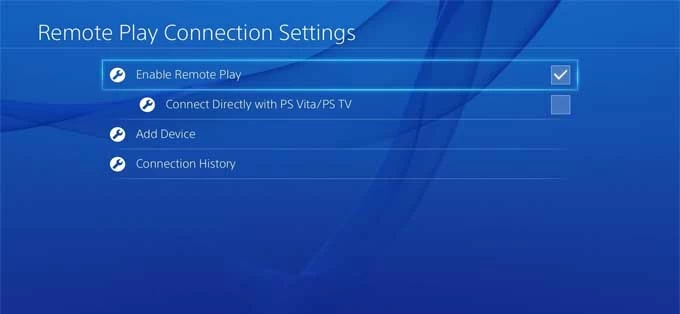
Start 3. Configure the PS4 settings.
Hit Start. Log into your primary PS4 account. Go to Settings on your PS4 and choose Remote Play Connection Settings to check the Enable Remote Playbox option.
Step 4. Choose the recording mode.
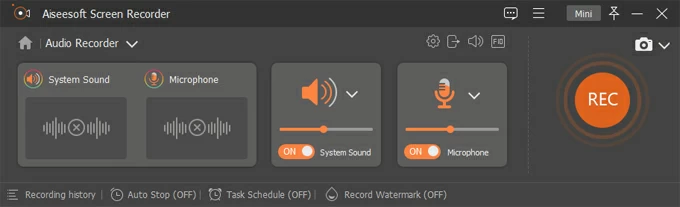
Open the AppGeeker Screen Recorder and run Video Recorder as an administrator to get the most suitable game recording situation.

Step 5. Adjust PS4 game recording settings.
Choose the game window first. Hit on Select the game and choose the PS4 gameplay window as the recording target. You can turn on the Webcam to capture your face. Then toggle on the audio source you want to record.
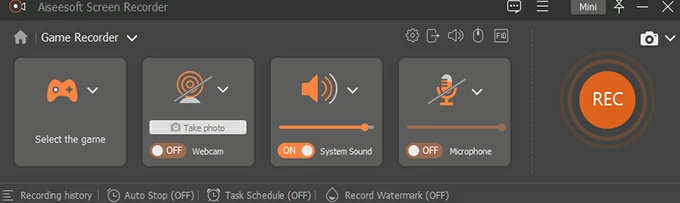
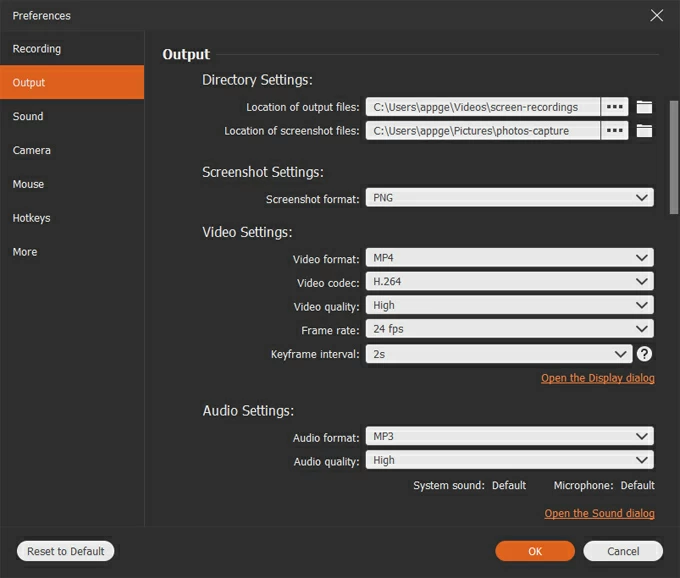
To adjust the advanced settings related to recording quality, click the gear button and choose Settings. You can go to the user guide for more details.
Step 6. Start recording.
Once you are satisfied with the settings, click the REC button to start recording. Then play the game on your PS4. The gameplay displayed on the computer will be captured now.


