How to Record a Snapchat Video

It's now possible for every gamer to easily capture gameplay on their PC. Here's how to do it without any effort.

Key points to know before capturing gameplay on your computer:

Multiple screen recorders let you record gameplay on your PC efficiently.
For those who love to play online games on PC, there might be times when they need to capture awesome gameplay moments to share with friends for fun or upload gaming videos to YouTube for recognition. It's not hard at all to record top-notch quality gameplay videos, all you need is an appropriate screen recorder.
How to capture gameplay on your PC easily (For beginners)
How to use OBS to capture PC gameplay (For advanced users)
Whether you are a novice or experienced user of PC gameplay recording, you can opt for a screen recorder that suits your needs right. Once you learn how, you can capture gaming videos on your PC simply with just a couple of clicks.
Tip: This guide is compatible with all the Win10 and Win11 PC, despite what brand your computer is of.
Related: How to record gaming videos for YouTube on PC
If you are a beginner at screen recording, a professional and complicated tool might not fit you, and that is why you will need these two pieces of software. They are beginner-friendly and easy to navigate. Take a look at them.
For PC users of Windows 10 and 11, Xbox Game Bar comes in as an in-built software on the system. So all you need to do is to find it and start using it. You can use this app effortlessly to record various PC games.
Game Bar has several widgets that you can use to record, screenshot, and interact with people in your community, enabling you to easily share your gameplay clips with others. However, this recorder still has some drawbacks:
Here's how you can capture gameplay on your PC via this tool.
1. Press Windows Key + G to bring up the Game Bar controls.
Note:
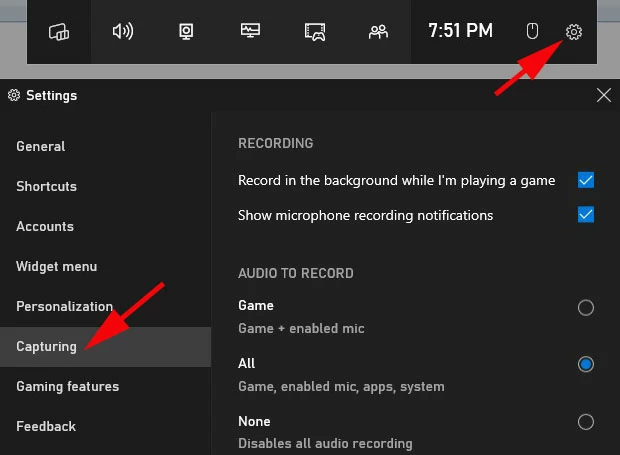
2. Adjust the audio settings based on your needs.
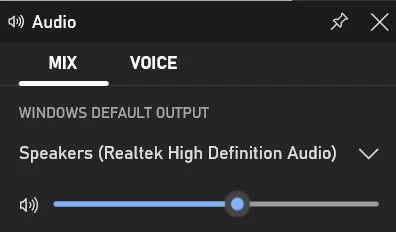
You can even decide what audio to get recorded during the gameplay capturing.
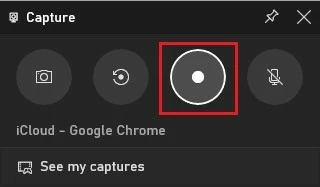
3. Play the game, and start capturing gameplay on your PC with the shortcuts Windows key + Alt + R.
Tip: During the recording, you can press Windows key + Alt + M to turn on or off the sound from your microphone.
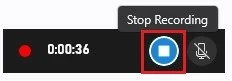
4. When you are done recording the gameplay, you can press the same keys Windows key + Alt + R or hit the Stop button to end the capturing.
The video will be saved in the Gallery then. You can play it back or rename or delete it.
If you have any other problems relative to Xbox Game Bar, this article may help you troubleshoot your issue: Fixes to "Nothing to record" on Windows Game Bar
Weaknesses of Game Bar can be overcome easily with the AppGeeker Screen Recorder. This brilliant software can not only capture the entire gameplay PC screen with your webcam included, but also record both internal and external audio in high quality. What's more, you can trim or merge the captured gameplay videos directly in this app.
Also, feel free to record your gameplay at any length via this app. And you can even save the recording files to preferred formats with output settings adjusted; it supports various formats such as MP4, WMV, MOV, F4V, GIF, etc. Now let's check out how simple it would be to record a gameplay video using this app on your PC.
Step 1: Open the gameplay and launch the AppGeeker Screen Recorder on your PC. Select Game Recorder at the beginning.

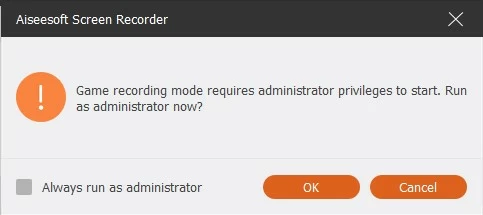
Step 2: When a message shows up to ask for the permission of letting the app run as administrator, click on OK to allow.
You may tick the box for Always run as administrator in the bottom left of the window to save the trouble of repeating the selection afterward.
Step 3: Hit Select the game to choose the gameplay window that needs capturing. You may selectively turn on Webcam, System Sound, and Microphone here.
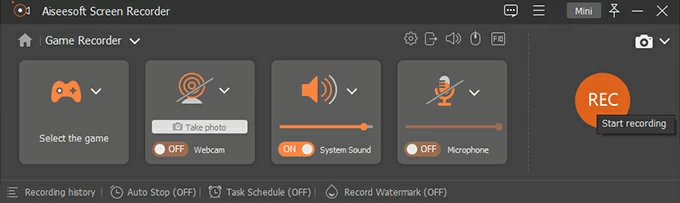
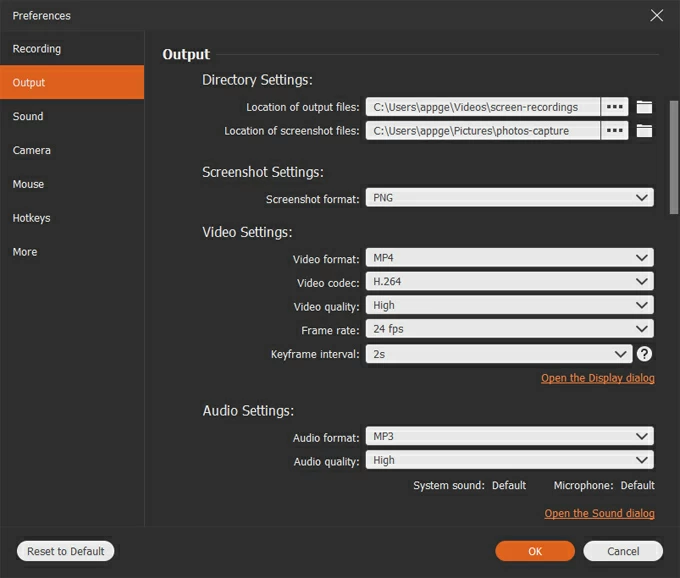
Besides, clicking the gear icon above the Microphone box can get you to the output settings, where you can decide the exporting format of the following recorded videos.
Step 4: Hit the REC button to start recording. You can begin to play the game now.
During the recording, you can pause it, make a screenshot or even add annotations.
![]()
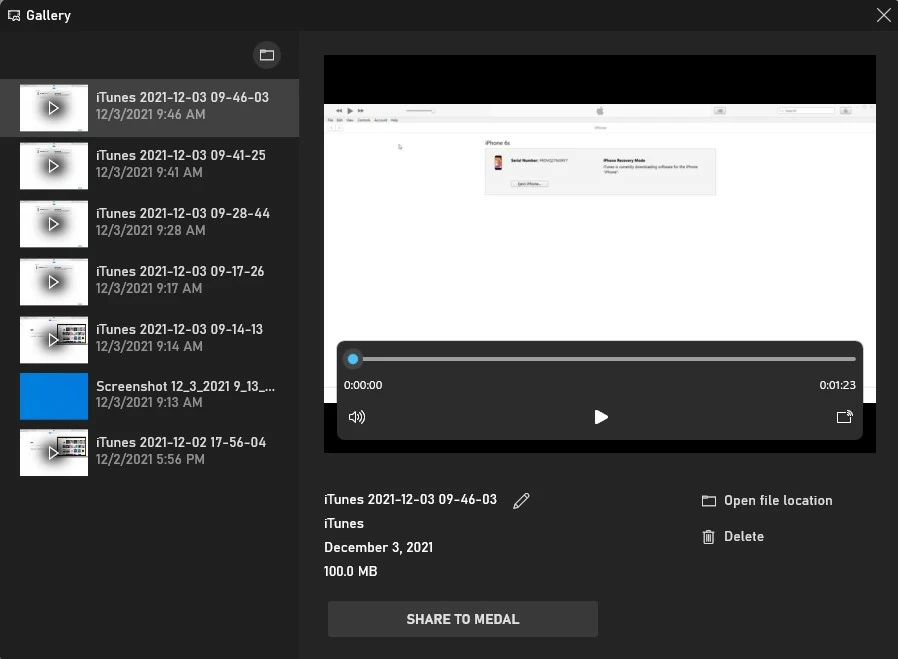
Step 5: With what you want recorded, you may hit the Stop button on the floating bar. Your gameplay video will be then available for you to preview and edit.
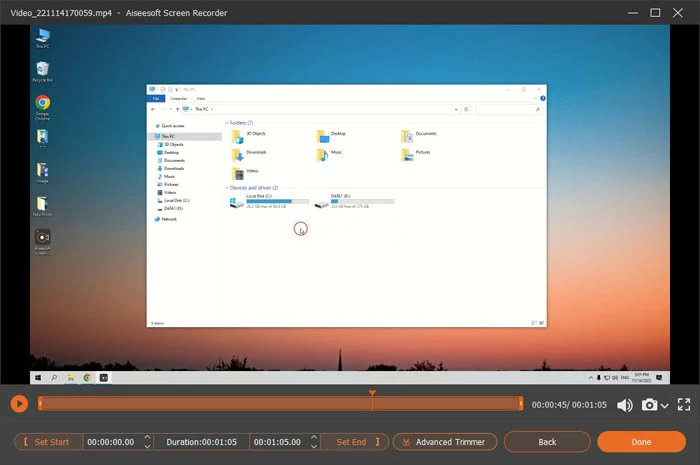
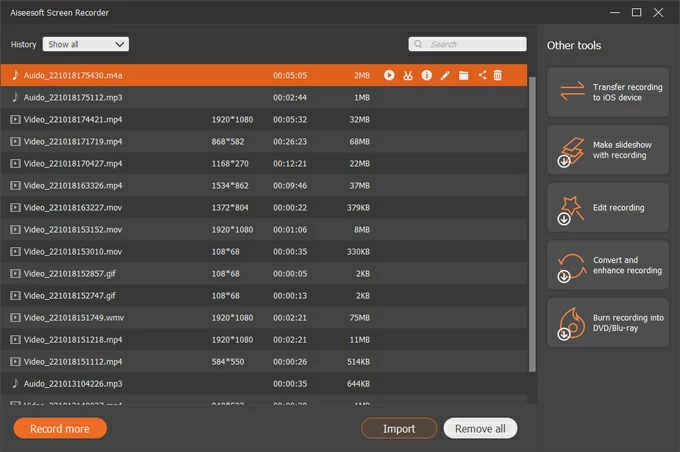
Once you finish editing the video, you can hit Done to save it. It will show up in the Recording history section.
Tip: You can review the previous recorded videos in Recording history. And on the right sidebar, there are multiple editing tools for you to make adjustments to your recordings if needed.
What's common between the two screen recorders above is that they are both easy to use, even for a beginner. The next screen recorder to be discussed is highly effective but a bit complex to use. And that is OBS.
OBS is an expert screen recorder that is built to record videos as well as live streams; but It can also capture gameplay and the whole PC desktop. As earlier stated, the features of OBS are more professional with various customization options, which makes it more suitable for an advanced user to capture gameplay.
Here we will elaborate on the steps to record gameplay on PC via OBS.
Step 1. Launch OBS on your PC
Download and install OBS from its official website. Then run it on your computer.
Note:
Step 2. Create a scene
Head on to the Scenes window and hit the small plus icon. Give it a name and click "OK" then.
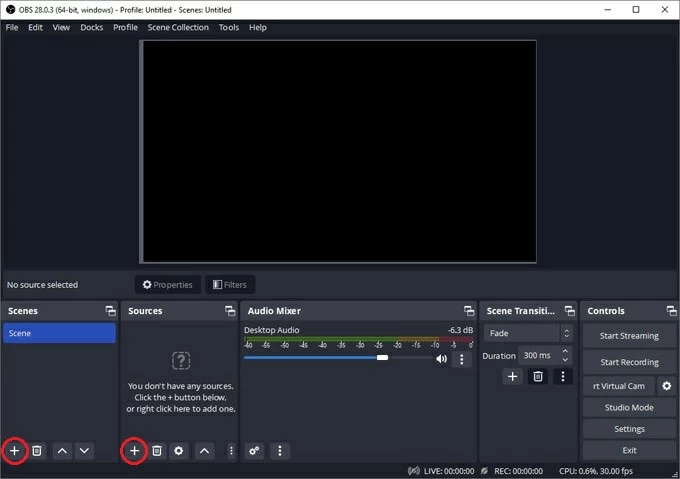
Step 3. Select a source window for recording
In the Sources box, hit the small plus icon and select Game Capture. This step enables you to record the gameplay window only.
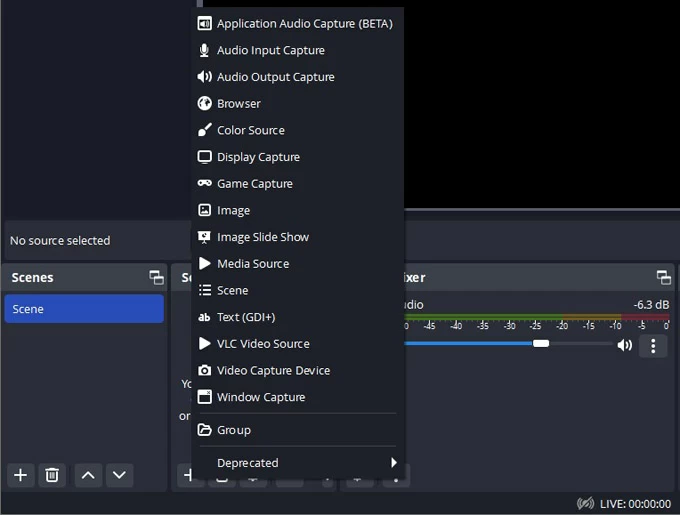
If you want to record the entire desktop covering your webcam, you should choose Display Capture here.
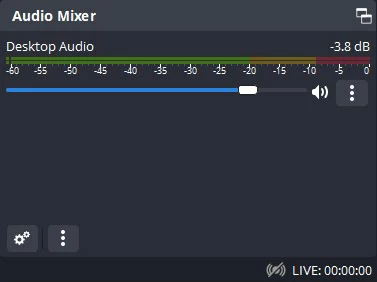
Step 4. Adjust the audio settings
Select the audio for recording and adjust the volume in the Audio Mixer section.
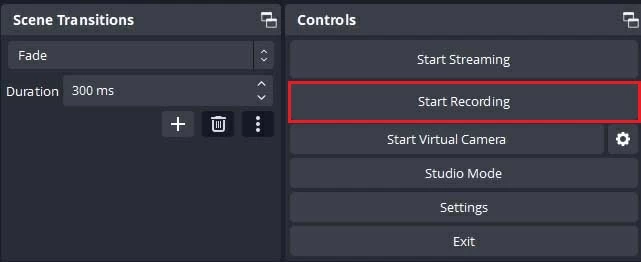
Step 5. Start capturing the gameplay
Hit the Start Recording button and open your gameplay to get it recorded.
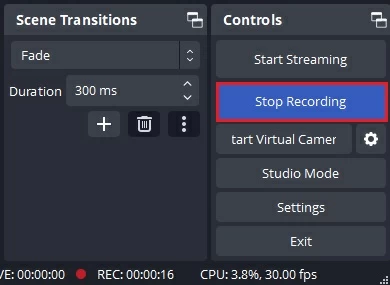
Step 6. End the gameplay recording
When you have completed capturing the gameplay, hit the Stop Recording button to stop it.
Step 6. Review the recorded gameplay videos
After you stop the recording, the videos will be saved to a local file automatically.You can navigate to File > Show Recordings to check what you have recorded just now.

Learn more: How to fix OBS Studio not capturing game issues
If you are not a techie, you might find OBS quite awkward to use. The interface is rather complicated for newbies when compared to what you have with the AppGeeker Screen Recorder. So if you are only a beginner, you might consider this point when choosing software for recording gameplay.
1. How do I record gameplay on my PC?
You can use the AppGeeker Screen Recorder to capture gameplay on PC easily. Here's how to.
2. Can I record a webcam when capturing gameplay on my PC?
Yes, with the AppGeeker Screen Recorder, you can capture both gameplay and webcam on PC at the same time. To do this, you just need to enable your webcam before starting the recording.
3. What tools can be used to record gameplay on PC?