
How to Record WhatsApp Video Call with Audio

Record all of your Discord conversations with ease and accuracy using Audacity. Get the step-by-step guide for recording Discord audio here.

Audacity is considered the most professional audio recorder that records internal audio or microphone sounds from programs like Discord on a computer. But the professionalism makes the recording process kind of complex for novices.
This post will explain how to record Discord audio with Audacity in detail. Additionally, we'll look at how to capture Discord audio conversations with other top-quality tools like Craig Bot, OBS Studio, and AppGeeker Screen Recorder.

Audacity is an audio recorder that supports recording internal and external audio from a computer separately.
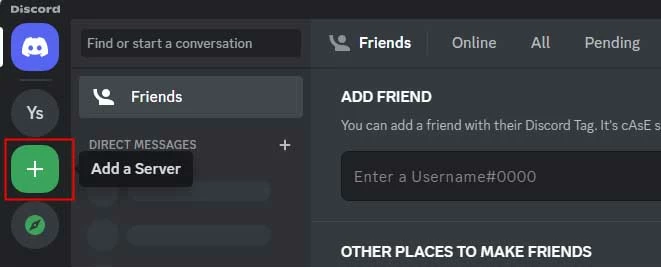
Discord is a widely-utilized online social media platform. Through it, you can stay in contact with family, colleagues, and customers without leaving your home. Gamers are particularly fond of it and use it as their primary communication tool.
Discord does not enable the recording of audio conversations, but a search of the internet will uncover various Discord-capturing methods. Utilizing a third-party tool like Audacity is the most recommended option. If you need assistance with Discord voice recording through Audacity, we are here to help.
Table of Contents
The Discord Terms of Service state that it is legally acceptable to capture audio conversations on Discord via Audacity, as long as all conversation members have given their consent. To ensure that you are not infringing on anyone's privacy rights, we suggest that you get permission from all conversation members before the Discord audio chat recording on Audacity.
Another condition worth considering before using Audacity to record Discord audio is the terms of service provided by Discord in your region. Some areas do not support private chat recordings in social media like Discord. Make sure you get consent from the Discord chat attendees and find out more about the law in your area to avoid potential legal risks.
Also Read: How to record Zoom meetings without permission?
Audacity is a remarkable audio recording software created for users to capture Discord and other sounds on computers. It's a multitrack recording platform that works with Windows, Linux, and Mac computers. Whether you are fresh to the application or a veteran user, you can use it to get and edit audio from Discord, featuring your sound or only the sound from others, with the help of the tutorial.
Step 1. Download and install the Audacity program for your Windows version freely from the official source.
Step 2. Launch the Discord app on your computer and click on the appropriate buttons to host or participate in voice chats.
Step 3: Once done, navigate to Audacity and set your preferences.
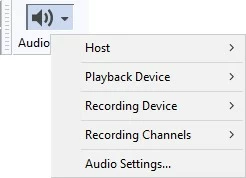
Click Audio Setup and set the Host as Windows WASAPI.
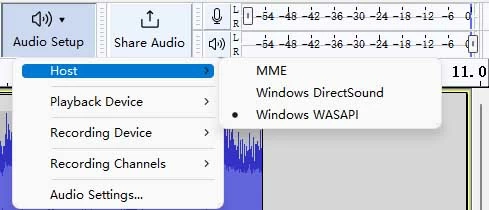
Then choose the Playback Device as the Headphone or the Speaker. It is determined by the device you use to hear the Discord recording.
Select your Recording Device due to your situation. You can record only your voice from Discord by choosing the Microphone or record the Discord audio without your sound by choosing the Headphones.
Note
Step 4: Start your conversation with friends on Discord and hit the Record button.

Step 5: Exercise patience until the Discord chat is completed, then hit the Stop icon on Audacity to terminate the call recording process.
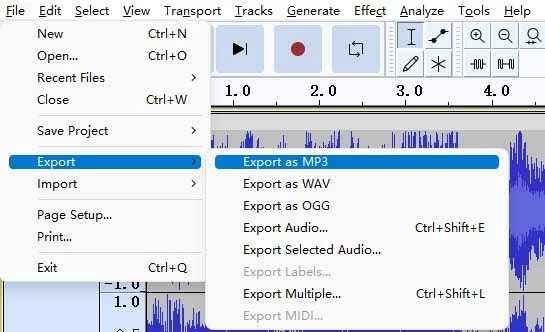
Step 6: After that, head to File, select Export and choose your preferred audio format to save your recording. Usually, we suggest you export the Discord recording in MP3 format to get the wildest compatibility on different platforms and devices.
The recording process with Audacity on Mac is more complex than on Windows pc. There're some limitations before recording:
Without SoundFlower, Audacity will only be able to capture your voice via the internal microphone on your Mac during your Discord call. If that is acceptable to you, then obtain the version of Audacity compatible with your Mac and abide by the steps outlined to record the conversation.
Step 1: Launch Audacity and install the plug-in SoundFlower to record the Discord conversation from the Mac.
Step 2: Navigate to the Apple logo in the top-left corner and select System Preferences > Sound > Output/Input > SoundFlower (2ch).
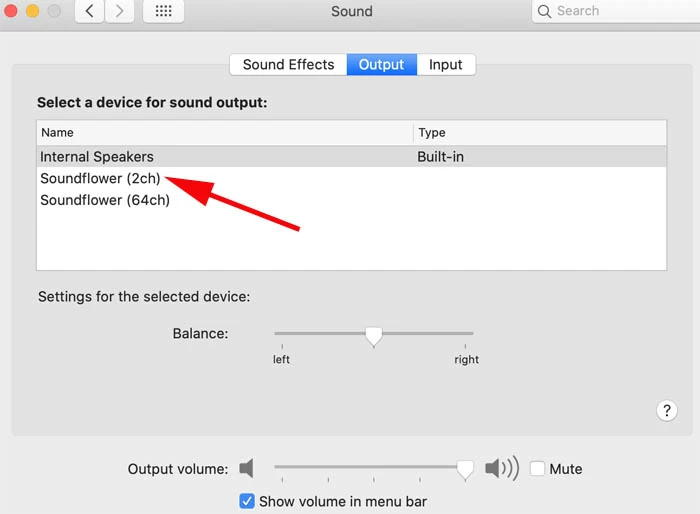
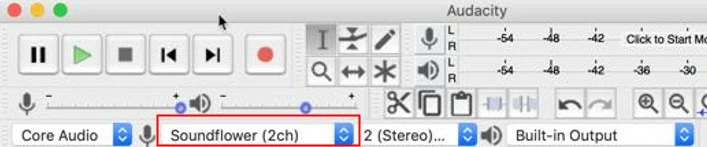
Step 3: Open Audacity, choose Built-in Output in the Playback Device panel, and set SoundFlower (2ch) as Recording Device.
Step 4: Open desktop Discord and start the audio call on it.
Step 5: Next, open Audacity and click on Start to begin the Discord audio recording.
Step 6: Wait until the Discord conversation is over, then hit Stop. Check the recording, and export it as MP3 to your preferred local storage media.
Audacity is a great option for recording Discord audio conversations on computers, but the process may be overwhelming for newcomers, and if you are a mobile Discord user, Audacity won't be of help. To make it easier, we have compiled a list of alternatives to Audacity for Discord audio recording.
Craig Bot is a formidable Discord recording bot available to be used by the owner or administrator to record chats. It is capable of recording audio from public and private conversations and will provide distinct audio files of each chat member without diminishing the sound quality.
Compared to using Audacity, Discord's Craig Bot provides gamers with a distinct advantage; it captures sound exclusively from Discord and can be used on both PCs and mobile phones. Moreover, the recorded Discord file can be exported in a variety of formats, such as FLAC and MPEG-4 AAC.
After getting the recording consent from other speakers, follow the simple and efficient guide to recording Discord audio with Craig Bot on computers:
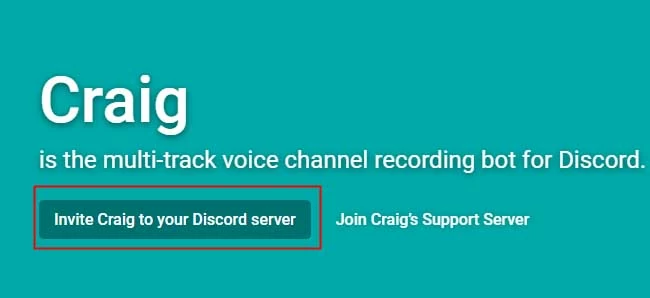
Step 1: Hit Invite Craig to your Discord server.
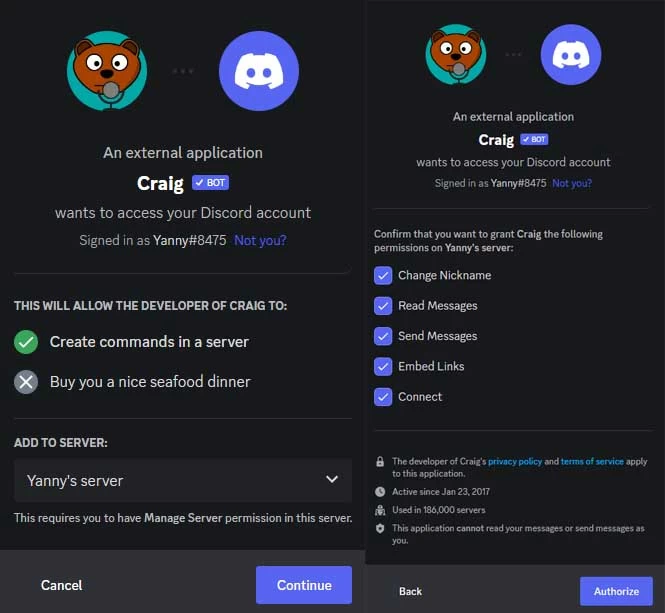
Step 2: Next, you will be requested to allow Craig Bot to join the server.
Step 3: Check the Add Bot To list and invite Craig Bot to the Discord server you want to record and click Authorize.
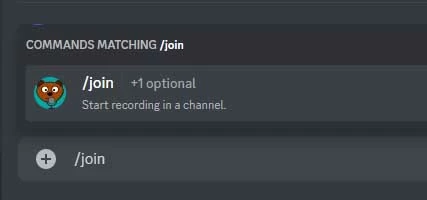
Step 4: When the Craig Bot joins the Discord server, enter /join command in the chat box, and tap on Send. Without further ado, Craig Bot will start recording your voice and that of other participants.
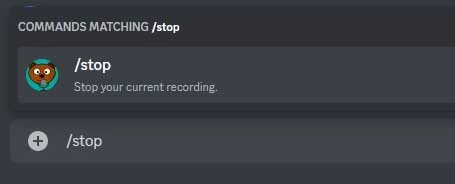
Step 5: Kindly send /stop in the chat box again to end the audio recording. To preview the recording, navigate to Craig Bot chat and select the audio recording.
If you use a mobile device, we'll look at how to capture audio from a Discord server using Craig Bot:
Step 1: Create a server as an admin.
Step 2: Head to Discord Craig Bot's official website and add Craig Bot to your Discord server.
Step 3: Log in to your account.
Step 4: Enter the command Craig:, join to start recording the chat in Discord.
Step 5: After recording, type Craig:, leave in the chat box to end the recording. Then choose the format to save the file. Whether you are an Android or iPhone user, you can edit the file later.
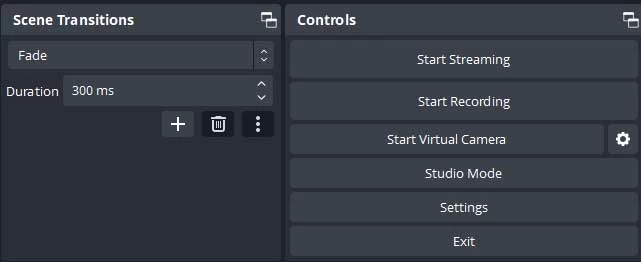
An outstanding audio recording program, OBS Studio is a great replacement for Audacity. It is open-source and allows you to capture audio and video streaming from Discord servers with ease. Once the Discord file is recorded, you can edit it. This cross-platform software works on Windows, Mac, and Linux computers. Let's dive into the Discord recording procedure using desktop OBS Studio.
Also Read: How to record desktop audio with OBS on Windows computer
Step 1: Install OBS Studio on your Mac or Windows computer, then launch it for Discord audio recording.
Step 2: Navigate to Sources and hit Add button.
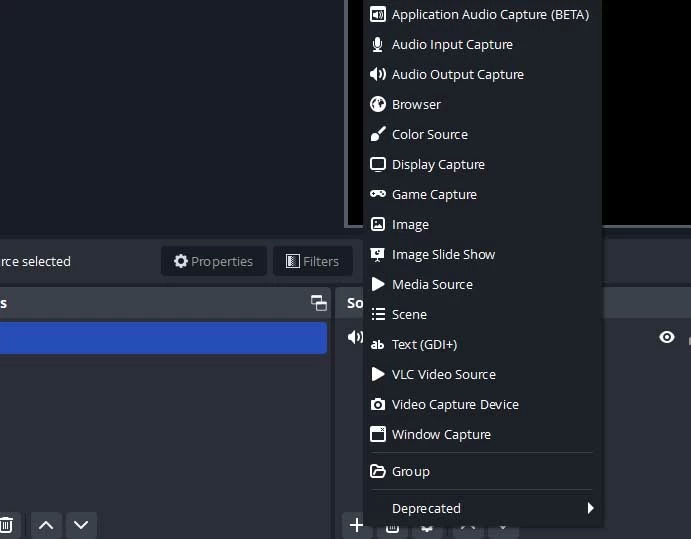
Step 3: Select Audio Output Capture and confirm.
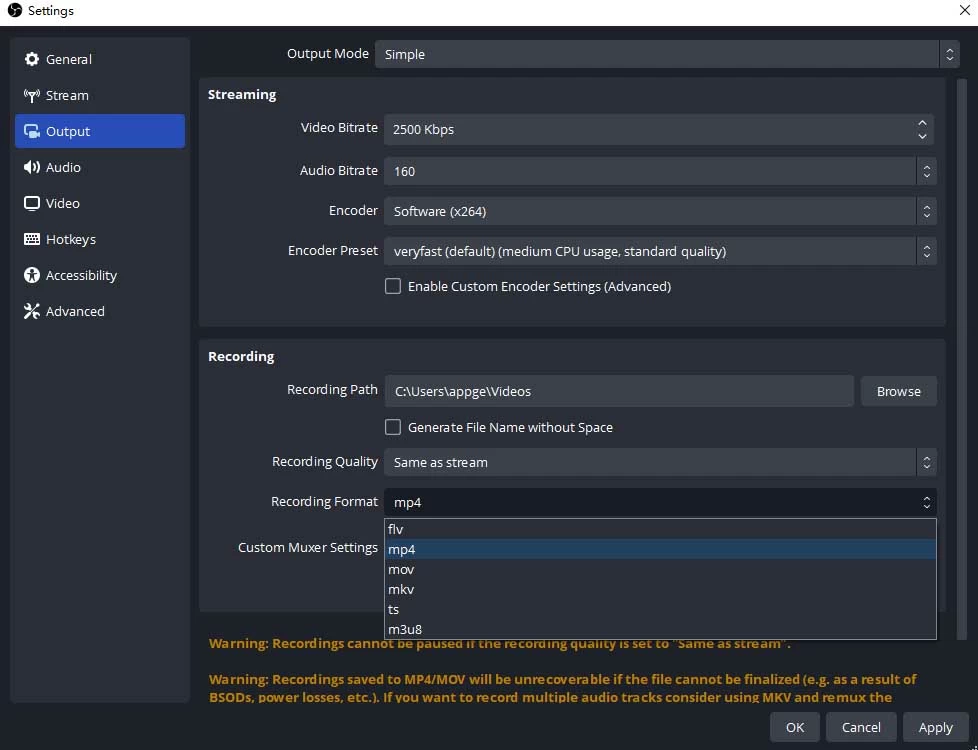
Advanced users who want to get the Discord recording with optimized audio effects can go to File > Settings > Output to tweak the parameters like audio bitrate.
Step 4: Locate the Controls section and click the Start Recording button.
Step 5: Now open the Discord voice channel and OBS Studio will commence the audio recording.
Step 6: Back to the OBS interface and click Stop Recording. The Discord audio file will be saved into the path My Computer > Video.
Aside from Craig Bot and OBS Studio, AppGeeker Screen Recorder is a unique recording program capable of capturing audio and video recordings. It records not only Discord audio but the live streaming, video calls, and on-screen chats. You can customize the recording effects as you want and edit the captured Discord file.
Desktop Screen Recorder records audio on both Mac and Windows pc. Besides, it supports capturing all on-screen activities like unforgettable scenes during gameplay, important online meetings, and non-copyright-protected YouTube videos, etc. The recording process is far more straightforward than using Audacity. Download AppGeeker Screen Recorder from the official website and proceed with the Discord conversation recording.
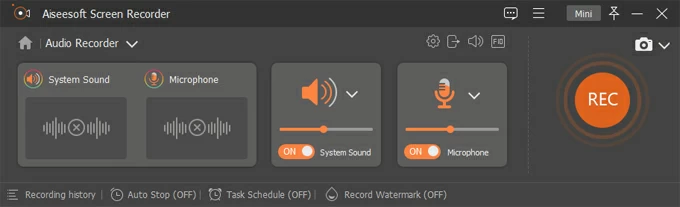
Step 1: Launch Screen Recorder and select Audio Recorder to record the Discord audio calls.

Step 2: Toggle on Sound System and Microphone to record the Discord call with your sound simultaneously.
Step 3: Next, make the necessary adjustments by clicking on the gear icon and choosing Preferences. You can go to the user guide to learn more about this.
Step 4: Open Discord and start your conversation with others.
Step 5: Hit the REC button to commence the audio recording.
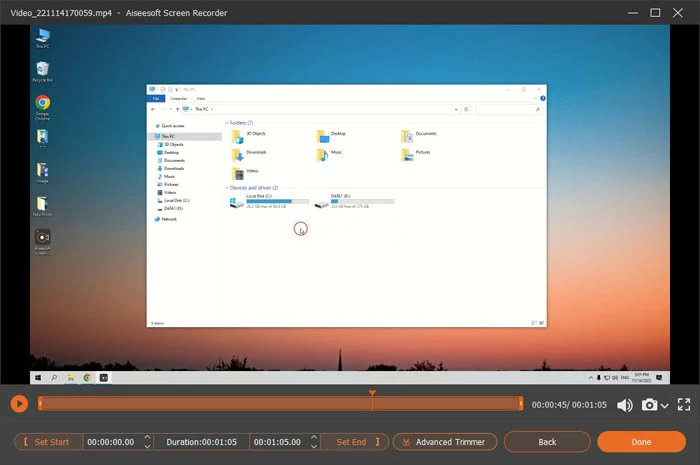
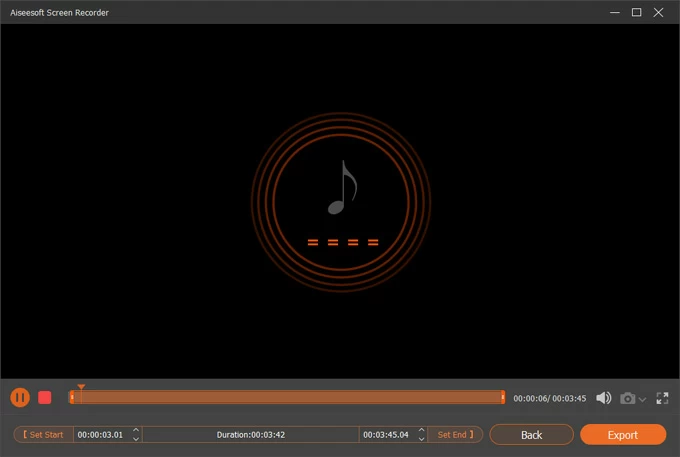
Once done, click on the Stop icon of the desktop Screen Recorder to end the recording from Discord. Preview the file and save it in your preferred storage space.
Conclusion
We have thoroughly discussed the method of using Audacity to record Discord audio. Aside from Audacity, many other options are available to you. You can locate the best technique for you and save your Discord chats. We strongly recommend AppGeeker Screen Recorder for a simpler approach. Go ahead and download the tool and give it a try!


