How to Record a Live Stream on PC

When you try to record audio from Mac with Audacity, it's likely that you'll encounter some usage problems. Check out this article to resolve your doubts.


By use of Audacity or its alternatives, you can record computer audio from Mac with ease.
Chances are that you may need to capture sound from your Mac like recording audio from YouTube video, or recording online lectures, etc. Considering Audacity's reputation and usefulness, you may choose Audacity to record sound playing on your Mac. As one of the most useful and versatile computer audio recorders for Mac, it will be difficult to understand how to record computer audio on Mac via Audacity without any instructions.
If you want to quickly master the art of using Audacity to record internal audio on your Mac, this guide will provide you with detailed instructions for recording computer sound on Mac with Audacity in studio-quality. In addition, here are some other great Mac computer audio recording software for you to choose from.
Audacity: Computer audio recorder for Mac
Alternatives to Audacity for internal audio recording on Mac
In this part, we'll briefly introduce Audacity and concretely explain how to set it up on your Mac and capture computer audio using this recording software. Read on to find more details.
Compatible with different operating systems of macOS, Windows and Linux, Audacity is an open-source and free audio recorder that supports audio modifications such as cutting, merging, changing speed or pitch, and multiple soundtracks editing, etc. Moreover, you can save sound files in various formats covering MP3, WAV, AIFF or OGG.
Before using Audacity, you'll need to first download and install it on your Mac. Here's how to:
Mac doesn't have a built-in feature to record streaming audio playing on sound devices. To be honest, recording computer audio using Audacity on Mac is a bit complicated because recording requires an extra help called SoundFlower plugin. Check out the following steps in using Audacity to record your Mac's audio.
Note:
Step 1: Download and install SoundFlower first on your Mac. Once done, open it.
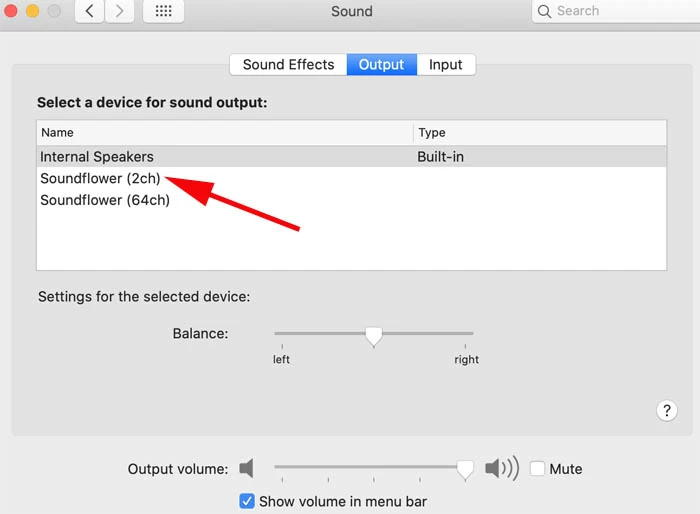
Step 2: Hit the apple icon on the upper-left corner of the desktop, and go to System Preferences > Sound > Output. Select Soundflower (2ch) for sound output.
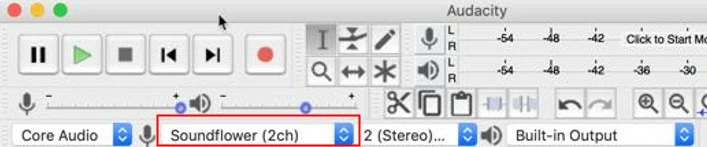
Step 3: Run Audacity and choose Soundflower (2ch) as a recording source from Audio Setup > Recording Device.
Step 4: Click the Record button (the red circle) to start the system audio recording on your Mac.
Step 5: After capturing your needed audio, press the Stop button (the black square) and the recording will end immediately. You can then edit it based on your preference.
Tip: In addition to using Soundflower to provide an additional audio device for Audacity to record computer playback, you can also use Audacity to record audio playing on a Mac by changing the audio output with a loopback cable.
Other audio recording tools are also effective for capturing internal audio from Mac, like the reliable easy-to-use software, Appgeeker Screen Recorder, and the pre-installed tool on Mac, QuickTime player. Below, let's see the introduction in sequence.
Audacity is a great tool for recording audio from Mac, but it can be overwhelming for beginners. Compared with the former, the Appgeeker Screen Recorder is a more user-friendly option for recording and editing audio. Additionally, not only is it able to record audio from system and microphone directly without installing a plug-in, but it can also record screen and take screenshot on your Mac.
Here are the simple steps to record computer audio on Mac via the software:
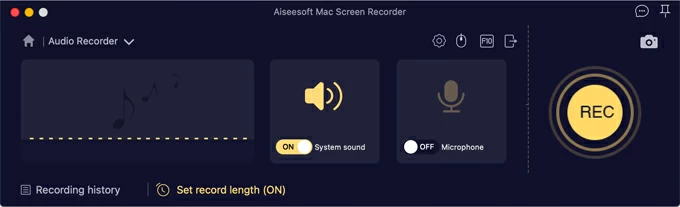
Step 1. Launch Appgeeker Screen Recorder on your Mac, and choose Audio Recorder from the main interface.

Step 2. Enable System sound, and hit the REC button to start the recording when you get everything ready.
Tip: Enabling System Sound will only record sound coming from the Mac computer; if you also switch on Microphone, you can record both internal and external sound on your Mac.
Step 3. Hit the Stop button to put an end to the recording.
![]()
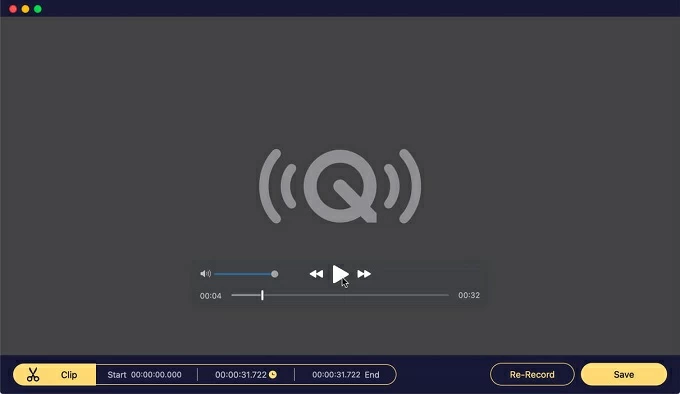
Step 4. You can then play the recorded audio and clip it before exporting it on the computer.
With the Appgeeker Screen Recorder, you are also able to record video on your Mac and perform simple modifications on it. Besides, multiple formats are offered in the tool for exportation of captured video and audio.
QuickTime Player is a built-in media player for Mac, which also serves as an audio and screen recorder. It's easier to use than Audacity, but similar to the latter, it cannot capture computer sound unless you install a plug-in beforehand on your Mac. With Soundflower configured as your audio output source, you can record internal audio on a Mac with QuickTime.
Step 1. Download and install Soundflower. Open it on your computer.
Step 2. At the top bar menu, click the apple icon on the left and select System Preferences. Next, hit Sound, and choose Soundflower (2ch) on the Output list.
Step 3. Go to Launchpad and search for QuickTime Player. Then launch it once you locate it.
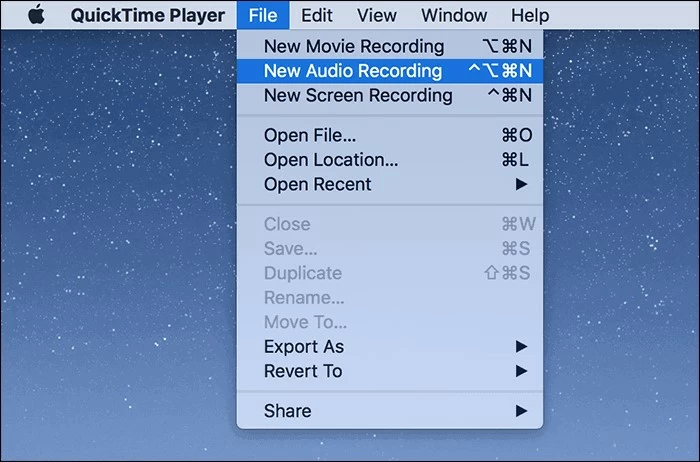
Step 4. Click File on the top left of the screen, and select New Audio Recording.
Step 5. The Audio Recording panel will show up. On the layout, hit the down arrow beside the Record button to set up audio source and quality from the drag-down list before recording. You need to select Soundflower (2ch) from Microphone.
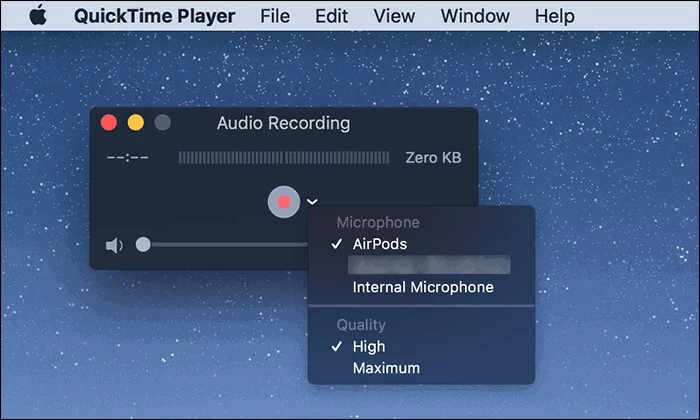
Step 6. Start the audio recording by clicking the Record button. You can monitor the progress with the timer and the audio file size reminder.
Step 7. Click on the Stop button to finish the recording. You can then listen to what you've recorded with the Play button, or simply trim it by selecting the Edit option.
Note:
Final thoughts
With this specific guide, you may start to record computer audio on your Mac by Audacity with little trouble. If you still regard it hard to use, you may seek assistance from other tools like Appgeeker Screen Recorder or QuickTime Player. We believe that you will find a proper audio recorder for capturing sound from Mac based on what you need.