
How to Record Music on Computer

It's common to sing the song with the backgrouns music, but using recording apps from phones will capture the noise as well.


Many recorders can't record internal and external audio at a time and brings trouble in recording singing with bgm.
Whether you own a mobile device or computer system, recording yourself when singing with background music shouldn't be a tedious operation to execute. However, the reverse is the case with most people, as they do not know how to.
Is that the same situation for you? Don't worry, this article is for you. Generally, there're three typical ways to record yourself singing with background music: using a computer with DAW software like Audacity, a mobile phone with the specific application, or a dedicated equipment. Here, we will discuss these three ways to record yourself when singing with background music. Without wasting your time, let's delve into the process.
Table of Contents
For folks that want to capture themselves when singing with background music via a computer system, you need a powerful DAW tool. DAW is the acronym for Digital Audio Workstation. It is a multifunctional electronic device or computer application that supports users recording audio files, and editing audio tracks. Audacity is such free DAW software. Whether you use a Windows or macOS computer, Audacity is a lifesaver to record multiple sounds simultaneously. You can easily record your voice over the background music with high quality.
To record yourself singing with background music on Windows using Audacity, kindly connect the microphone to the computer. Once done, follow the procedure below:
Step 1: Upload the Background Music to Audacity.
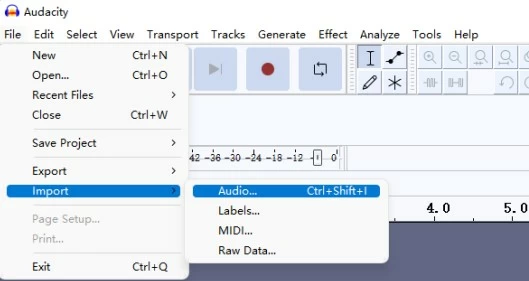
To record your voice when playing the music, head to the top left corner of the Audacity page and select "File". Click "Import > Audio". The local drive where your audio files are stored will pop up. Choose your preferred background music, and hit the "OK" button to import it.
Step 2: Configure Audacity Settings
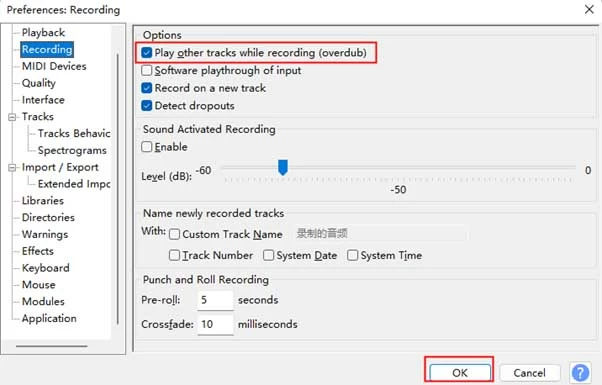
Navigate to the top menu bar and select "Edit > Preferences > Recording". Click on the Options drop-down menu and click "Play other tracks while recording (overdub)". Hit the "OK" button to confirm your actions.
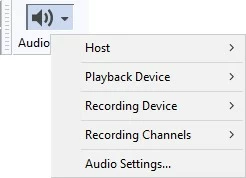
Select "Audio Setup > Playback Device" and choose the "Headphone" or "Speaker" to use for playback. Then choose "Mircrophone" in "Recording Device" panel.
Step 3: Start Recording You Singing with Background Music
Hold the hotkeys "Shift + R" and Audacity will immediately start recording. The backing track will start from scratch and you can see the wave of your voice presented on the screen in real-time as another track.
Step 4: Stop Recording
Once you finished the song, click the red "Stop" button to stop recording. Then click the green "Play" button to audition the audio. When you are satisfied with the singing, go to "File > Export > Export as MP3" to save the audio to your local drive.

Note
Audacity also works well with Mac models. But the recording process is more complex than using it on Windows.
Step 1: Download and install Audacity
Download and install Audacity from the official site, then launch the Audacity software on your Mac.
Step 2: Import the background music
Navigate to the top left corner, and select "File > Import > Audio". Choose an audio file to use as a backing track, and tap on "OK" to import it. Alternatively, you can drag & drop the audio file to Audacity.
Step 3: Setup the Audacity preferences
Now, head to the "Audacity" section at the top-left menu bar, click on it and select "Settings". Click the "Recording" panel and check "Play other tracks while recording".
Step 4: Start recording
Connect your headphone or microphone to the computer, and click the "start recording" button. Or you can hold the "Shift + R" button to commence recording your voice from the beginning of the imported audio track.
Step 5: Stop recording
When the song is completed, press the "Space" key or click the "Stop" button. Then preview the final version.
Step 6: Export the file
Once you are satisfied with the recording, go to "File > Export as > Export as MP3".
There would be a pop-up noted that "Your tracks will be mixed down and exported as one stereo file". Click "OK" to confirm it and edit the metadata tags if you want. For personal use, click the "OK" button and your song with background music will be saved on your Mac.
Note
Besides a PC, your mobile device can also perform a similar operation, recording yourself with a backing track. All you need is a professional audio recording application. In this section, we will introduce two powerful mobile apps respectively for iPhone and Android capable of recording when singing with background music.
GarageBand is a professional audio recording tool that iOS users can currently invest in. With this app, you can simultaneously record your voice with a backing track. It's a very simple tool, lightweight, with quality recording capabilities.
Step 1: Download the background music and save the music file in the Documents. Connect a microphone to your iPhone with GarageBand, and open the GarageBand.
Step 2: Hit on the + button to create a new session.
Step 3: Scroll to find the Audio Recorder. Tap Voice.

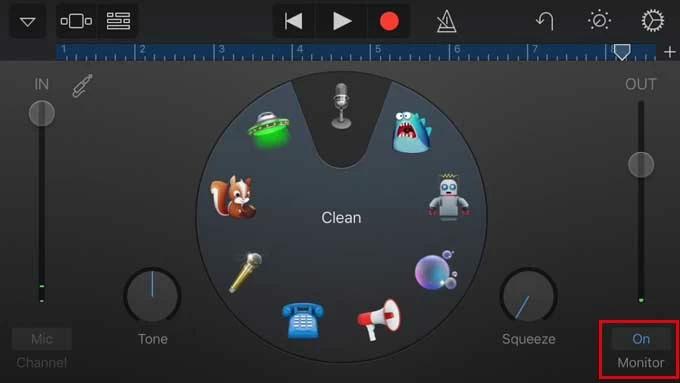
Step 4: Turn on Monitor in the right-bottom corner for hearing the recording from the headphone
Step 5: Hit on the button as below. The screen will turn to the track list.
Step 6: Hit the loop icon in the top-right corner to import the audio you wish to use as a backtrack from ducuments.

Step 7: Now hit the red button to start recording yourself singing with the backgrouns music.
BrandLab is an award-winning audio recording app loaded with quality features. The app allows you to capture audio and share the resulting content without difficulty. You can also use it for overdubbing as it lets you record your voice and background sounds concurrently.
Step 1: Install BrandLab and launch it for audio recording. When it opens, tap on the red Create button at the upper right corner of your screen to start a new project.
Step 2: Select Import Audio/MIDI to add the backtrack file. Once done, enter the project Name, Key, Tempo, and other necessary commands. Select an audio source and hit the Record to start recording your voice.
Step 3: Next, exercise patience till you complete recording yourself.
Step 4: Once done, hit the Record button again to stop. Check the recording and export it as MP3.
AppGeeker Screen Recorder is a feature-rich software loaded with multiple functionalities. With this software, you can create a video and audio recording with minimal stress. It allows you to capture several on-screen events like games, livestreams, online meetings, singing songs with background music, etc.
This software is capable of recording multiple sounds at once without compromising the audio quality. Compared to the methods above, AppGeeker Screen Recorder is a better option because of the ease of use, and quality results it generates. It features noise-canceling and automatically optimizes the audio quality when recording.
After downloading and launching the AppGeeker Screen Recorder, follow the procedure below to record yourself singing with background music.
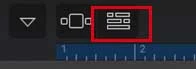
Step 1: Choose a proper recording mode.
Select Audio Recorder from the recording options provided. If you want to record your face as well, you can choose Video Recorder.

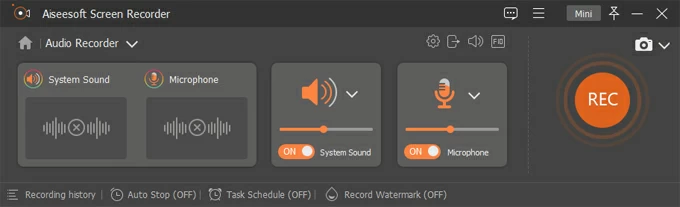
Step 2: Set the audio source
Toggle on the Microphone and System sound buttons to ensure that both the background music from your computer and your voice from the microphone can be recorded.
Step 3: Adjust recording settings
Heading to the Settings menu, and make the necessary adjustments due to your demands. Select your preferred output format, audio, and camera sources. After that, move to the next step.
Step 4: Start recording
Now click on the orange REC button. AppGeeker Screen Recorder will automatically initiate video recording. Play the background music on your computer and start singing.
Step 5: Stop recording
Wait until the recording is completed, and click the Stop button. The recording will be presented on the screen for you to check. Once you are satisfied with it, click Export to save it.
Conclusion
With the guide above, recording yourself when singing with background music shouldn't be a problem anymore. There are over three approaches introduced in the guide, kindly select the one that suits you. We recommend AppGeeker Screen Recorder because of the excellent results it will give. You should try it out!


