How to Watch DVD Movies on Windows Media Player


See more about: All-in-one Blu-ray Converter to Convert Blu-ray & DVD & Video & Audio to format you need
I'm a teacher at a University, I'm trying to capture a short clip from DVD's video so I can embed it as one of the slides on a Power Point presentation at work. The file size needs to be reasonable and the Power Point presentation will be connected to a high definition projector. Any fairly easy solution?
Let's say, you are making a PowerPoint (PPT) to give a presentation in class or business meeting to illustrate an idea or concept, and you want to pull little pieces of a movie or a documentary (a minute of half of hour in duration) from a DVD and embed it into a PowerPoint presentation. It may be to your advantage in the long run to convert a common video to Microsoft PowerPoint compatible format before you put it into the presentation project.
However, since most of commercial DVDs you purchase are copy protected, ripping a disc to a video that works with PowerPoint slide is not always an easy task. You'll have to decrypt the restriction on disc and extract the movie contents from it and then transcode to PowerPoint compatible format.
How can you put clips of a DVD into PowerPoint without involving using few software with complicated process? DVD Ripper is definitely the way you go to deal with this sort of thing.
It rips DVD and supports a massive amount of output file formats such as ASF, WMV, AVI, MPEG, MOV, MP4, FLV and more. It also gives you more options and greater control over the video through advanced settings, and there's a function to rip any random scene you want to use by setting the beginning and end time. The program is cross platform and will rip DVDs for you on Mac.
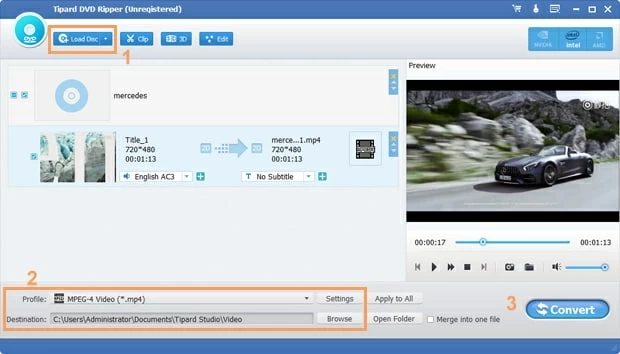
Step 1: Add source file
Put the DVD in your drive and fire up DVD Ripper.
Click "Load Disc." to import DVD files you want to rip to PowerPoint video file. You should then be presented with a file listing of all the DVD titles you just selected on the main interface.
If you need to merge the selected files into one, just check the "Merge into one file" option beneath the preview window.
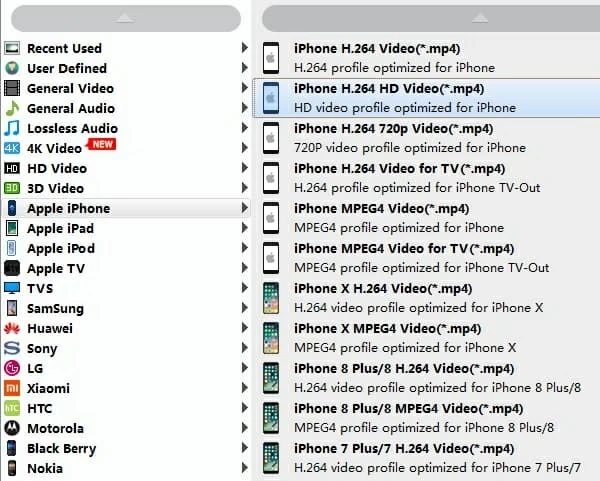
Step 2: Select PPT readable format
In the screens above you can see both the relevant infomation and the preview window. Now take a look at the lower left portion of the window highlighted with yellow box line.
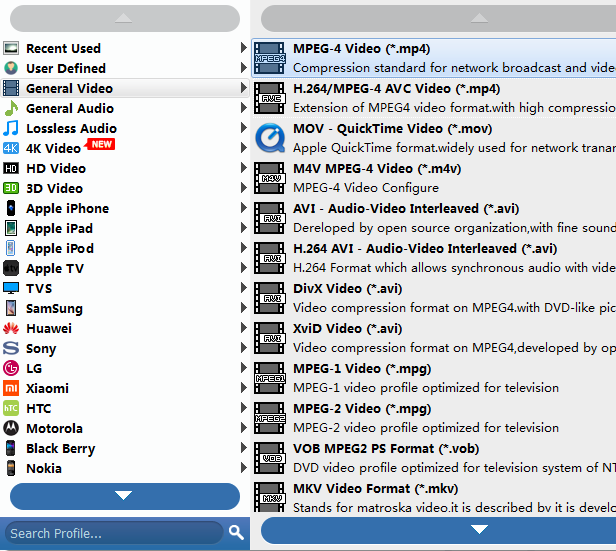
In Office PowerPoint, you can insert and playback many different file types of video/audio. According to Microsoft PowerPoint help documents here (for 2007), here (for 2010) and here (for 2013), for the best video playback experience, we recommend that you use .avi videos encoded with Xvid video, .mpg videos and wmv videos for PowerPoint 2010 and its previous versions, and use .mp4 videos encoded with H.264 video and AAC audio for PowerPoint 2013 version.
So, click "Profile" drop-down menu, this will display a panel where you'll select the format you want. Here, we pick AVI, WMV or MP4 as the output format.
Optional: This DVD to PPT converter looks to be a simple program until you see all the rather complex advanced options hidden away in the "Settings" button (near "Profile" menu), where there has support of configuration for each of the variety of video formats and codecs.
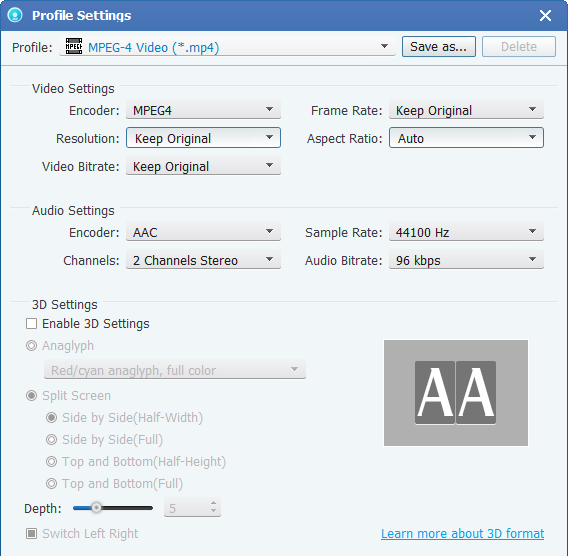
In addition to converting DVD to PowerPoint video, the program has presets from columns on the left side for dozens of popular devices like the iPad, iPhone, Android, PS4 and many more. Just select a preset and it will fill in all the settings for you accordingly.
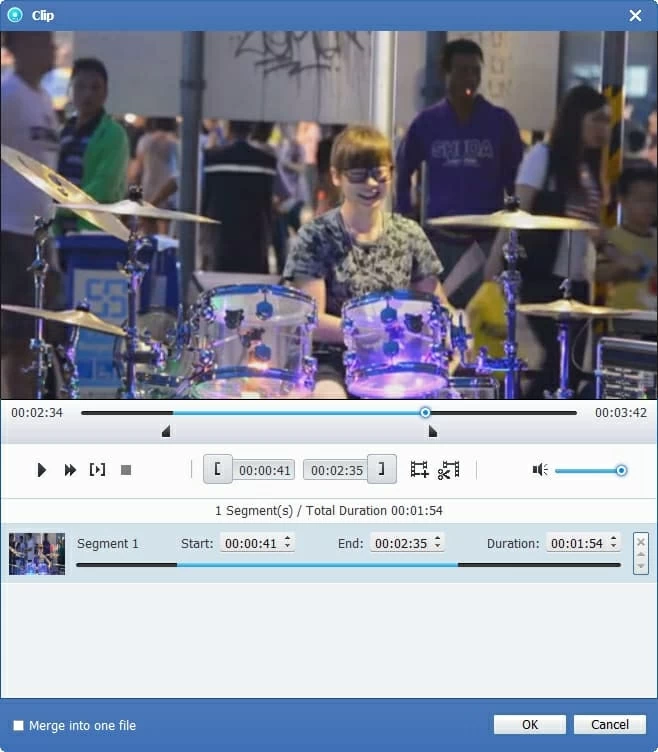
Optional: You may want to choose the section of a DVD to show in your PowerPoint presentation. You also have options to do this. Click the "Trim" icon on the top bar, this will open a window similar to the screenshot below, where you'll split a part from the DVD movie as easy as selecting your video file, setting the clip range with a start time and end time and then clicking OK. Some of other editing options are available for you to control your video further.
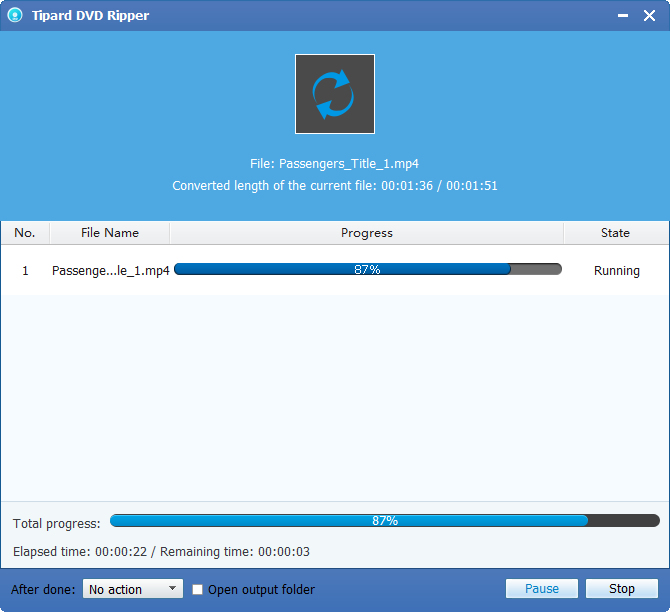
Step 3: Convert DVD
Finally, choose the local folder where you want the exported files saved through "Destination" option beneath the "Profile" drop-down menu.
Now, hit the blue "Convert" button on the bottom to begin ripping DVD into PowerPoint friendly file format. The conversion process is displayed in the progress bar. The complete process could take a while depending on the number of files that you are converting and the speed of your computer and DVD drive.
Once finished, you'll have the new AVI (wmv or mp4) file on your hard drive that are ready to be embedded into Microsoft PowerPoint document. here below is the links about how to insert the ripped DVD video into Office PowerPoint.
1. Add and play a movie in a presentation 2007
2. Insert video into your PowerPoint presentation 2010
3. Insert or link to a video that is stored on my PC into PowerPoint 2013