
How to Retrieve Deleted Text Messages on iPhone


Tip: If you're running a Windows computer and want to capture everything that's happening on your screen, see here.
Before you actually start capturing screen with Video Recorder tool built in Screen Recorder, please download the application from the links below and install it on your desktop. The process is pretty simple, and it's almost identical on both Mac and Windows computers.
Highlights
Click the Screen Recorder icon on your Mac to launch the application. If this is your first time using it, you will be prompted to give the app access to record your screen.
In the main interface, select the Video Recorder tool to proceed.
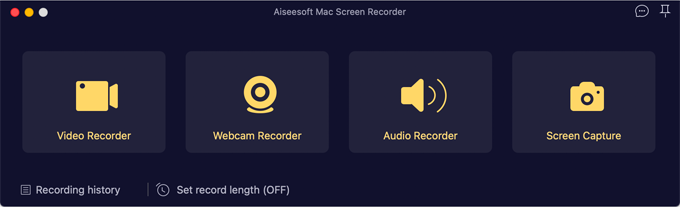
It will get you into the video recording screen.
In this part, you're going to choose how you want to record your screen. You can record from your whole screen, a window, a selected area, your computer sound, microphone, or a webcam.
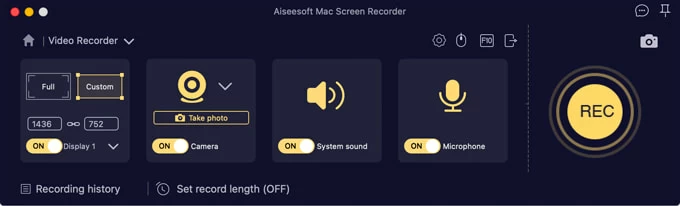
The Screen Recorder for Mac offers the flexibility to record custom dimensions, the whole screen, a region, a window, or a fixed aspect ratio.
1. Click Full option to record the entire screen.
2. Or, click the Custom, and then click Select region/window from the drop-down menu.
At this point, the crosshair appears. Drag the crosshair across the desired area on your screen to select the portion of the screen you want to capture. You can then select a corner of the orange and white stripped outer boundaries and move it to the desired location to adjust the size of recording frame.
You can also take advantage of this application's Auto-select When Hovering Mouse feature to help you snip a region of the screen accurately. Simply hover your mouse over the region you want to capture and it'll be highlighted. Click once and you're good to go. This can be really convenient if you're clean capturing a specific region, window or dialog box.

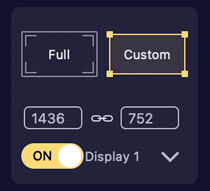
3. Choose the resolution you'll record footage from presets list in Custom drop-down menu:
Select a preset in the list to activate it, and then click within the highlighted area and drag the selection to the desired location on the screen.
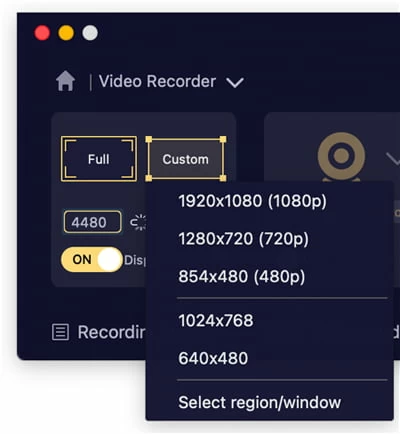
4. Custom Dimensions - enter the specific dimensions into the Width and Height fields. At this time, a fixed recording area will open along with a dashed line around your screen. Click and drag to move it to the desired location on the screen to select recording area.
![]()
Tip: After you enter the desired values for Width and Height, you can click the Lock icon between them to lock the selection to a specific aspect ratio. It doesn't matter which value you change in Width or Height, it stays locked at the fixed aspect ratio and sets another value automatically.
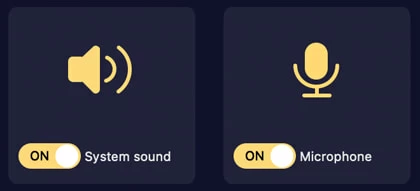
You will also want to record a screen that includes an audio track from either Mac internal sound (sounds from applications and websites) or microphone, or both simultaneously.
To do so, toggle the switch beside System Sound or/and Microphone to ON position.
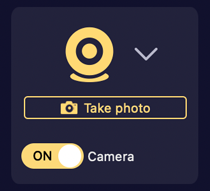
In addition, the software allows you to record your screen along with your webcam. This can be very useful especially if you want to express something important for your video.
To do this, toggle the switch near Camera to ON position and a live video of camera window opens. You can then drag and resize the webcam frame within the recording area by selecting the webcam frame. It's advisable to do a camera test before recording.
Tip: If you have more than one camera attached in the computer, you can click the down arrow next to the icon to select the desired one. By default, the program will use the built-in FaceTime HD Camera.
Now, click on the REC button on the right side of the program window to start recording your screen. Wait for the countdown and then perform whatever actions you want and use your microphone to record audio.

When it's recording, it displays a dashed box that indicates the recording area and places a float bar under it. With the bar, you can click the Pause button to temporarily stop recording, resume it, and capture snapshots.
![]()
Another nice touch is this application's Annotation option. By clicking on the Edit icon on the right side of the float bar, you can add annotations during the recording. arrows, shapes, texts, callouts are all supported.
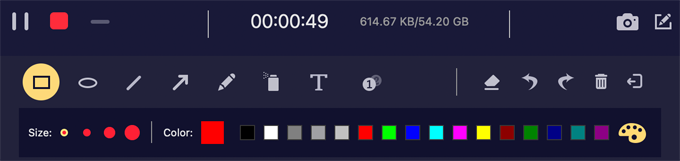
When you are finished recording your video of the screen, click the Stop button (the red square icon) to end the recording.
![]()
When you're done with your recording, the video will appear in a simple editor, where you can preview and trim it to suit your needs.
If you're happy with the result and don't want to do anything else, just hit the Save button in the lower right corner to save it to your Mac.

The software will save it to the default location automatically on your computer and open the Recording history window. You can choose to view, rename, open the folder, share or delete the recordings as you want.
By default, the recorded video will be saved in MOV (H.264 + AAC) format. (In Preferences, you can change it to MP4 or M4V format the next time you want to screen record your Mac)
Tip: you can click the Recording History option located in the lower left corner of the program main screen to see your recordings history.
Before export your screen recording, the application lets you make simple trimming task to remove unwanted sections at the beginning, or end of your video.
To do this, click the Clip button located in the lower left corner of the screen.
![]()
It will present you with a new clip bar. Simply move the Beginning slider to the point you need. The same goes for End, followed by Trim button.

At the bottom of the main screen of the software, it gives you more flexibilities to enhance your recording experience.
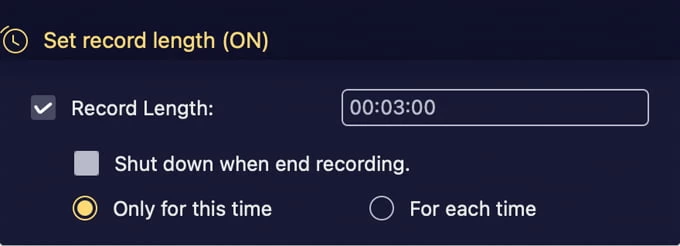
Click the default Set record length (OFF) button.
![]()
In the open window, set how long you want to record the video, and decide if it shuts down your computer after stopping recording. You can apply this setting to just this time, or for tasks.
Also, you're able to tweak screen recorder preferences, including Recording, Output, Mouse, and Hotkeys.


