How to Extract Sound Track from MKV and Convert to AC3 Mac


About WebM
WebM is a new standard to be used in HTML5 video tag for the purpose of viewing videos on the web. Video streams encoded in WebM file format use VP8/VP9 video and Vorbis/Opus audio technology. WebM appears to dethrone flash players you used years ago. The highlights about WebM are its adaptation to various bandwidth, real-time video delivery and fast loading speed. To date, a number of web browsers and video sharing sites have offered WebM videos, including Firefox, Opera, Chrome and YouTube.
About WAV
WAV, which belongs to the program of Microsoft and IBM, is an uncompressed audio format using PCM codec. It is part of RIFF (Resource Interchange File Format) technology. As a lossless format, it produces high fidelity and CD quality audio. For this reason, WAV files are large. In some sense, WAV is equivalent to Apple's AIFF.
Convert WebM Footage to WAV in the Right Way
Whether you are convert WebM videos to WAV for audio editing or other media requiring best audio quality, Video Converter does exactly what you have been expecting. The highlight about this tool is the ability to let you select a format to wrap the output audio data that are ripped from the WebM videos, like WAV, MP3, M4A, AAC, AC3, etc. It also can convert video files to the format required for various devices. Besides, you are allowed to do simple editing. For example, you can trim the original video file to get any segments you like to before you convert from WebM files to WAV on Mac or PC's.
Step 1: Import WebM video files
To load WebM footage onto this software, you can simply drag them from the local folder and drop them onto the interface. You can also click "Add File" button on the toolbar to browse for the files and choose them. Once done, the titles of the selected WebM files will show on the interface in no time.
The simple user interface suggests how easy things are going to be from the beginning.

Step 2: Configure output settings
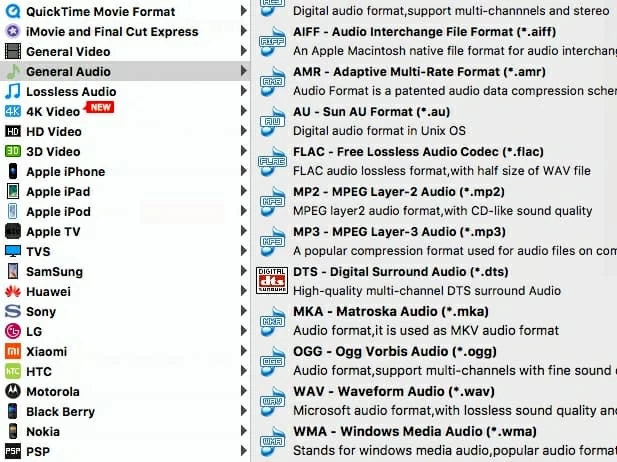
Click "Profile" drop-down menu in the lower left hand corner of the interface to open the Format panel, then click the "General Audio" column on the left side to expand the list, from which to select "WAV – Waveform Audio (*.wav)" as the output format.
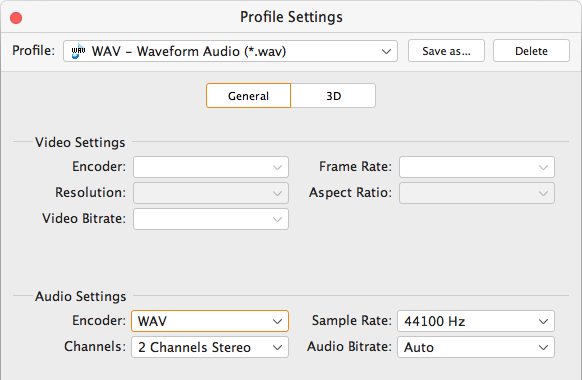
If you intend to further modify .wav audio parameters like Audio Bitrate, Sample Rate and Channels, you can click the "Settings" option to the right side of "Profile" menu to get into Profile Settings window.
It's worth noting that if you mess up the settings accidentally, you can change the settings back to their original values by clicking the "Restoring Default" button located in the lower left corner of the window.
Step 3: Start conversion
Click "Browse" (beneath "Settings") and navigate to a place where you want to keep the exported files.
After you are satisfied with all the settings, click the orange "Convert" button and this WebM to WAV converter begins to convert your WebM files quickly to WAV file format on your Mac or Windows machine.
The process may last from a few minutes to a few hours, depending on the speed of your computer and the size of the source file. The progress bar gives you an indication of each file's converting speed and status.
That's it.