How to Burn iPhoto & Photos slideshow to DVD on Mac


See more about: Blu-ray Creator, a quick way to turn digital MTS videos to Blu-ray.
How do I convert videos (recorded in .MTS format) from my HDR HC7 camera into a DVD? I have DVD Flick but it always doesn't work. Anyone know the software to burn MTS to DVD disc? Preferably software that makes a menu with play button and scene selection.
AVCHD MTS files is very popularly used in camcorder shot because of its good quality performance. However, the original MTS videos can't be played directly on a regular home DVD player. So if you've got some of MTS clips from your digital camera or a camcorder, and want to be able to burn MTS to DVD for watching on a big TV screen, then you will need to a third-party tool to get the job done.
That's where DVD Creator for Mac comes in. It is a great DVD authoring tool that handles almost any video file format, including the capability of converting MTS to DVD on a Mac for playback or backup purpose. There is no need to convert MTS files into a DVD compliant format and then burn to the disc. You just load them into program and it will do the rest for you. To make the creation of a disc more personlized, there are lots of pre-designed stylish menu templates you can choose from. Backgrounds can be personalized, as well.
If you are running on a Windows PC, and want to put MTS you have on your hard drive onto a disc so you can watch it through your DVD player, please try DVD Creator for Windows.
Step 1: Add MTS video clip(s)
Run this MTS to DVD converter and the first thing you see is a plain screen as the program loads.
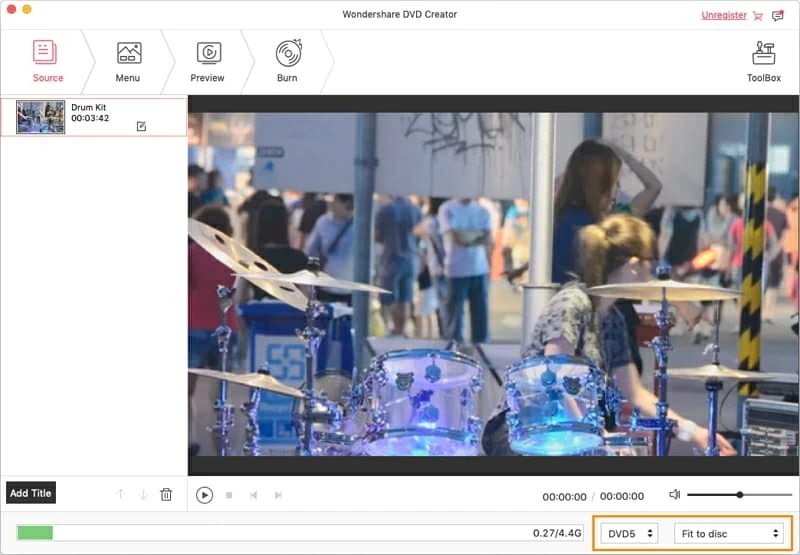
To get started we will add video files, so click on the "+" icon on the center area of the program window, then navigate and select the MTS videos you wish to burn to the empty disc. When the video files are loaded a green bar in the bottom side will show you how full the DVD disc is.
Note it's really easy to figure out if you added too much video or not through the bottom bar, which will show you the percentage of the DVD that is full.
<
Step 2: Edit MTS Videos
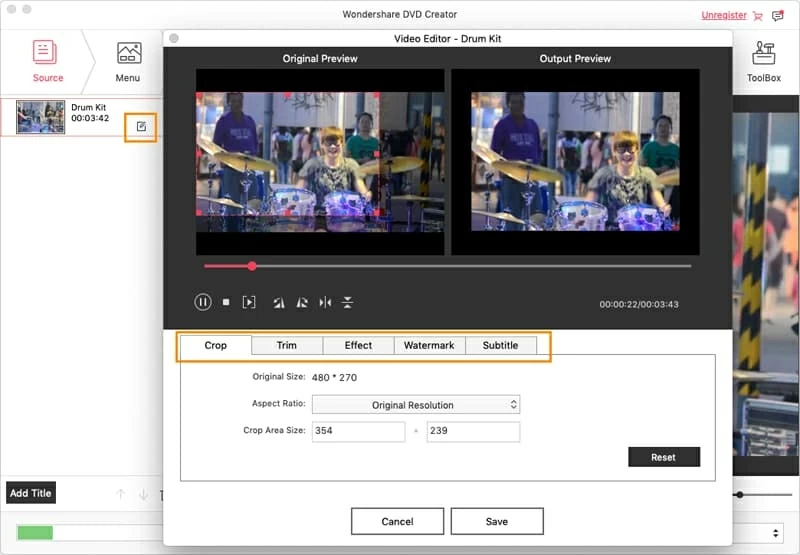
Once you have added all of your MTS clip(s), go ahead and edit the files if you like. This MTS to DVD converter for Mac includes a pretty basic editing feature. Simply highlight the video file to be edited, and then choose "Edit" icon in the lower right side of the video to open the editing window. Here you can do some trimming, adding watermark, performing effects, and even importing external subtitles. Pretty simple to use.
Step 3: Add a DVD menu
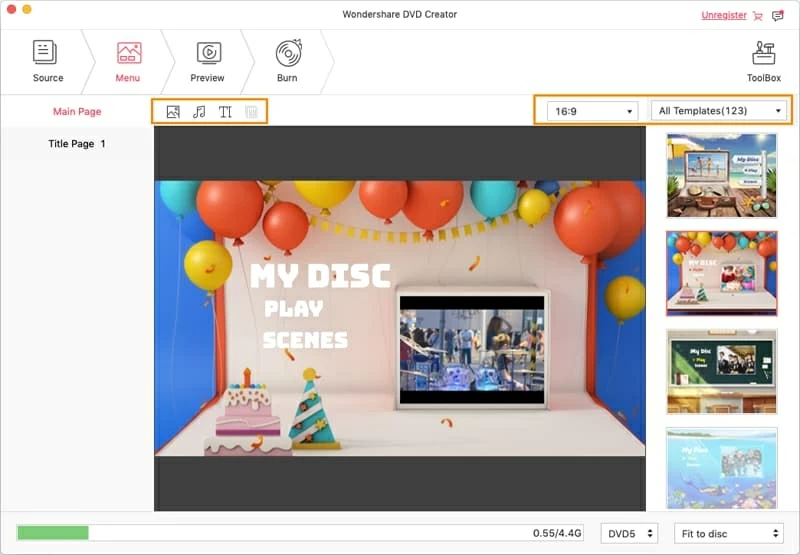
Go ahead and move to "Menu" tab, you have a variety of cool menu styles that you can choose from to create your very own, custom designs for the DVD project.
Here you can choose a template which will determine the appearance of the menu, as well as frame and button for the titles and chapters.
Step 4: Start burning MTS files
Before the MTS burning, the application will quickly generate a preview with your selected DVD options. Go to the "Preview" tab (next to "Menu" tab) on the top to preview the finished DVD project.
After everything is done, insert a blank DVD: 4.7 GB (Single Layer DVD) or 8.5 GB (Double Layer DVD) to your Mac, and press the "Burn" tab, this will open up the dialog box where you can burn MTS file to DVD disc or, if you want more control, change for "DVD folder" (AUDIO_TS, VIDEO_TS), "DVDMedia" and "ISO File".
Again, click on the red "Burn" button to start burning MTS to DVD on Mac.

A process screen will appear indicating how long until it is finished as the MTS file(s) burns. The time for MTS to DVD conversion takes a while, especially if you're burning a long quality MTS video. Usually the larger size or higher quality the videos are, the more time will be needed.
That's it! After the process finishes, just pop the disc into home DVD player and enjoy it on a big, beautiful HDTV screen.