How to Rip a DVD to Work with Windows (Live) Movie Maker


See more about: All-in-one Blu-ray Converter to Convert Blu-ray & DVD & Video & Audio to format you need
What is the best way to import DVD-Video into Sony Vegas project? When I try to open it this way and I go into "File" then click "import" to try to import the DVD content into Vegas...but then nothing happens. Any suggestion?
As a digital video fan, there are many of reasons to own DVD collections on your bookshelf. An optical disc is a great media to store high quality movie content and you can watch the funning DVD movie via a big TV in the living room with kids. Also, it may be quicker and easier to buy a DVD than wait to download a video from Internet if you lack a fast Internet connection. Sometimes, you may want to extract some clips from your DVD and put into Sony Vegas Pro to create a new project file for further use, this is what this article is all about.
Although Vegas Pro can't recognize DVD format natively, a variety of software are available that will let you rip DVDs to Sony Vegas Pro. I prefer DVD Ripper for the simple reason that it is easy to use and can rip the entire disc, or pick out just the main feature or episodes. It gives you options to merge all of the DVD's movies into a single video, or export individual movies of your choice.
The software also allows you to choose subtitles and audio tracks. For experience users, you can get full control over the video by tweaking with a click of a Settings button.
Additionally, when you rip the disc you have the option to customize the video - trim the video to get a part, crop it to remove black margin, and add effects to it. For those who're running a Mac OS X system and want to convert DVD to a format you can work with Apple TV, iPad, TiVo, iMovie, or whatever other device/application you might be using, please head over to DVD Ripper for Mac.
Step 1: Select DVD source
Install the program and get ready with the DVD you want to rip for Sony Vegas Pro.
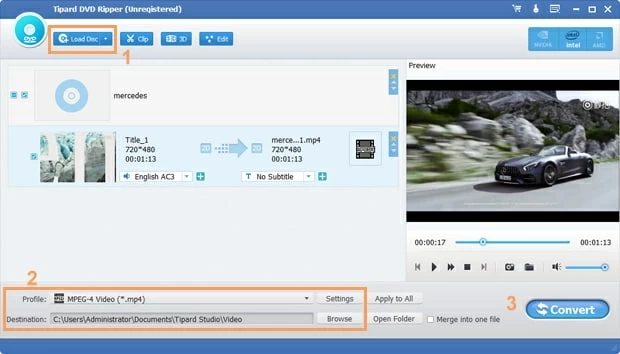
Click the "Load Disc" button on the top menu bar. In the opening browser window, find the DVD files you want, select them and hit OK. The DVD Ripper will begin scanning the DVD's content. Generally, it will detect the title with longest durations and largest size and import into the project area.
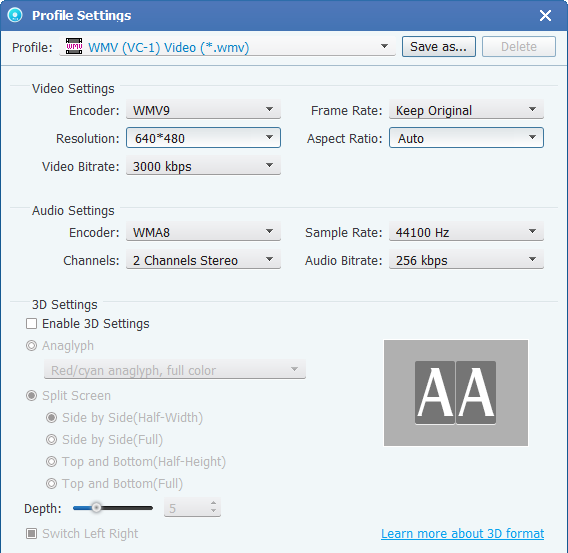
Step 2: Set output preferences
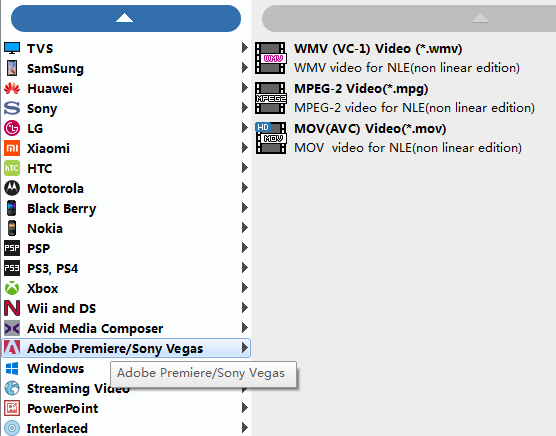
On the bottom side of the main screen, click the "Profile" drop down box to bring up the format panel.
Generally speaking, WMV, MPG and MOV are the standard video format most people used to rip DVDs to Sony Vegas. So here just choose one of them as the exporting file format, all the necessary settings of the format will be automatically optimized for you.
Next to "Profile" dropdown menu, click "Settings" button, This should bring up a window for configuring the encoding settings, which will affect how the final video will look. You can leave those alone by default if you know nothing about it.
Step 3: Convert the DVD Video to Sony Vegas
Hit the blue "Convert" on the bottom right side of the main window to begin the ripping process. This might take some time from minutes to hours, depending on the size of the video file and the computer's hardware.
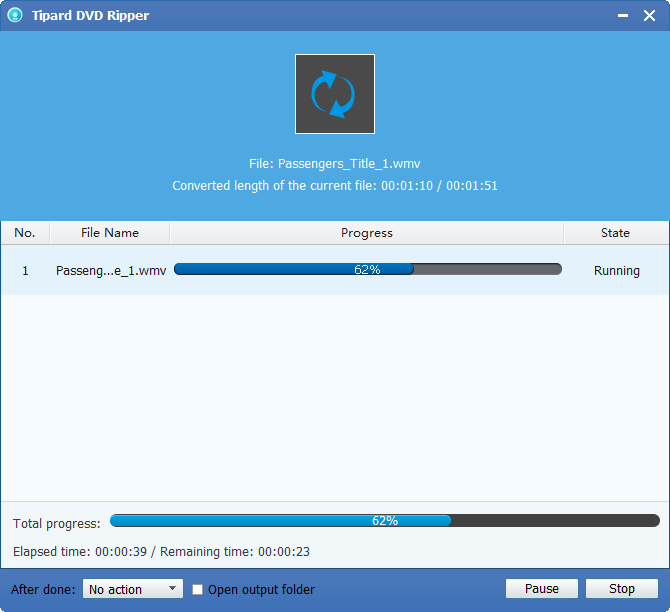
This DVD to Sony Vegas converter, holding NVIDIA GPU Acceleration and AMD APP Acceleration technology, will help you rip the DVD disc in a fast way!
That's it!
Step 4: Copy the files from the DVD into Sony Vegas
Now, put the new created file onto Vegas Pro by clicking the Import Icon (next to the lighting icon), or 'File' > 'Import'…> 'Media…'. Happy enjoying!