
How to Retrieve Call Logs from Samsung Galaxy Phone


Manage your iPhone in a much easier manner without iTunes? You may be interested in iTransfer.
I'm having an issue where, after updating my device to iOS 13, notes from the Apple Notes app are not syncing or uploading to iCloud. Tried signing out and back into iCloud account, but it still failed to sync. Interestingly, if I add a note through Notes app in iCloud.com, it appears on both my iPhone and iPad immediately. Anyone else has this issue and how can I resolve it?
Notes app is for iPhone users. You get used to saving anything valuable within it, whether it's all about a quick thought or an interesting idea. If you've ever thought about backing up notes on iPhone, now is probably a good time. It saves you the trouble of losing the data in the event of accidental deletion, hardware failure, device misplaced or stolen. And, maybe some of the notes disappeared since iOS has been updated.
An iTunes backup includes notes every time you back up your device on iTunes (or Finder if you're on a Mac with macOS Catalina); and iCloud gets notes from iPhone backed up or keeps them in sync with its server. Besides that, thanks to a helpful tool, you could even backup and export the notes to your computer (Mac or PC) with minimal work.
While the approaches are referencing iPhone models, similar processes can be used when backing up notes on iPads.
1. Back Up Notes on iPhone Using iCloud
The sound and free method to back up notes from iPhone is, as we mentioned, to use iCloud. The wireless sync feature keeps the notes on your device in sync across Mac, iPad, as well as iCloud.com, and saves them to the storage. To activate iCloud note syncing process, go to Settings > [your name] > iCloud, and toggle on Notes.
While the notes syncing to iCloud account don't include in an iCloud backup, you can still make a copy of the notes on your Mac. Note: there's no option at iCloud website or iCloud for Windows for getting a note to the computer. So if you're using a Windows PC where you would like to back up notes and files to, you'll need to look at method 3.
To back up notes from iPhone Notes app to iCloud, do this:
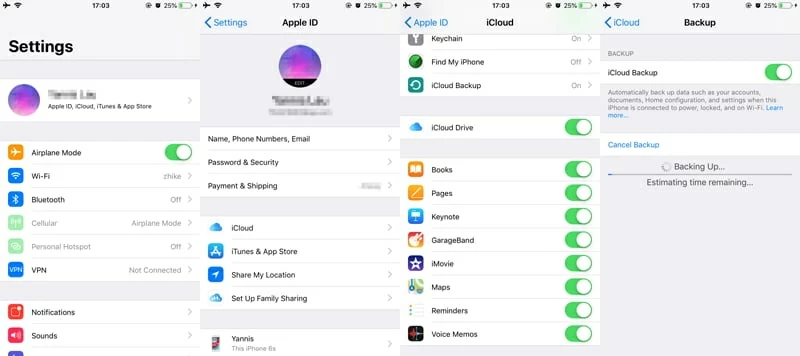
Tips: With automatic iCloud backup, your device will back up to iCloud any time it's locked, connected to Wi-fi, and plugged into a power source. And basically, the data in iCloud is encrypted.
2. Backing Up to Computer Using iTunes or Finder
It's possible to apply iTunes to back up notes of iPhone rather than using your iCloud account. This could be an option if you want to keep a backup on the computer, but unfortunately, you can only restore the backup to the device when you need to access notes from iTunes backup. The end result to an all-or-nothing restoration is that any data in the backup will replace whatever is on your phone.
The process is also applied to those who is going through Finder in macOS Catalina 10.15 for the iPhone notes backup. Here're the necessary steps:
By far, iTunes backs up notes from iPhone to PC or Mac; whenever you reset or erase the phone, all notes will appear after restoring from iTunes backup. There's one additional situation: If you do have Notes turned on in iCloud settings, they're not included in the iTunes backup.

3. Back Up and Save Notes on iPhone to PC & Mac
Instead of backing up anything and taking a backup of notes locally as iTunes or Finder does, it's a very good idea to back up just notes, not entire device, on the computer. One such application, iOS Data Backup & Restore, features immediate access and control, allowing you customize what you would like to back up, and export certain notes to the PC or Mac in the readable HTML file.
By the way, the software will keep the iPhone backup forever in its storage once it's made and therefore, you can find and recover your old notes. This makes it one step better than Apple's iTunes and Finder with its overwriting previous backup.
It's the basic of the software in this section, but read on to see more details on how it works to get iPhone notes backed up and save to a computer. You'll need the tool installed on your PC or Mac for these instructions to work.
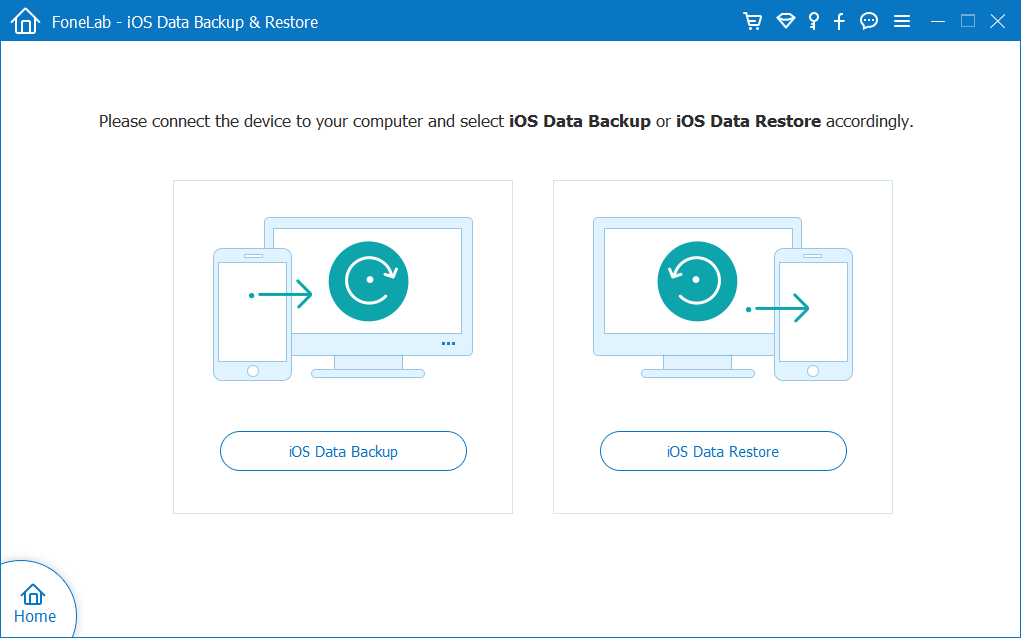
Step 1: Choose "iOS Data Backup" mode
To start with, open the utility. In the startup window, click "More tools", then choose "iOS Data Backup & Restore" tab on the next screen.
Move on and click iOS Data Backup button to begin the iOS notes backup task.
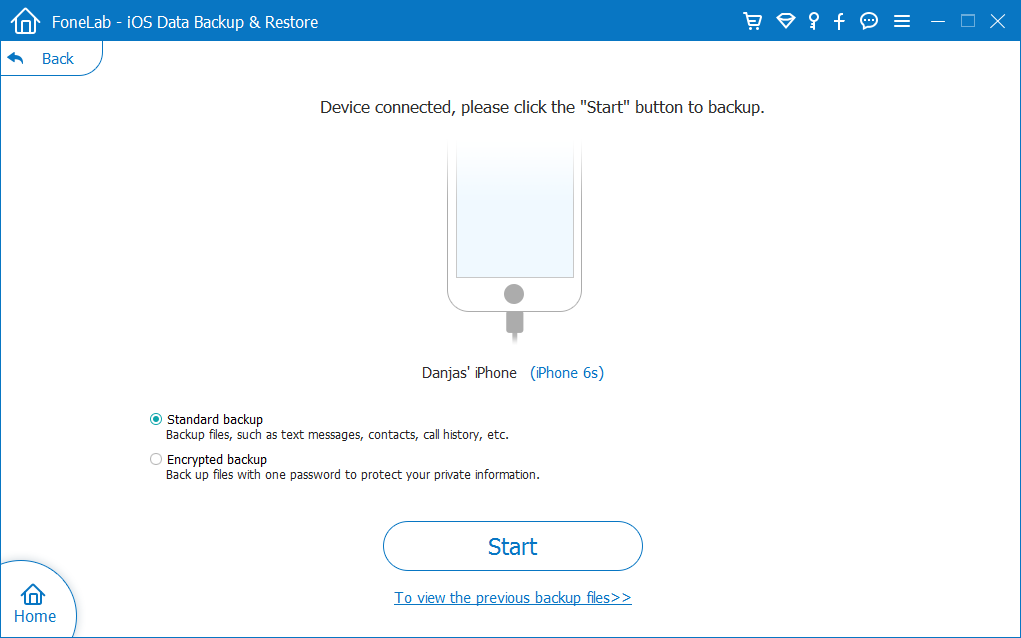
Step 2: Plug iPhone into your computer
Then use a USB cable to attach your phone with the computer. Before clicking the Start button, you could also check "Encrypted backup" option if you need to encrypt your notes.
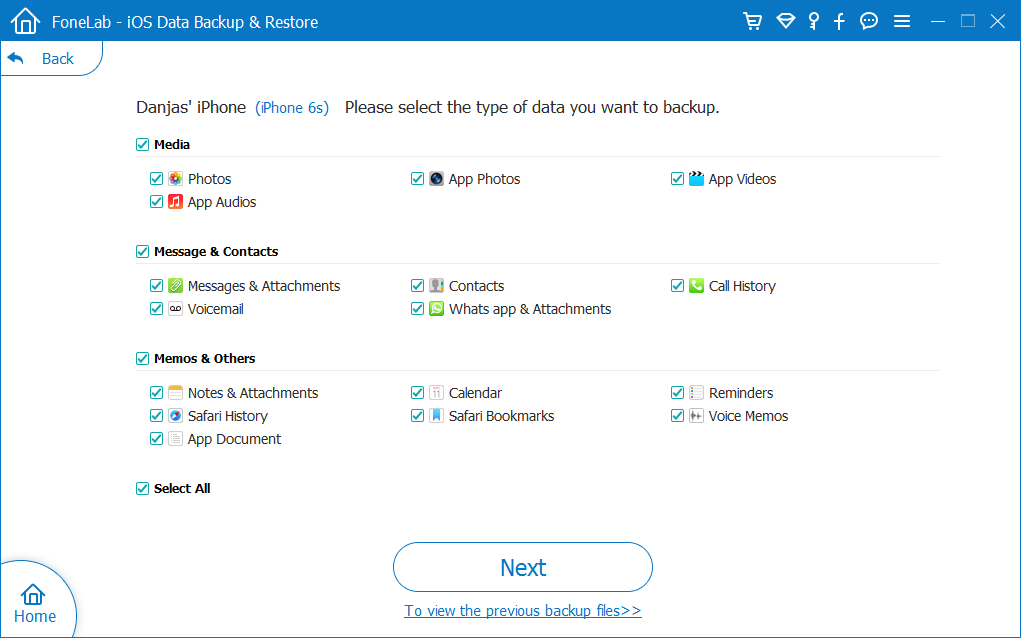
Step 3: Select "Notes & Attachments" and back it up
Afterwards, you should see all types of files that the software can work with.
By default, the "Select All" box is checked and all the types of data are selected. To only back up notes from an iPhone, uncheck the "Select All" and select "Notes & Attachments" box.
When you're ready, click Next button. Depending on how large the notes file is, the process may take varied time to complete.
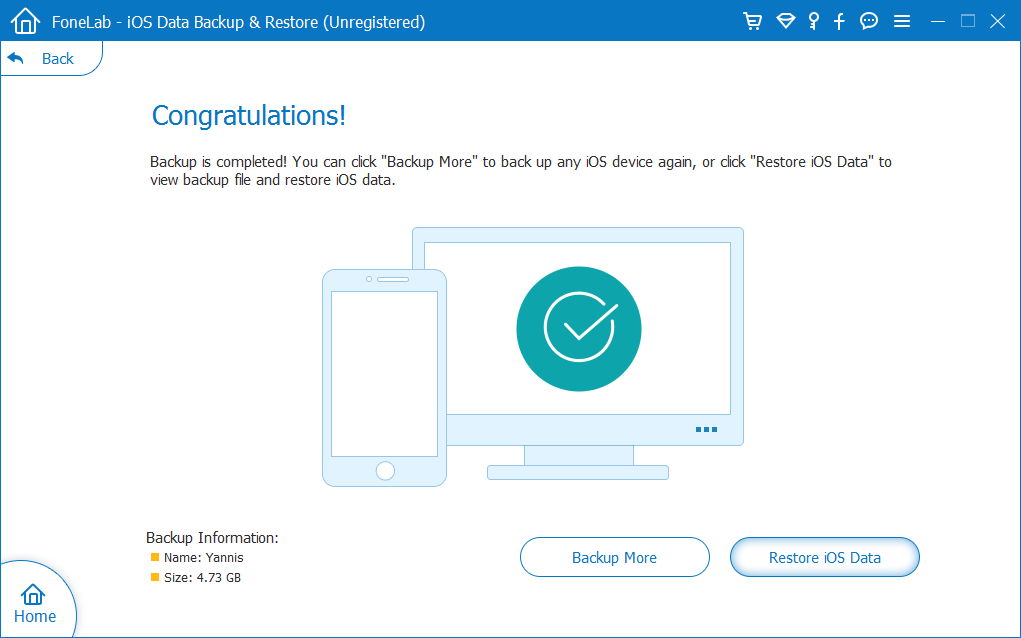
Step 4: Export iPhone notes to computer
Once the backup for notes is made, click Restore iOS Data button, and view the backup.
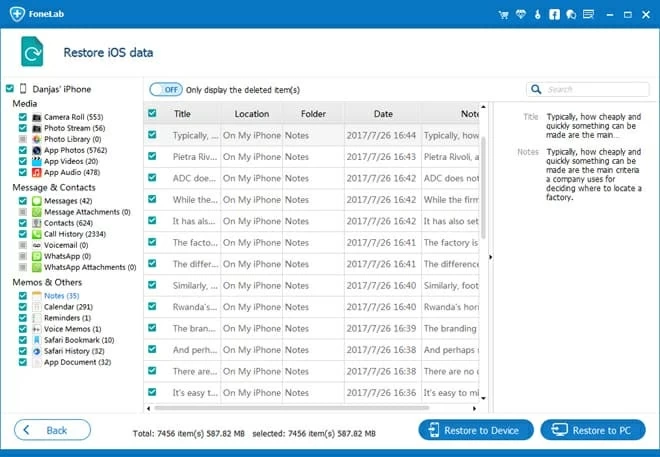
Now preview the notes within the backup, check the boxes for the notes you do want to export, and then hit Restore to PC (or Mac) button to save anything in a HTML document on the computer.
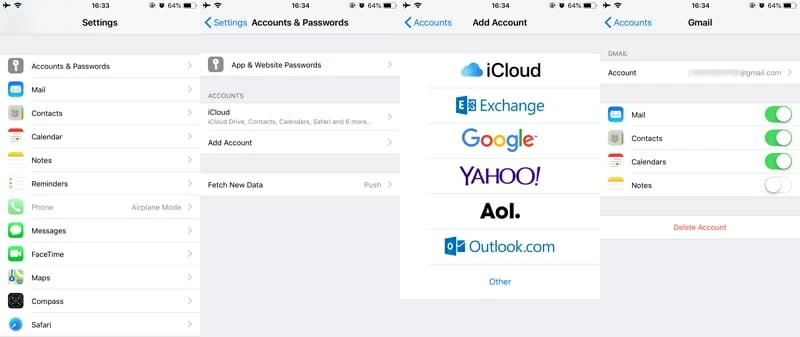
4. Backup Notes on iPhone to Google
Google works well with iPhone as well. Follow up these steps to sync iPhone notes with Gmail account (if you have one):
[Also Read: How to Back Up iPhone 11 Pro Max to Windows 10]