
How to Record a Snapchat Video

If you want to record audio in Windows 10 desktop or laptop, whether it's your own voice or the sound that your computer is playing, this guide will give you the answer.

Voice Recorder app is available for recording audio on your Windows 10 PC.
It's a well-known fact that recording audio on your Windows 10 computer can be very helpful! You can record your thoughts, communicate more intimately, and even create an audio diary that takes you down a near-lively memory lane over and over.
Actually, Windows 10 has an in-built audio recording program called Voice Recorder, which has an easy-to-use interface that enables you to record your voice and share audio files easily. But if you want to record audio on Windows 10 in high-quality and have more control over your audio, including microphone and system sound, you can do so with the more professional Windows 10 audio recorder - AppGeeker Screen Recorder.
Without further ado, this article will show you how to record audio in Windows 10 in detail using default Voice Recorder app and other audio recording software for Windows 10 PC.
Table of Contents
As a pre-installed app on Windows 10, you can use Windows Voice Recorder without downloading it. You can record audio on your Windows 10 computer from a microphone or a connected external device and save the recorded audio in M4A format.
Note that if you are using a Windows 10 desktop, you will need to connect a microphone to use the app to record your voice on a Windows PC; however, for a Windows laptop, its built-in microphone should be sufficient for decent audio recording.
Here's how to record audio on your Windows 10 using native Voice Recorder:
1. Plug in the mic to your computer.
2. Open the Voice Recorder on your Windows 10 desktop or laptop. If asked, grant the permission settings that it's requesting to start using it.
Note:
3. Click the blue microphone icon to start the audio recording on Windows. Alternatively, you can also press Ctrl + R to begin the recording.
Tip: Choosing a well-connected microphone device and speaking close to the microphone will help you record your voice more clearly on your Windows 10.
4. If you want to pause the recording, click the Pause button (or press Ctrl + P). And you can add markers to highlight your recordings by clicking the Flag option.
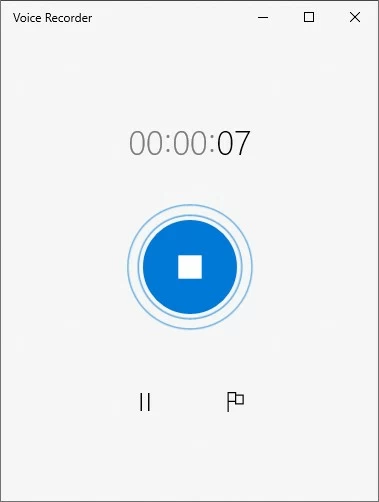
5. Hit the Stop button to end the recording. The audio file will automatically save in an .m4a audio format on your PC, which you also can find in the Documents > Sound Recordings folder.
Note:
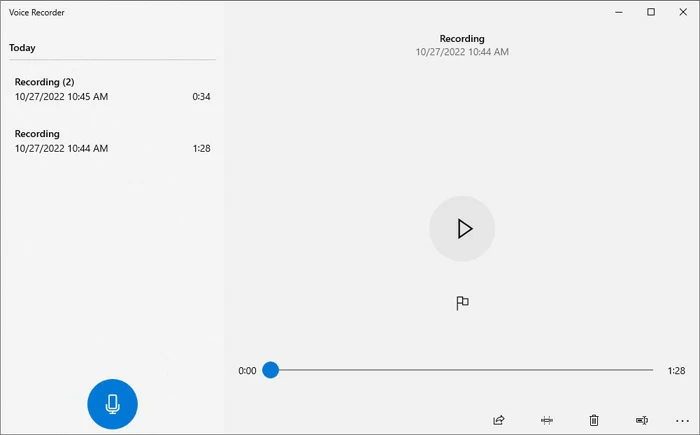
From the list of recordings on the left side of the app, you can select audio files to play, rename, delete or share with your friends. Besides, you can use its trimming function to cut the parts you don't need.
If your Windows 10 is playing other audio, Voice Recorder will capture it along with your microphone sound, but the audio from your computer will sound muddy in the recording.
In fact, few people know that Voice Recorder can also record Windows 10's internal audio, but only if you configure Stereo Mix, which is a feature that can capture any sound you hear on your Windows 10 computer.
Note:
1. To enable Stereo Mix, you will first need to navigate to Settings > System > Sound.
2. Locate and click on the Sound Control Panel on the right side of the pane to access the output and input configuration options for sound.
3. Find the Stereo Mix option under the Recording tab in the pop-up window.
4. Right-click on Stereo Mix and click Enable to be able to use it.
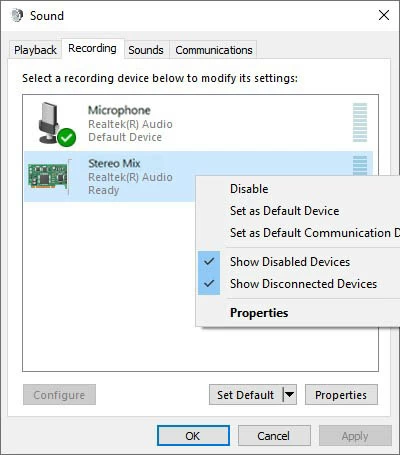
Quick Tip: If the Stereo Mix option doesn't appear, right-click on the blank area in the pane and make sure that both View Disabled Devices and View Disconnected Devices options are checked.
After activating the Stereo Mix option, you can run the Voice Recorder app and click on the big Record button to start recording the audio your computer is playing. Then you will get pure internal audio recordings on Windows 10.
If you want to capture both high-quality lossless system audio and microphone sound in Windows 10, then AppGeeker Screen Recorder will be what you need, a far-too-advanced tool for recording internal and external audio on your Windows computer.
AppGeeker Screen Recorder not only allows you to record system sound and microphone simultaneously or separately, but it also supports various audio file output formats, including MP3, WMA, AAC, M4A and so on. Additionally, it is equipped with microphone noise reduction and volume adjustment features to help you make a clear audio recording on your Windows 10 PC in a noisy environment.
Key features:
We demonstrate how to use this software to record audio on your PC.
Step 1. Open the software and choose Audio Recorder
Launch AppGeeker Screen Recorder on your Windows desktop or laptop and select Audio Recorder for the audio recording task.

Step 2. Adjust audio recording preferences
Click the gear icon above the microphone to enter the recording parameter settings, where you can adjust the audio output format, quality and other sound settings. Go to Output > Audio Settings, and select your audio format and audio quality. You can pick the Lossless option to ensure that the audio will not be distorted.

In the Sound tab, you can adjust the audio input device of the system sound and microphone, and perform recording test.
Step 3. Select the audio source
When everything is set up, select System Sound and / or Microphone as your recording target. If you want to record audio from games or meetings on Windows 10, it is recommended that you turn on both System Sound and Microphone and adjust the volume by dragging the dots.
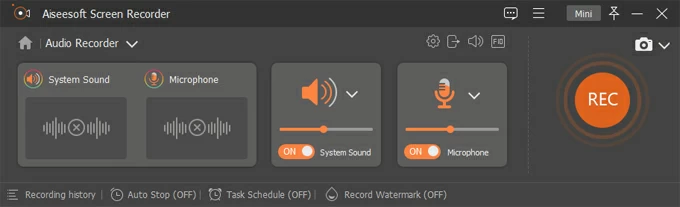
In addition, click on the inverted triangle next to the microphone to select Microphone noise cancellation and Microphone enhancement to improve the clarity of the voice.
Step 4. Start audio recording
Hit the REC button to start audio recording. Both your voice from the microphone and any audio that is playing on your Windows will be captured.
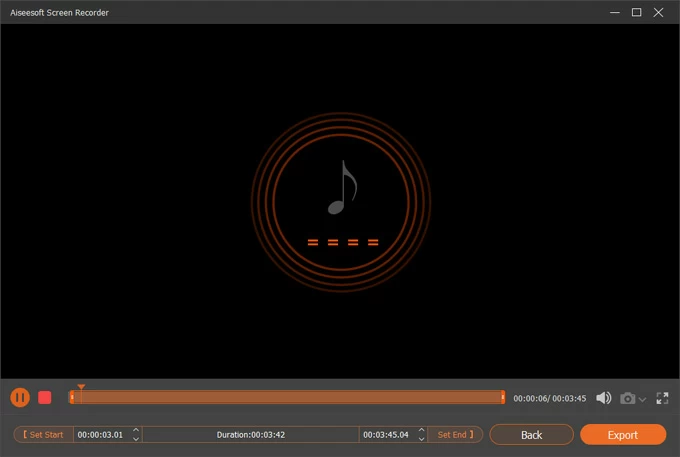
Step 5. Stop audio recording
When you want to finish recording, click the Stop button. Then in the pop-up window you can preview your audio file and edit the recorded audio with advanced trimmer tool. Finally, you can export your custom audio recordings on the Windows 10 PC and share them with your friends or on social media platforms.
Also read: How to Screen Record Desktop on Windows 10
There are also many other audio recording software for Windows 10, and Audacity is one of them. Audacity is a free and open-source application that can record sound on a Windows 10 computer. It does a great job of merging multi-track audio and offers many effects for modifying audio files.
However, its tool layout is very cluttered, which is overwhelming for novices. Thankfully, the easy-to-use interface of AppGeeker Screen Recorder makes it effortless for novices to create audio recording on Windows 10.
Conclusion
Based on the above description and your specific needs, you can pick the most suitable one for audio recording on your Windows PC.