How to Undelete Files in Windows 10

Wondering how to screen record desktop on Windows 10? This article has all the necessary steps to help you achieve an entire desktop recording for all activities.

Here're things to be pointed out before recording the entire desktop on Windows 10:

Taking a screen recording - a video of your Windows 10's desktop - is easy, though Xbox Game Bar won't.
Windows 10 natively comes with screen recording option within Xbox Game Bar app and gives you instant access to widgets for recording a video of any activities in gameplay and almost any app on the computer. Game Bar works for basically any screen recording from gaming footage to application tutorial videos. Click this link and head to learn how to record your screen in Windows 10 followed by setting up Xbox Game Bar tool.
Even though we raved about how amazing Xbox is recording from a single application at a time, a video recording of your Windows 10 desktop or the File Explorer would be not possible. If you want to record the entire screen displaying on the desktop, or if you need to illustrate anything using the Windows File Explorer or Windows Start Menu, the third-party Screen Recorder is a great alternative to choose from among a slew of screen recording software solutions.
Here's how to screen record desktop on your Windows 10 computer, and then find the video once it's saved.
Table of Contents
Xbox Game Bar has not been tailored to recording everything happening on the desktop in Windows 10 PC & laptop. Activities from the entire desktop like from the Start menu, from File Explorer, or from folder cannot be captured while using Windows 10. Only applications.
BTW, here's what Xbox Game Bar can do for your when it comes to screen recording:
Quick Tip:
The tutorial covers two ways that helps you easily record video from desktop on Windows 10 in a stepwise manner, including capturing all desktop activities: the integrated Xbox Game Bar, and AppGeeker's Screen Recorder.
Xbox Game Bar is preinstalled in Windows 10 and Windows 11 for recording video games as well as a variety of desktop apps like Chrome. The recorded video should be saved in MP4 format. it would be a good route if you have no need to record Windows desktop activities and File Explorer - as the Xbox does not show the desktop and File Explorer at all.
[Don's miss: How to Transfer Vides from PC to an iPhone]
AppGeeker's Screen Recorder adds some extras that the internal Windows 10 screen recorder doesn't have. Not only can it capture a video of anything happening inside and outside of games or applications, it can also screen record your whole desktop and all windows on it. You're allowed to record multiple different windows at a time, even you open a new app or window during the recording process. This is an excellent recorder utility if you need to create a full video clip of guideline along with the actions on desktop captured.
You should know the Xbox Game Bar built right into Windows 10 for recording a video clip and start screen recording by hitting Windows Key + Alt + R. But if you need to record the full desktop, you might need to use a robust screen recording tool called Screen Recorder.
The software is an all-in-one recorder & editor that is dedicated to capture anything on PC screen within a single app, or multiple apps at the same time. It does a great recording work of recording streaming games & vlogs, and capturing desktop screen & activities, File Explorer, as well as video and audio (system & microphone) with high quality, taking your pick from several output formats including MP4, MOV, WMV, F4V, TS, WebM, GIF.
For desktop recording on Windows 10, you're granted to capture the entire desktop, or any area of your screen by dragging to select certain width and height either as a video file or a screenshot. And when you finish making your recording, the utility offers a preview window and video editor, which isn't the case with Game Bar.
Use the following instructions to make screen record on desktop of Windows 10, and save the video recording to MP4 file.
Step 1: Launch desktop screen recorder on your Win 10 computer
With Screen Recorder open, select Video Recorder tab on the screen.

Step 2: Configure the tool for screen recording on the desktop
Before recording from your desktop with video and audio, here are a few options you could tweak:

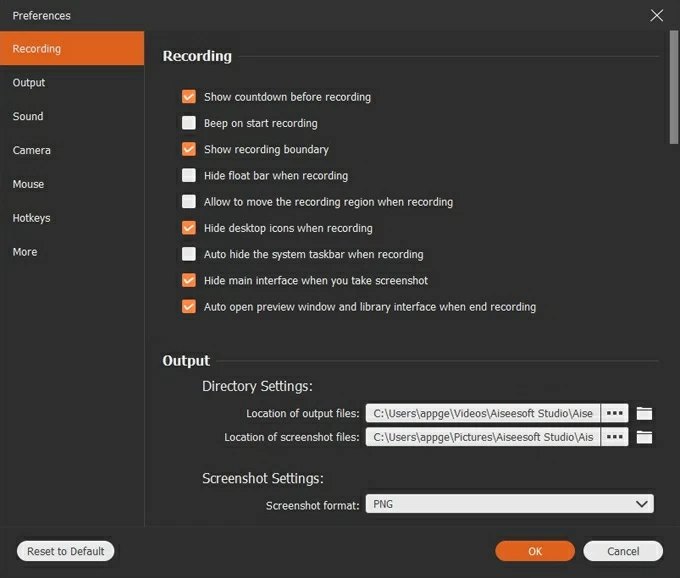
Go ahead to click the gear icon located right above the Microphone tab should you see the advanced settings:
1. Recording
You can tick the items if necessary. "Hide desktop icons when recording" is a useful option when recording your desktop.
2. Output
Directory Settings: Change the location to where you want your video of desktop recording saves when the process ends.
Video Settings:
3. Sound: Adjust the volume for system sound and microphone. The software also offers noise cancellation and enhancement to improve the quality. You can check the sound before recording.
4. Mouse: It's necessary to enable "Record mouse clicks" if you tend to record a tutorial video of the desktop or the File Explorer in Windows 10 PC. Of course, you're allow to record your activities on more than one desktop apps.
When you're satisfied with the configurations, click OK button to return to the video recorder screen.
Step 3: Initiate video recording of the desktop for Windows 10
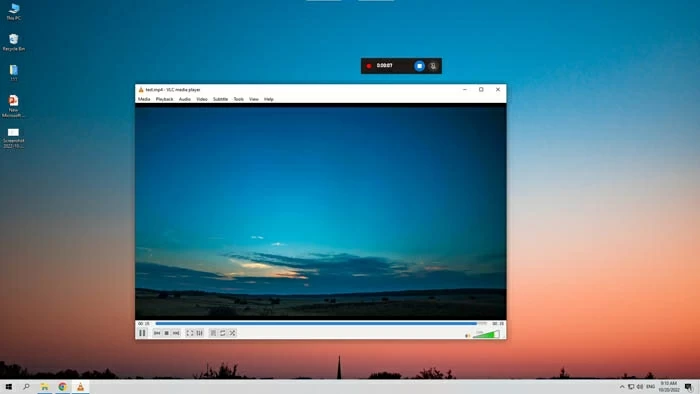
The final step is to hit the orange REC button. You will see a countdown from three to one, and then the software will start recording video of your desktop (with system sound). A small recording widget will appear somewhere on the screen, showing how long you've been recording.
Step 4: Preview the recorded video once recording is finished
When your recording ends, you will see it in the preview window. Click Export button, and then label your creation with file name, cover, etc. This can also be done by pressing Back button and then selecting "Recording history" option at the bottom of the main screen.
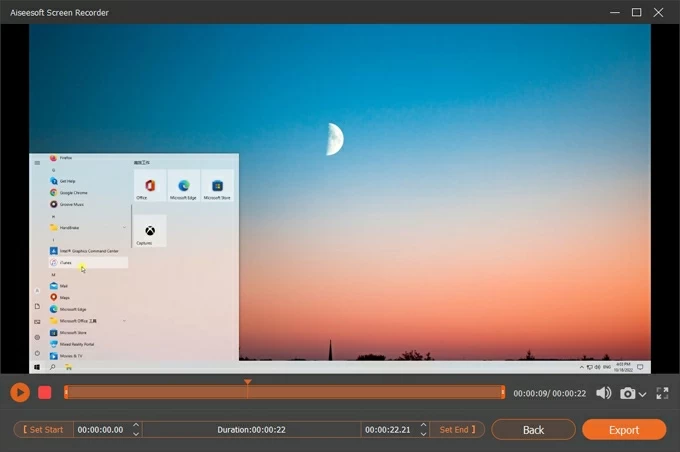
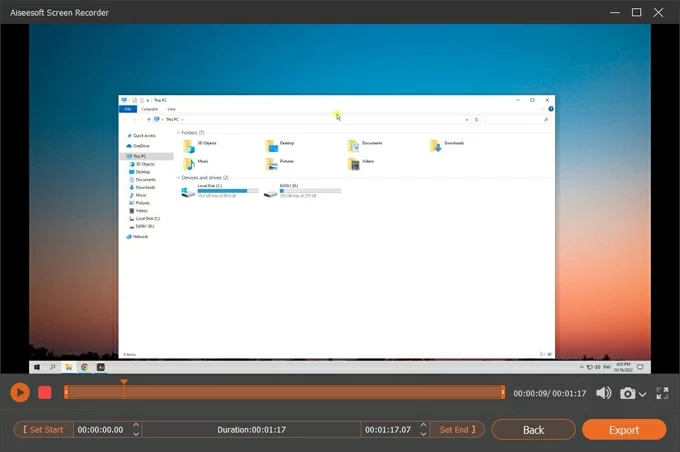
As you see from the screenshots of the desktop recording below, the computer screen recorder has successfully recorded the screen of Windows 10 full desktop (all desktop icons are set to hide before capturing). This is what Xbox Game Bar cannot do.
Entire screen recording 1: Windows 10 desktop and Start Menu
Whole screen recording 2: Windows 10 desktop and File Explorer
So desktop video recording on Windows 10 is a simple matter of triggering Video Reorder, selecting to record the whole screen or the specific part of the screen, and clicking the REC button. You can also hit Ctrl + Alt + R to start recording, and press the hotkeys again to stop screen recording.
Read also: How to Convert MP4 to MOV on Mac
Getting Xbox Game Bar to screen record from Windows 10 is easy. 4-steps for a quick start:
You can locate your video in MP4 file format under Videos\Captures folder.
Note that Xbox is able to record your screen for almost apps and activities you perform on the Windows 10, excluded Desktop and File Explorer.
Before you can record your screen, you'll need to turn on screen recording feature in Game Bar from Settings app.
1.Click Windows 10 Start icon and choose Settings (gear icon.)
2. Choose Gaming.
3. Under Xbox Game Bar, switch on the toggle for "Enable Xbox Game Bar for things like recording game clips, chatting with friends, and receiving game invites."
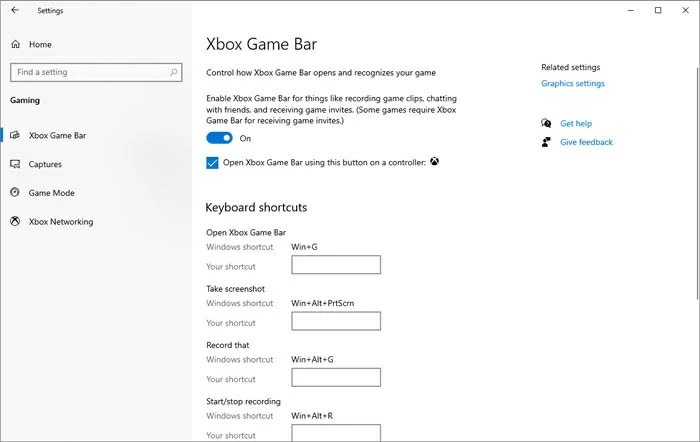
Make sure Windows Xbox Game Bar screen recording function has been enabled before making a video.
Tip: Once the option is ON, Game Bar will open with Windows Key + G to achieve a Windows 10 screen recording. To disable recording again, just return to this screen and toggle off the option. The screen recording option will slide to the left, appearing to be grey.
1. Open whatever you want to record on your computer Windows 10. This can be an app, a game, a web page, or a Microsoft office file. Quick Notice: PC screen recorder Xbox won't record the desktop and any folder (File Explorer.)
2. Hit Windows Key + Alt + R to let Game Bar screen record in Windows instantly at any time. You should see a small bar on the right side of the screen counting down how long you've been recording for.
Alternatively, press the Windows button + G on your keyboard to open the Xbox Game Bar, and then in the Capture dialog, click the white circle icon to start capturing video.
3. To stop video recording, hit Windows key + Alt + R. This can also be done by clicking the stop icon on the recording timer.
Xbox Game cannot record entire Windows screen. Only the area that the app covers to be captured.
4. When you get the message "Game clip recorded", click on it. This will take you to the Game Bar's Gallery for previewing the video you captured. You can also click "Open file location" to locate your new screen recording in the folder that you specified. In general, the recordings are outputting to MP4 format and saved into C:\Users\[yourname]\Videos\Captures by default.

Click on the alert to watch your video you recorded.
Xbox Game Bar can screen record up to 4 hours at a time, whereas Screen Recorder mentioned previously does not limit your screen recording time on Windows 10.
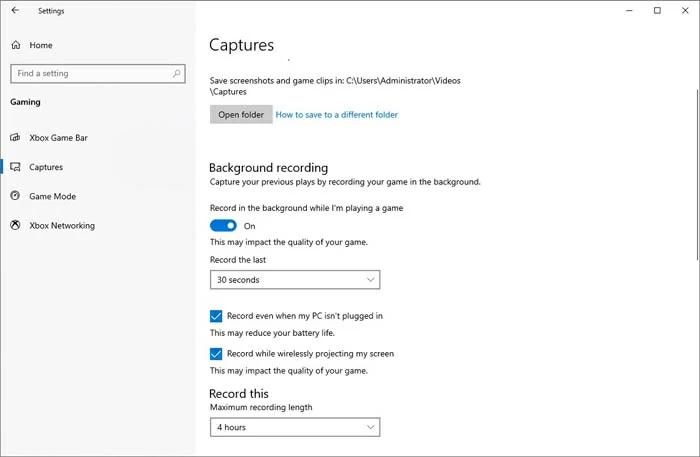
Navigate to Settings > Gaming > Captures and refine the recording settings at the first place.
Q1: Record desktop Windows 10 Xbox. How it works? Any limitations?
Xbox Game Bar is an excellent tool for capture Windows 10 computer screen in an app, web browser, game, online streaming media, office file, and more. The caveat is that it's not a recorder for desktop, file explorer and some programs.
To screen record in Windows 10 computer, begin by opening an app you desire to record. Then press Win + Alt + R to initiate the video recording. Perform any action to be recorded, and when you're ready to stop the recording process, hit Win + Alt + R.
Limitations for Xbox capturing your Windows screen:
Q2: How to record your desktop screen Windows 10 free?
The top 3 screen recorders Windows 10 that offers ability to record desktop video are AppGeeker Screen Recorder, OBS Studio and Screen Recording function in PowerPoint.
AppGeeker Screen Recorder
Screen Recorder for Windows 10 is a one-stop simple application that offers a pretty intuitive interface to let users to record desktop, system audio as well as microphone in-one-stop.
To record anything on desktop, choose Video Recorder on the main screen and hit the REC button. You will have options to record full screen or select the screen area to record, as well as options to capture computer audio or voice from microphone.
OBS Studio
OBS Studio is a free, open-source tool for video recording and live streaming on Windows, Mac or Linux. It requires 4 steps when recording desktop video. Once you download OBS from its website and install it on your PC:
1- Launch it and follow the steps in the Auto-Configuration Wizard. For the purpose of creating video record on desktop of Windows 10, select "Optimize just for recording, I will not be streaming." Then specify the resolution, encoder, bitrate, and more.
2- Set up your audio devices. OBS is by default capturing desktop audio and microphone, but if you don't need the sound captured, you can mute it by clicking the speaker icons in the audio mixer.
3- Add your source for video and ready for recording. You need to manually add a source that you want to capture. Click on the Plus icon under Sources and select Display Capture from the menu in order to record everything demonstrated on the entire desktop or monitor.
4- Start Recording. After verify the output settings through Settings > Output, hit Start Recording.
PowerPoint
The Screen Recording feature built in PowerPoint app makes a breeze for desktop capture Windows 10. Start menu, task bar, folder, File Explorer, as well as all scenes can be recorded.
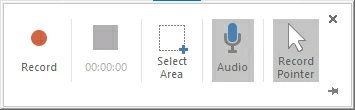
Open a new presentation, click Inset > Screen Recording.

When a dock appears, click Select Area, and use your mouse to click and drag the part of your screen you need to record. Hit the Record icon to begin capturing all actions on desktop. By default, audio and mouse point are recorded.
Q3: How can I make screen recording Windows 11?
Xbox Game Bar is available in Windows 11 as well. With it, you can easily record your screen in Windows, outputting to a MP4 video file.
1. Ensure that Xbox Game Bar for screen recording is enabled.
2. Launch an app or whatever window you're going to capture.
3. Press Windows Key + G on your keyboard to open its recording toolbar.
4. Hit the Start Recording icon. You will see a timer on the screen displaying the length of the recording.
5. To end the video recording, hit the Stop icon.
To find the screen recordings on Windows 11, navigate to C:\Users\[yourusername]\Videos\Captures