
How to Transfer Music to iPhone without iTunes

iTunes and iCloud don't offer a feature to select what to back up or not when it comes to backing your iPhone on the Mac. We explore some alternative methods for you.

What to know
Back up your iPhone without iTunes or iCloud, along with the step-by-step instructions below.
As an iPhone user who also owns a Mac, you may rely on iTunes and iCloud to back up your iPhone on Mac, but both of them have a few limitations.
iTunes is Apple's media data management tool. While it allows users to keep your iPhone on your Mac, it won't let you select what files to back up. Moreover, using iTunes to back your iPhone on Mac is fiddly: the interface and operation are too unfriendly for beginner to master.
Likewise, you're limited to performing a full-iPhone-backup on your Mac by using iCloud. One of the most discussed issues is that Apple gives only 5 GB of free storage for each iCloud account. This is the last thing we would like to see, especially when we are in urgent need to back up more than 5 GB of iPhone Data on the Mac.
There's still hope, though. In this post, we'll look at all the different methods to take backups of your iPhone without iTunes or iCloud.
Fortunately for you, all the problems mentioned above can be easily solved with a smart and easy-to-use third party tool — Appgeeker iPhone Data Transfer. It delivers on its promise to make backing up iPhone on your Mac without iTunes or iCloud easy and quick.
Being a powerful tool, iPhone Data Transfer allows you to select what data on your iPhone to be backed up on the Mac, including music, photos, videos, message and much more. Not only this, but iPhone Data Transfer supports a wide range of devices, so you can easily transfer data from iPhone to Mac, iPhone to Windows and vice versa, even iPhone to iPhone. What's more, there is no limitation to the amount of data that you select to back up.
Backing up your iPhone on the Mac without iTunes or iCloud can be difficult, but not when you're invited to use iPhone Data Transfer. Click on the green button to download it on your Mac now.
Step 1: Let iPhone Data Transfer detect your iPhone
Open iPhone Data Transfer on your Mac. Follow the on-screen prompts to connect your iPhone to manage data by using a USB cord. Enter the passcode to ensure your iPhone is fully connected to your Mac. Once connected, iPhone Data Transfer will display the detailed information about your iPhone like the following screenshot.
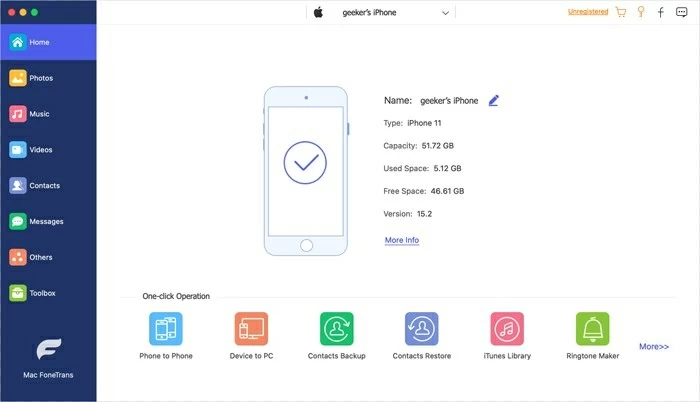
Whichever tab you click, iPhone Data Transfer will load up the relevant files on your iPhone.
Step 2: Select the data that you want
iPhone Data Transfer offers some tabs on the left for you to back up different types of files from your iPhone to your Mac. You can select the tab according to the type of data. In this post, we take the Photos tab as an example.
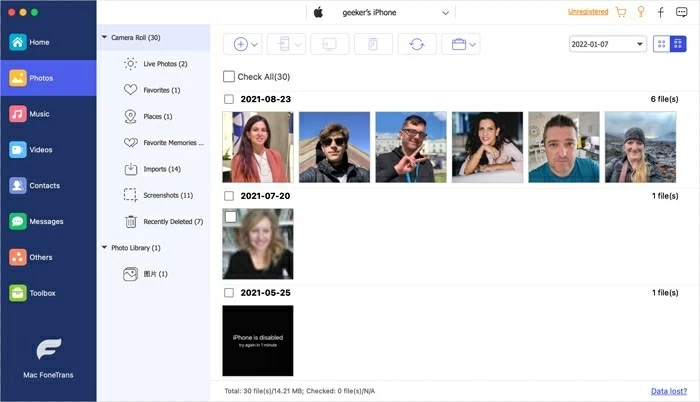
From the left sidebar, click on the "Photos" button. iPhone Data Transfer will load up all the photos from your iPhone. Slide the screen to browse these photos. Tick the photos that you would like to back up from your iPhone to the Mac computer.
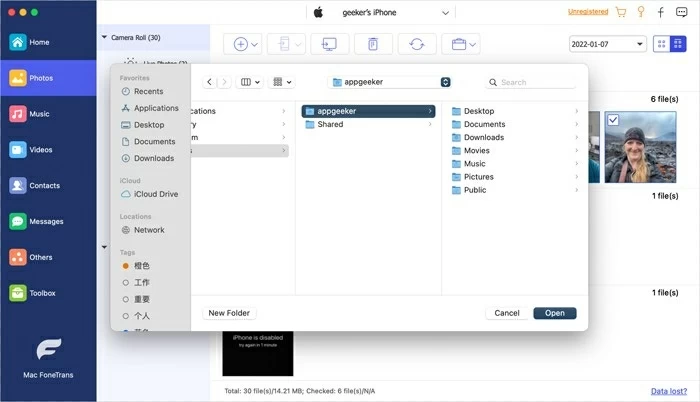
Step 3: Click the computer icon
After ticking the photos you want, click the icon that looks like a computer in the upper menu. Here pops up a window asking you to choose a folder to store these selected filles. Feel free to choose a folder as you like. Finally, click "Open" to begin the process of backing up your iPhone on the Mac without iTunes or iCloud.
Depending on how much data you're moving, the process will take from seconds to a few minutes. And finally, you'll be able to access all the data you just backed up from iPhone to Mac.
As mentioned at the beginning, iTunes has been retired since macOS Catalina, so you have to use Finder to back up iPhone on the Mac
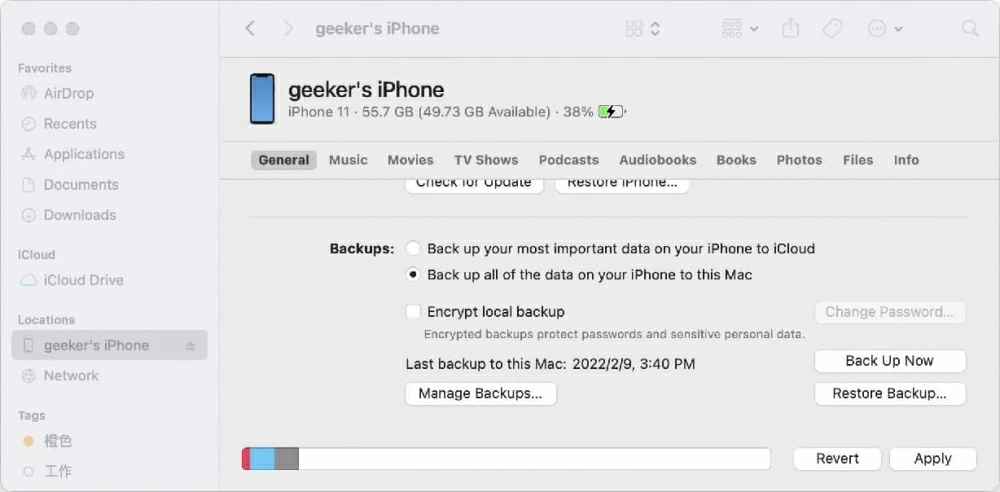
If you are using a Mac of which the version is macOS Catalina and later, you now use the Finder app to take backups of iPhone on your Mac without iTunes or iCloud. This process is similar to backing up your iPhone on Mac through iTunes, though there are a few differences.
Follow these steps to back up your iPhone on the Mac without iTunes or iCloud via Finder:
Plug your iPhone into the Mac and launch the Finder app. Tap "Trust" on your iPhone and click the "Trust" button on your Mac to let both the devices trust each other. Click your iPhone's name under "Locations." Scroll down to find the "Backups" section, hit "Back Up Now" to begin.
In the end, choose the way that works best for you. Finder gains enough popularity as it's Apple's official option to make a full-iPhone-backup on your Mac. On the other hand, iPhone Data Transfer is a perfect option, letting you be able to select what you want from your iPhone to back up on your Mac in a few clicks. It's flexible and won't cause any data loss.


