
Forgot Passcode and iPhone is Unavailable

Need a Mac screen recorder to capture video of your screen? The Shift+Command+5 keys or native QuickTime player can handle the job. You have other options available as well.

To Record Your Mac Screen, you Need to Know:

After capturing screen and recording sound on your Mac, you can play, edit, and share the recording.
Perhaps there is a streaming video on YouTube you want to capture for offline watching or a Zoom meeting you want to save for future reference. Perhaps...No matter what situation is, it is easy to screen record on a Mac to capture what you're doing or viewing.
In this article, we'll look at how to record a screen on Mac, or how to capture video from your MacBook screen using the different ways, ranging from the Apple's own screen recorders that are already integrated in macOS for recording of your entire screen or just a portion of it, to the third-party video capture tools that have more features for recording a video on Mac.
Here's everything you should know about Mac screen recording.
Table of Contents
Modern Mac machines, including iMac, MacBook Air, MacBook Pro, Mac Mini, Mac Pro, will be able to record your Mac's screen with audio. The built-in screen recording capability is part of the QuickTime Player. Starting with macOS Mojave or later, recording screen on a Mac is even smarter as Apple introduces the Screenshot Toolbar, which you can use Shift+Command+5 keyboard shortcuts to open it and display the recording tools.
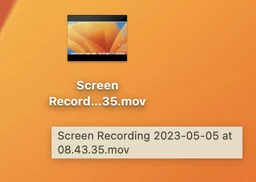
The recorded videos will be saved in MOV format automatically on the desktop by default, along with the name having "Screen Recording date at time."
Before learning how to screen record on a Mac, you may want to check to see if the built-in screen recorder for macOS is work as expected.
If you have a Mac running Mojave, Catalina, Big Sur, Monterey, Ventura, or newer, press Shift, Command, and 5 at the same time on your keyboard, you should be presented with a toolbar with options to capture screenshots as well as record a portion of the screen or entire screen.
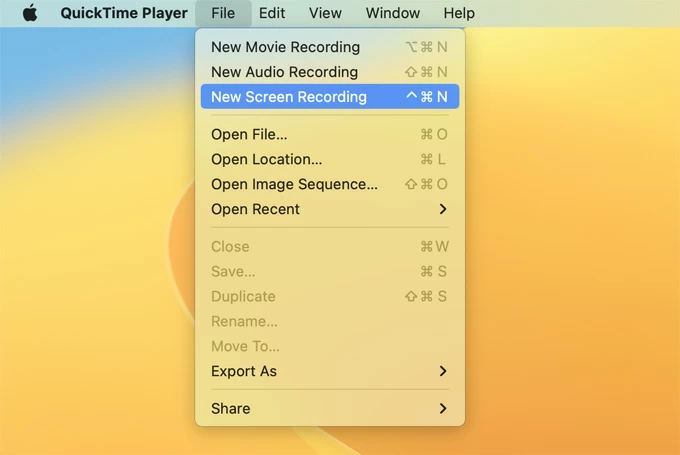
If you have a Mac running macOS 13 High Sierra or older, launch QuickTime Player from Application folder, then select File > New Screen Recording from the menu bar of your Mac. A small Screen Recording window should appear, with a red circle icon located on the middle.
No, it just captures voice from microphone and not the system sound. With Mac's own built-in recorder, you can make your video recordings of your computer screen with hotkeys or QuickTime with just a few clicks. However, it's not a perfect solution either, as it can't integrate the system audio into your screen recording. That means you can't record Mac screen with audio from YouTube videos, music, browser, active window, or any computer audios from system.
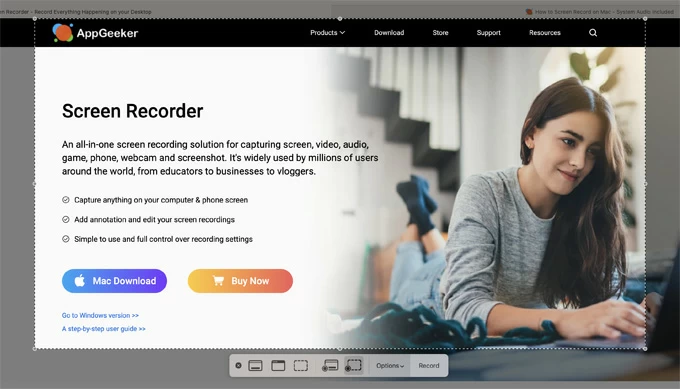
To record the screen on your Mac with audio from system and external source, you may want to use a more robust, third-party app as Appgeeker Screen Recorder if you want more controls.
Platform: macOS Mojave 10.14, Catalina 10.15, Big Sur 11, Monterey 12, Ventura 13 and later.
Without any extra downloads or installations, the easiest way to record your screen on a Mac computer is by pressing the Command + Shift + 5 keys on your keyboard. Beware though, you'll need to be running Mojave 10.14 or newer to use the hotkeys to start recording your Mac's screen. If you can't or don't want to use it, skip to the section on recording with QuickTime player.
1. To bring up the inbuilt screen recorder for macOS, press the Command + Shift + 5 keys.
2. In the opening Screenshot Toolbar at the bottom of your screen, select Record Entire Screen tool. You can hover the mouse over the icon which reveals the name and function of that option to find the particular tool.

3. Press the Record button, which locates on the far-right side of the toolbar. Once you press this button, your screen recording of the whole Mac window will start.
Quick Tip: Change your mind and want to give up taking a Mac recording with Screenshot? You can press the Esc key on your keyboard prior to clicking the Record button.
4. To stop a recording, press the Command + Control + Esc keys. You may also click on the Stop icon (a square in circle) at the top of your Mac's screen, but the keyboard shortcut is much simpler.

1. Press the Command + Shift + 5 keys at the same time on your keyboard. It will launch Screenshot on your screen with several tools for screen capture and recording.
2. Next, select Record Selected Portion tool from Screenshot.

3. Drag the dotted lines appearing on the screen to choose the area you want to record.
4. Press the Record button to start recording your Mac with the section you specified.
5. Once you want to end your Mac screen recording, press the Command + Control + Esc keys at the same time, or click on the Stop icon (a square in circle) at the top of the screen.
1. Press the Command + Shift + 5 keys to launch Screenshot Toolbar on your Mac.
2. To record a part of the screen, select Record Selected Portion from the menu; to capture full-screen videos, select Record Entire Screen instead.
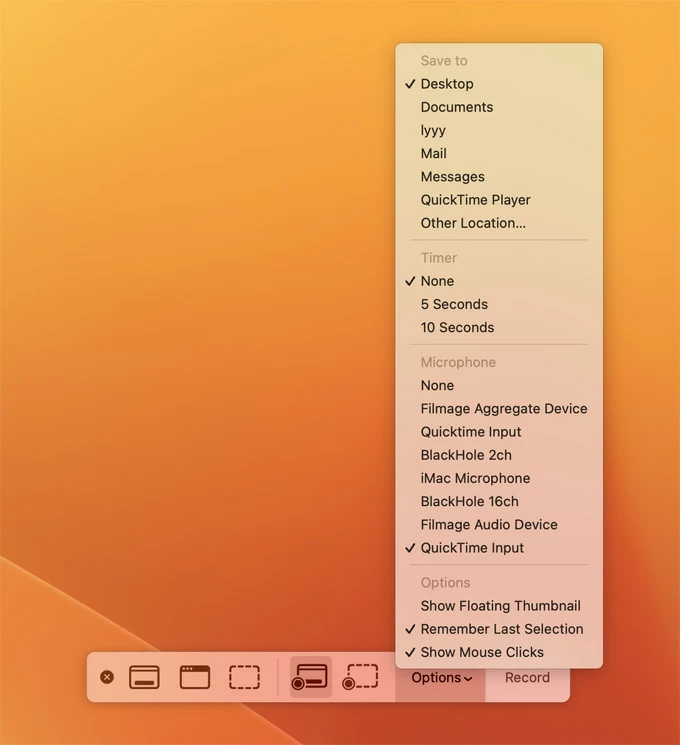
3. Click the Options pop-up menu, select the Built-in Microphone or an external microphone as an audio source if you want to record your audio on Mac while screen recording.
4. Press the Record button and let the Screenshot record screen on Mac with sound.
5. When you've completed the activity being captured, press the Command + Control + Esc keys or click on the Stop icon at the top of the screen to stop the recording.
6. You'll see your video saved as MOV file on the desktop.
Tip: Aside from screen recording Mac with QuickTime player, the program is also capable of recording iPhone on your Mac after connected.
While the default settings are good for most tasks of screen recording in macOS, there are a few options you can change.
1. Press the Command + Shift + 5 keys to bring up the Screenshot recording toolbar.
2. Click Options pop-up menu to change any of the following settings (see image above).
Platform: macOS 10.12 or above
There's no doubt that you can use the keyboard hotkeys Command + Shift + 5 keys to screen record Mac, but the biggest drawback to using it is that it doesn't support audio coming from Mac system. For recording screen Mac with internal audio, you need a third-party app and, while there are many, we like Appgeeker Screen Recorder for this purpose.
The program is one of the most popular screen recording software that works on both Mac and Windows, letting users capture your computer's screen, and audio from multiple sources with ease, including system sounds directly through your Mac and external audio via a microphone. And, in the main, it delivers precisely the experience you'd expect.
Appgeeker Mac screen recorder also has flexible controls, giving you options to pause and resume recording easily, draw and add annotation while recording, schedule your screen recordings, set recording length.
Key Features:
Here's how to record your screen on a Mac using Appgeeker Screen Recorder.
Step 1: Pick Video Recorder
After launch this screen recorder for Mac, select "Video Recorder" from its main interface for recording video on Mac with audio.

Step 2: Select the full screen or a portion to record
In this step, you can choose to click "Full" to capture the whole screen of Mac, or select "Custom" and drag to select a particular portion of your screen to capture.
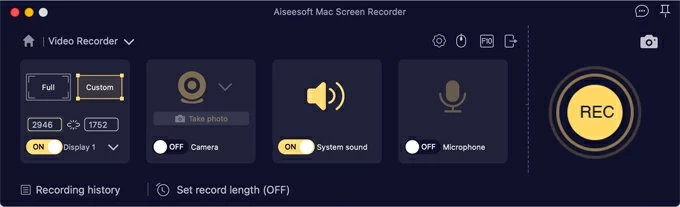
Step 3: Select your audio source
Go ahead to confirm that the "System sound" on the interface is turned on. This will ensure you can record internal sound coming from your Mac.
Step 4: Begin recording your Mac screen
When you're ready to record videos on your Mac, simply click on the yellow "Rec" button on the far right side of the interface. There are also keyboard shortcuts are available to control your Mac recording: click Command + Control + S to start and stop the recording, and Command + Control + R to pause and resume to take a record of your screen activity.
A float bar will appear at the bottom indicating the recording process.
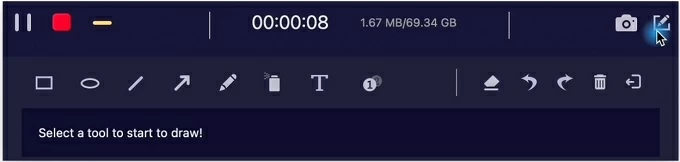
While recording your Mac, you can click the Pen icon on the upper right corner of the float bar to quickly access Markup tools to annotate your video recording.
Step 5: Stop and save the recording
Click "Stop" button (the red square icon) or press Command + Control + S to stop your recording. The recorded video will appear in a preview window automatically, from where you can clip the video to remove unwanted parts.
Finally, hit "Save" button to export the recorded video to your Mac, which will be ended with MOV (H.264 + AAC) format. In Settings menu of this macOS screen recorder software, you can change the format to MP4 or M4V for the recording if you wish.
Another video recording tool that you can use to capture videos from Mac screens is Apple proprietary media player software—QuickTime. QuickTime Player is mainly designed to play media files on your Mac. But it's a versatile tool that can be used as a basic macOS screen recorder for screen recording MacBook Air, MacBook Pro, iMac, or any other Mac machine.
With QuickTime, you can easily Mac record your screen, grab your audio from microphone, and then save the captured video to your Mac. The recording itself is saved as an MOV file, so you can easily play it in QuickTime, edit it using iMovie, and share it on social media websites.
Ready to get started? Learn how to making a screen recording on a Mac with QuickTime Player application below.
1. When ready, open the Application folder on your Mac and double click QuickTime Player to open it. QuickTime should have been installed on your Mac out of the box. If not, you can download it for free from the Mac App Store.
2. Select File > New Screen Recording.
If you're using a macOS version running Mojave 10.14 or later, you may see a Screenshot toolbar with onscreen controls for screen record and capture. If that's the case, follow the instructions listed in the previous sections. Instead, if you get the Screen Recording window like the image shown below, continue to follow those steps.
3. Select Options arrow and select your audio source. You can use QuickTime to record screen with audio from Built-in microphone or external speaker at the same time, and adjust the volume via slider there.
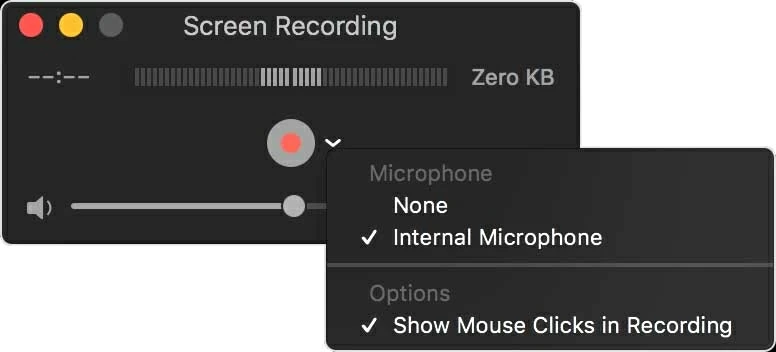
4. Press Record icon (square with red dot inside) and click anywhere on the screen to start a full screen capture; or drag to select the recording area to fit your own custom size, followed by Start Recording button within that area.
Note: Some apps might stop QuickTime Player from recording their screens on Mac.
5. Click the Stop button in the menu bar at the top of the screen to end your Mac screen recording. The Command + Control + Esc hotkeys are also available for stop the recording.
Just as Screenshot toolbar, the QuickTime screen recording capability lacks support of capturing a video of your screen with system audio on Mac. If you need a versatile tool that can record Mac screen without QuickTime and capture everything happening on your computer, don't miss Appgeeker screen recorder Mac.
Related Article: How to Audio Record MP3 on Windows 10
You don't have to be stuck with the built-in macOS recording feature when it comes to recording on a Mac screen. On the market, there are plenty of popular third-party apps you can take to record screen activity on MacBook and iMac.
Here're 5 popular Mac screen recorders available to choose from.
If you're new to macOS screen recording, you might be wondering where does the recorded videos of the Mac's screen go after using the Screenshot toolbar or QuickTime for a recording.
Normally, Desktop is the default place for all the video recordings that you take with hotkeys and QuickTime Player on your Mac. You can simply minimize all your windows, and double click on a file that uses the name "Screen Recording date at time.mov" to open it. You may also access Options menu in Screenshot and check Save to field to see where you store the recordings if you change the default location previously.
As soon as you finish recording the screen on your Mac using either hotkeys or the QuickTime Player, you will want to end the recording to save the captured video. Just as begining a screen recording, it's always easy to stop your recording. Two ways are available to use:
After you stop recording on Mac, the recorded video will open automatically in QuickTime Player. If not, you can manually double click on the recording file to open it. You can now play it with QT to check if everything goes well.
1. Open the video file in the QuickTime Player application. Alternatively, press File and import the recording you want to edit from the dialog box.
2. Click on the Edit button from the menu bar at the top of the screen to make basic edits like rotate, trim, and split.
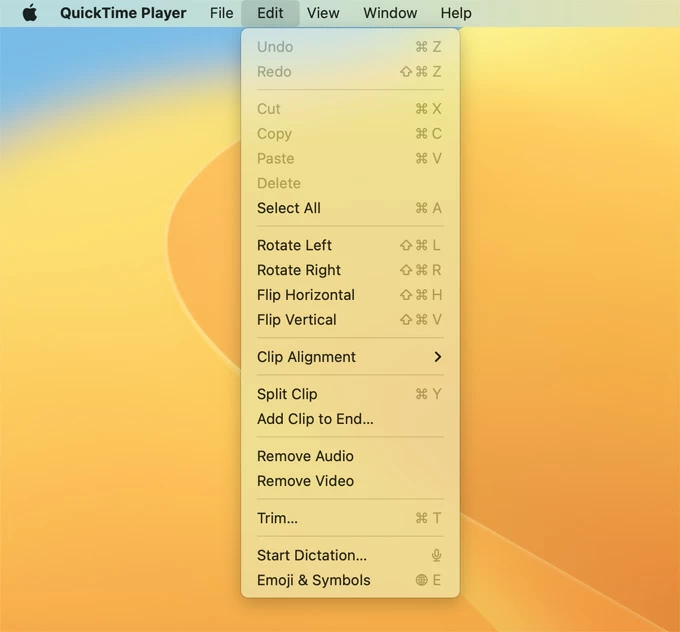
3. Go to File > Save to save the edited recording.
Once you have opened your Mac recording file with QuickTime Player, go to File > Share. Select the destination you want to share the file to. It can be Email, Message, AirDrop,, or online social media networks (YouTube, Facebook, Vimeo, etc.,). Then Log in to your account, and you're good to go. Wait for it to upload and share your video.


