
How to Convert OGG File to MP3 Format on MacOS


Monkey's Audio, also known as APE, is a free lossless audio compression standard. This means that no sound material is lost when you make compression of an audio file. However, even though its efficiency in compression, APE is used in Windows platform mainly and is not as popular as something like MP3, the current most widely used lossy audio format on the planet.
MP3 makes it easy to move around or store audio files on your home computer, portable media players, and even car stereo system, and it's commonly used as the preferred audio file format for music sharing online. Because of MP3's universal nature, sometimes converting APE to MP3 is necessary for certain audio players that don't support APE yet, especially if you're a fan of Apple products—Apple refuses to implement APE support on its products. See how to convert APE to Apple Lossless (alac) for use in Mac.
Luckily, it's possible to change APE files into MP3 audio format on either a Mac or PC relatively easily; Googling search on "APE converter" will display tons of results. Among them, Video Converted for Mac is one of our favorites. It's a full-featured program that combines audio conversion and video conversion all in one place. It can batch convert your favorite songs from one lossless format to another (FLAC, WAV, ALAC, APE, AIFF) without compromising the quality to the sound, or to a lossy format like MP3, M4A, AAC, AC3 with excellent output. It also does a nice job of converting your video collection in all popular formats.
The following is a walkthrough on how to convert APE music collection to a MP3 format on Mac computer, so you could make audio compatibility issue a thing of past. The whole operation is just a few simple clicks of the mouse. To convert from .ape to .mp3 on Windows, stick with it counterpart—Video Converter for Windows.
Step 1: Add APE File(s) to the software
Download and follow the on-screen instructions to install the software. Launch it and you will be welcomed with clear-cut wizard.
Go to the top menu bar and click Add File to load (batch) APE source song(s) you want to convert into MP3s. Alternatively, open the folder containing the APE lossless tracks, select it and drag onto the middle processing panel of the program. You can add more files if you want and they will be processed in a batch.
This APE converter also includes a media player, so you can once click of the added file to preview the sound from the program itself, saving you the hassle of making sure its the right audio file by playing it in outer media players.

Tip: if you want to combine several short audio tracks into a single one, just highlight the files, and then check the "Merge into one file" box located in the lower right corner of the interface before the conversion start.
Step 2: Select Output Preferences
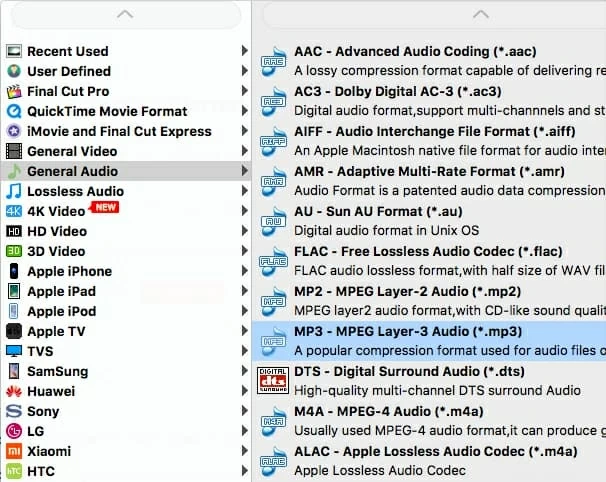
Go down to Profile in the lower left corner of the screen, and choose "MP3 - MPEG Layer-3 Audio (*.mp3)" among diverse formats from the list.
Next, you can click Browse button (see bottom center) to specify a destination folder for saving your target mp3 audio files.
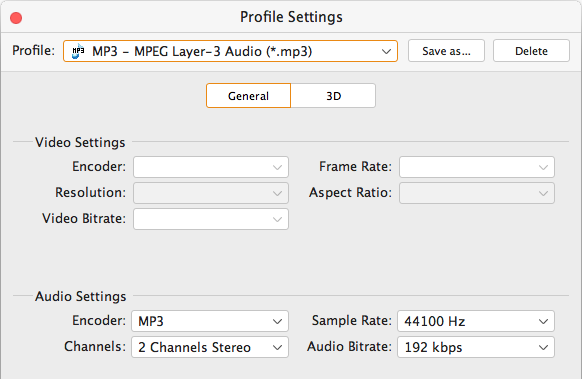
For the advanced users, you could also further customize many encoding parameters by hitting Setting button to enter the Profile Settings panel. Audio bitrate, encoder, channels and sample rate are supported to be configured freely on your own.
BTW, if you set a high bitrate for MP3 file, like encoded with 320kpbs, you may nearly not be able to perceive the differences between original APE and converted MP3 for which is too subtle for human ears.
Note: The higher the bitrate of a track, the larger file size it will be but the better quality it will be.
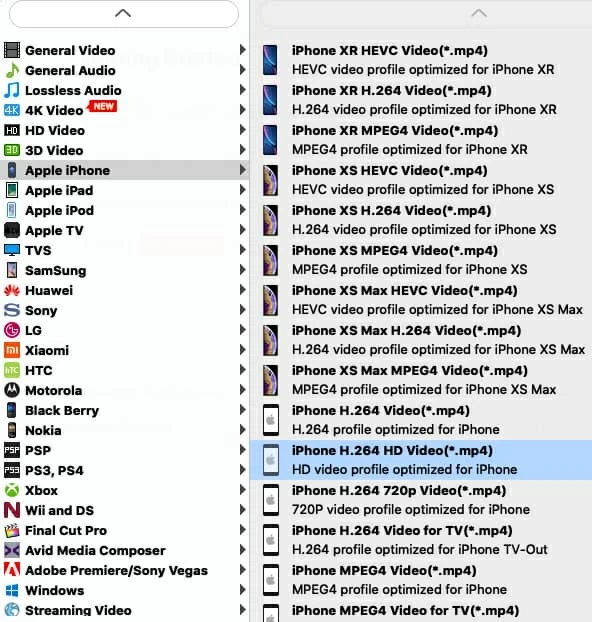
In addition, you are given an array of built-in portable devices presets including a bunch of Apple gargets, Android phones, TVs, etc. to simplify the process of picking the formats.
Optional! One of the nicest features that may be helpful for you is the ability to extract a portion of audio from the entire file by using Clip shortcut on the top tool bar. Just set the starting point and the ending point you like.
Step 3: Start APE Conversion to MP3 for Mac
At last point, just press Convert button to let go the APE to MP3 converting process. Once beginning, you will see a conversion process window coming up as below. You can track the process status.
It will take some time depending on your computer's power and size of the source APE audio files, especially if you have a large number of lossless APEs in the queue.

That's it. After the whole progression complete, you can go to the local destination directory to view your newly created MP3 file. Now you're ready to enjoy the MP3 audio on your Mac or transfer it to your phones or handy multimedia players.
BTW, we suggest that you KEEP the original lossless APE files backed up somewhere if required.