Restoring Photos from an iPhone that Were Deleted


It is so bad that you lost your iPad and that means not only the hardware is missing, but also all the data and files in it are gone. If you are lucky enough and leave the iPad somewhere in the conference room, you can still get it back as long as you act soon enough. In the "Find My iPad" app (or visit iCloud.com), you can track down the missing iPad on a map. Also, you enable the app to give a sound to help you pinpoint its exact location (assuming the device is not far from you).
If worst comes to worst and the lost iPad cannot be found anywhere, and you are worried that some bad guys will capitalize on the data for wrongdoing, then you can erase all the data and settings over the internet by sending instructions to the stolen iPad. At the same time, use the "lost Mode" to lock down the tablet so that all the features and functions will be disabled, only displaying a message with a phone number on it for the person who picked to call to return.
Despite the stolen iPad, chances are, you can still recover the data if you have backed up the tablet in advance. Apart from the third-party backup services, Apple's iCloud offers a good option to save all your important data including contacts, photos, notes and reminders in the cloud if you schedule the iPad to back itself up to the cloud automatically. iTunes is also a good choice when you want to have a local backup in control.
Here, Appgeeker iOS Data Recovery can help you bring back the data from iTunes/ iCloud backup files when you want to check the relevant information after a theft.
The job of iOS Data Recovery consists of three steps: Scan, select and recover. It is safe to use and will not modify or corrupt any backup files. You can retrieve the lost iPad files stored in iTunes and iCloud backup selectively and migrate the results to the computer.
Now, please figure out which recovery plan of the two is good for you and restore the content of the lost iPad on the computer immediately.
Step 1: Detect iTunes backup files
Run the program on the computer. Choose the mode labeled "Recover from iTunes Backup File", and the tool will immediately detect the iPad backup files you have made through iTunes on the computer and display them in a list, along with detailed information (name, latest backup date, serial number).
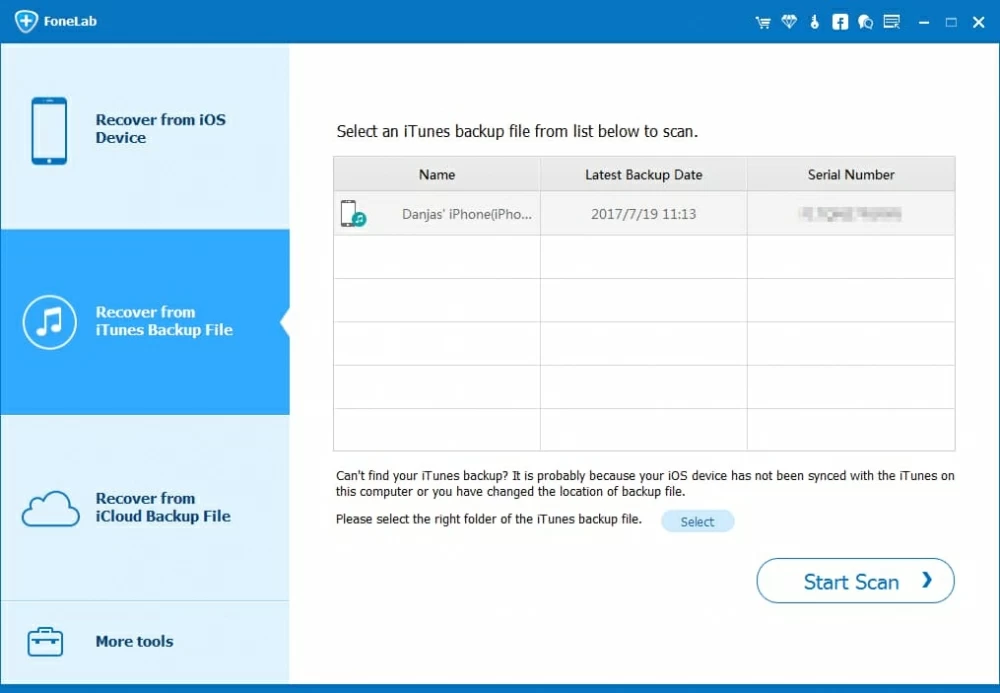
Step 2: Choose one backup file for scan
From the list, choose one backup file that you wish to restore data from and then press the Start Scan button.
Wait for a while until the scan comes to an end. Then, you should get an overview of all the files.
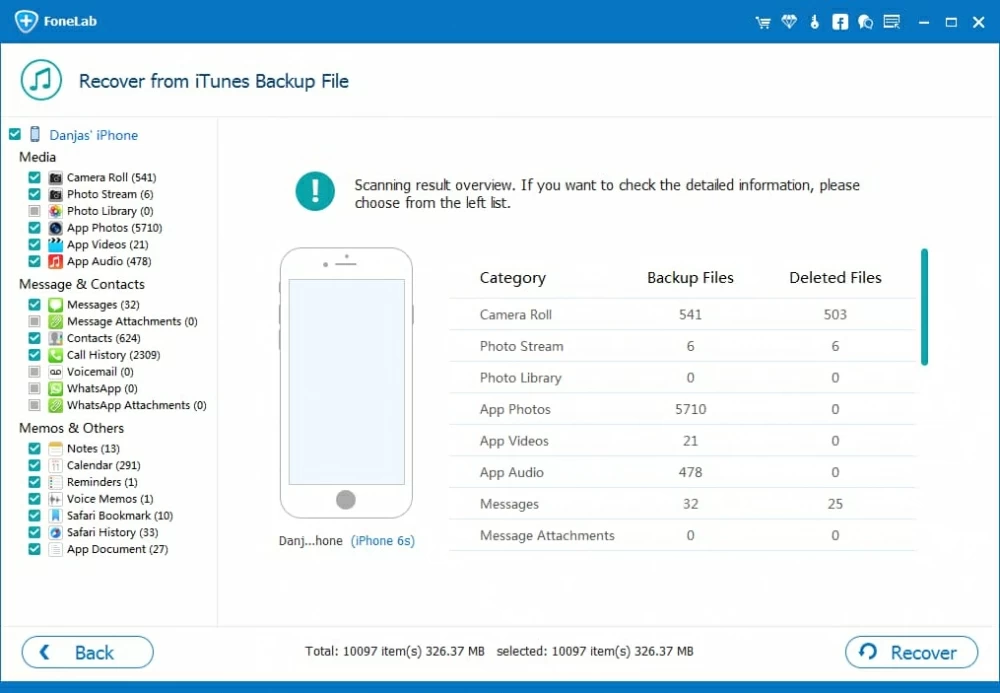
Step 3: Start retrieving data from iTunes backup and save to the computer
It would be a good idea to make a full preview of files individually by clicking any one of the categories from the left column before recovery.
Next, choose the items you want to restore by checking the boxes next to each file name.
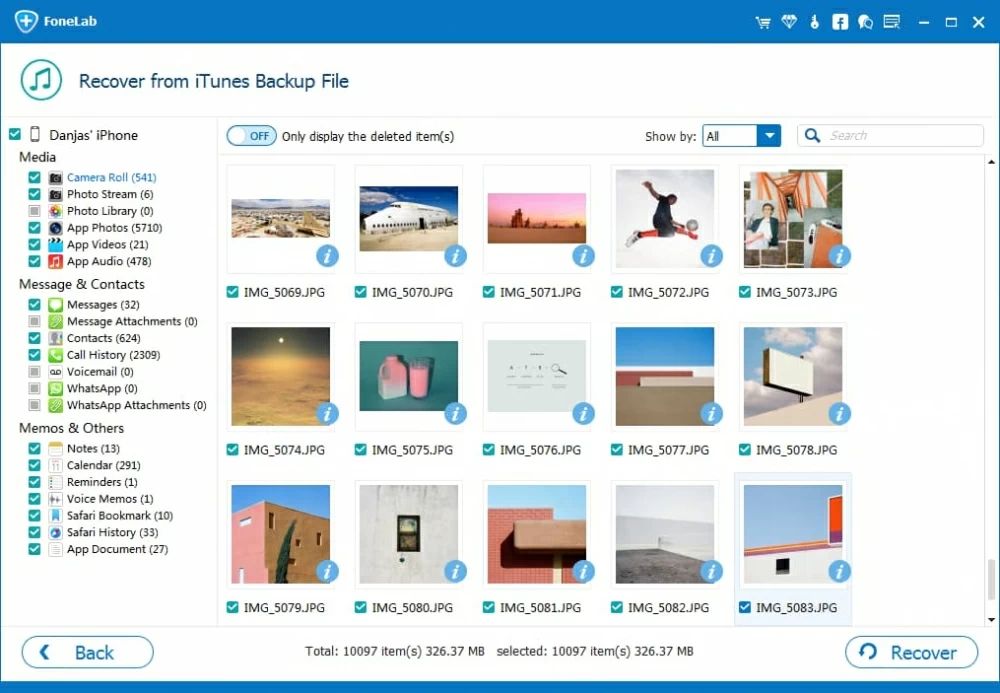
Now hit the Recover button at the lower right-hand corner of the window. This will open a dialog box to ask where you want the exported data to be saved. After you select a local folder, press the Recover button again to start retrieving the content for your lost iPad.

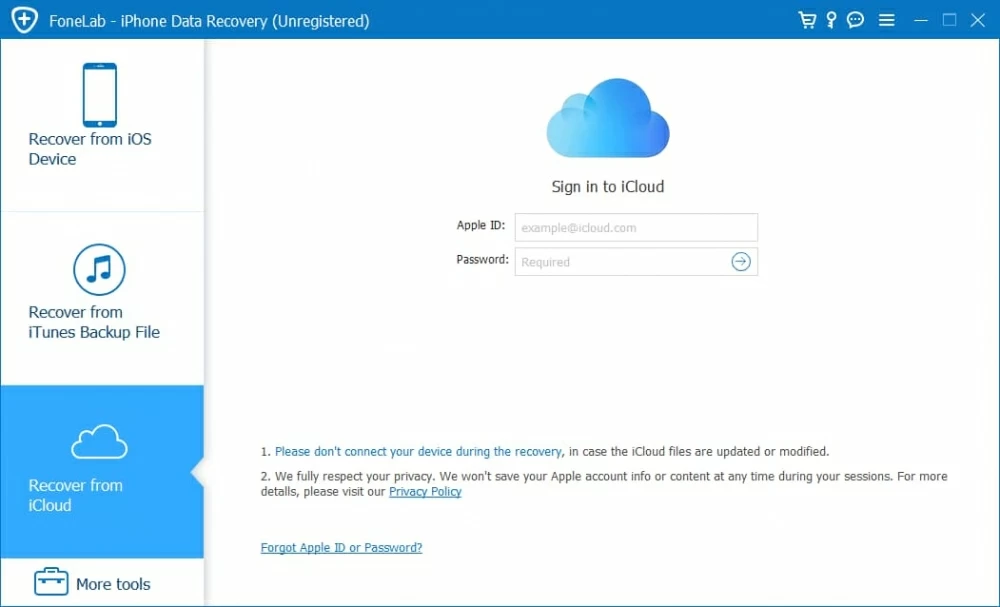
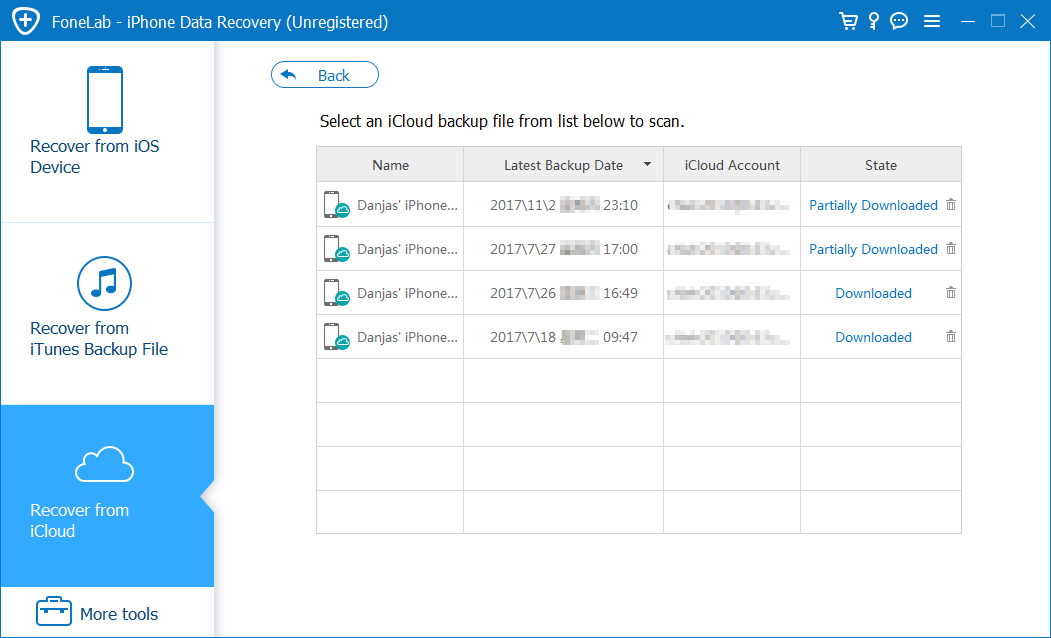
Step 1: Log into iCloud
Select "Recover from iCloud Backup File" mode and log into iCloud by entering Apple ID and password.
Step 2: Choose one iCloud backup
After login, the software will detect all the backup files produced by this account and display them on the pane, sorted by backup date. Choose one that includes the data of the stolen iPad. Next, press the Download button.
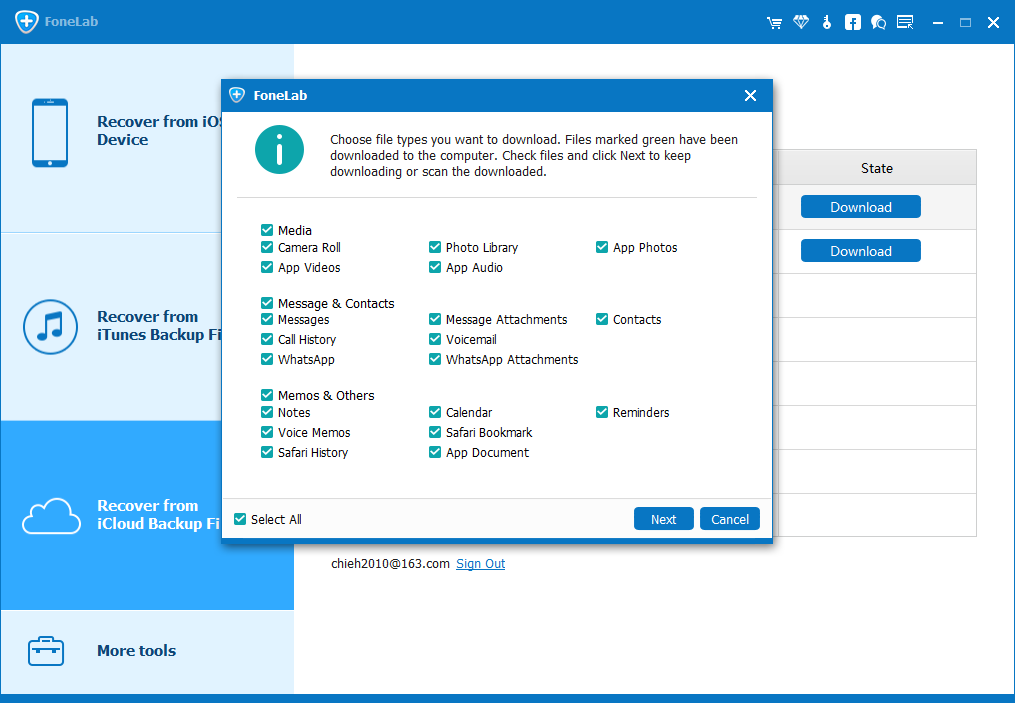
The pop-up window lets you customize your choice of the file types to be downloaded by ticking the categories selectively. If all the files are to be restored, there is nothing to do since all the data types have been marked by default.
Then, press the Next button to download the selected files.
Step 3: Begin retrieving backup data with iCloud
The tool quickly downloads all the available iCloud content you selected and displays them on the left sidebar in an organized manner, which makes it intuitive to check every category for relevant information.
Click the file types you want to restore on the left part and tick off the files.
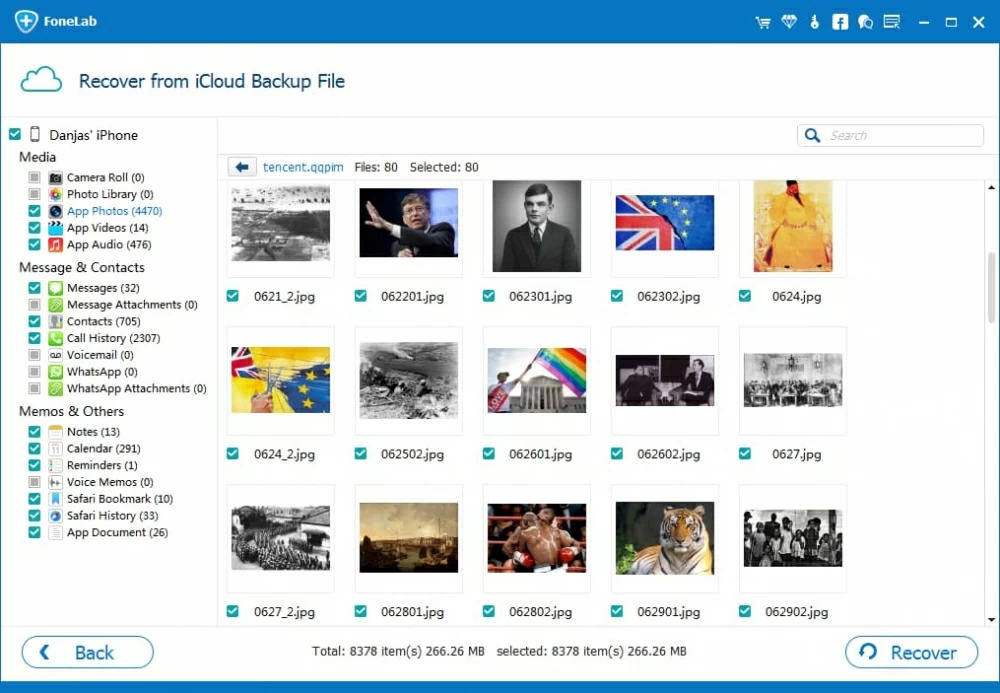
Next, press the Recover button at the bottom-right corner. In the opening dialog box, choose an output folder for the resulting files.
Again, hit the Recover button. The software will begin restoring your selected content from the iCloud backup to the computer.
Once the process is finished, you can go to the folder and check the results.