
How Do I Get My iPhone 8 Notes That Were Deleted Back


You may have already used your iPhone 7 (Plus) for quite a time so a lot of valuable photos are kept in camera roll. If you tend to ignore the need to back up your iPhone 7 (Plus) either with iTunes and iCloud regularly, you could run the risk of losing your photos.
But unfortunately, backups are not always made in time. When you inadvertently deleted some pictures on iPhone 7 (Plus) and wanted them back badly, you cannot restore them from the backup copies. If you've come across this problem, you might be wondering whether there's a method to get the photos back from iPhone 7 (Plus) without any iTunes or iCloud backup.
In fact, the chance of retrieving the pictures of iPhone 7 (Plus) with no backup files is fairly greater than you have imagined. Generally, when you delete pictures on iPhone 7 (Plus), you don't need to be desperate since the deleted photos get stored in the "Recently Deleted" album in Photos app. Unless you've already cleared them out within the 30 days period, you can easily restore any deleted photos there with a tap of Recover option.
However, what if the 30-days period has already passed? Thankfully, you can now resort to the third-party recovering software for the task of recovering iPhone 7 photos if you haven't produced any backup before. Our favorite is Appgeeker iOS Data Recovery, a tool that can help you easily recover lost photos on iPhone 7 (Plus) with a few clicks of mouse in the absence of backup, even if you've never used anything similar in the past.
iOS Data Recovery, as the name implies, is a program primarily designed for iPhone, iPad or iPod users to tackle data loss issues. It's capable of recovering various different types of data, including text massages, notes, calendar events, reminders, contacts, call history, Safari bookmarks & history, app video & audio, photos and much more. Better still, it features a preview function so you have ready-access to the deleted files before completely recovering.
The following step-by-step guide will show you how to recover lost photos on iPhone 7 (Plus) without a backup file needed. Actually, the process is easier that you might think. Let get started.
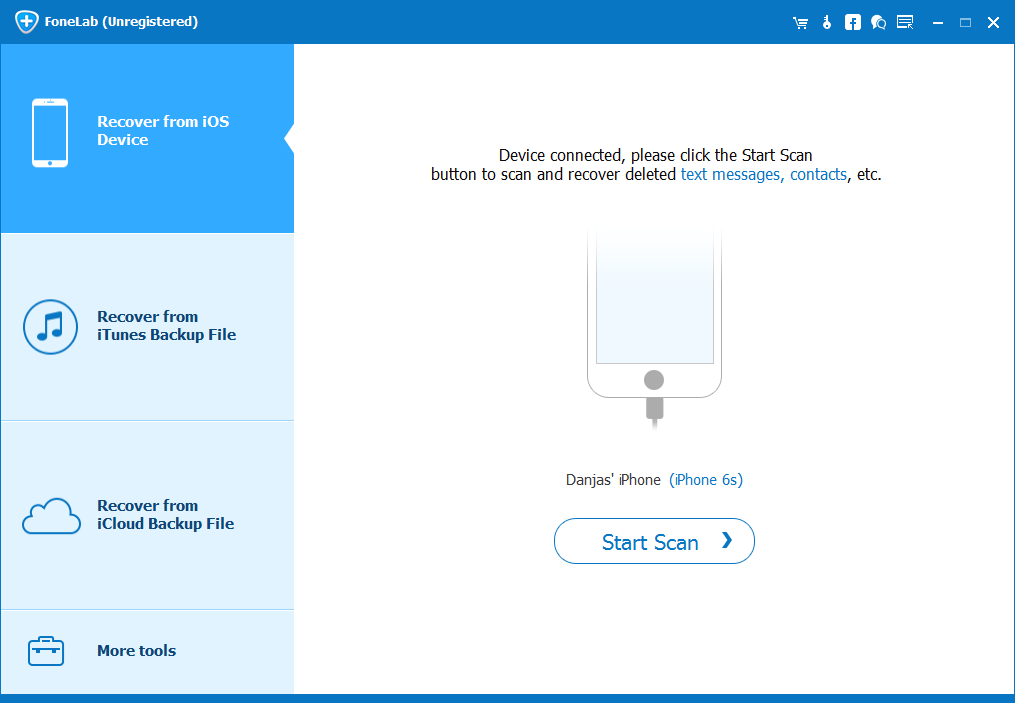
Step 1: Attach your iPhone 7 (Plus) to the computer
Download the utility and follow the on-screen instructions to install it on your computer. Open it after it is successfully mounted. You will see the main interface, along with three recovering modes on the left sidebar that you're enable to choose from.
Since there is no backup file available in hand, you should choose the first "Recover from iOS Device" mode to recover deleted photos from iPhone 7 (Plus) storage directly. Then you'll be asked to connect your device to your computer using USB cable. Just do as required.
Step 2: Scan data stored on the iPhone 7 (Plus)
Choose data type to scan. Here we select "Camera Roll", "Photo Library" and "Photo Stream" and then hit the Scan button to start doing a deep scan on the iPhone 7 (Plus)'s memory.
You should see the number of files it found go up. Be patient and let the program do its work for a few minutes. Once done, a new screen should be open as shown below. You will see that all the stuff is grouped by different file types on the left sidebar.

Step 3: Select photos to be restored
At this stage, you're able to preview and select the deleted photos for retrieving back.
Simply click on "Camera Roll" category (or "Photo Library", "Photo Stream" and "App Photos" category) under "Media" section, all the photos under this category will be completely introduced on the right pane of the interface, shown as thumbnails. This is rather easy for you to see which pictures will be restored from.
Now, select the photos that you want to restore from the displayed items on the right pane.

Step 4: Begin restoring iPhone 7 (Plus) photos
When you are satisfied with your selections, hit the Recover button at the bottom right corner. This will bring you into a dialog screen where you need to specify a location for the recovered photos.

Subsequently, hit the Recover button again in the dialog and the program will now start retrieving photos from iPhone 7 memory without backup file and saving to the computer soon.
After the process is done, you can open the folder your specified previously and check them.
You're done!